AAA Grilled Cheese Sandwich
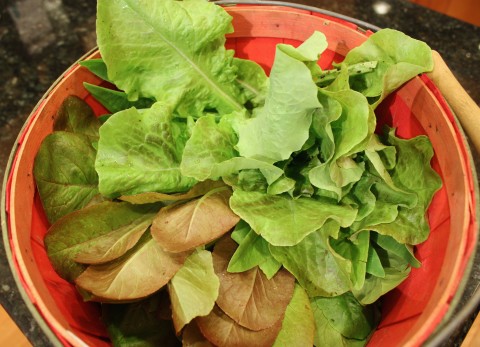
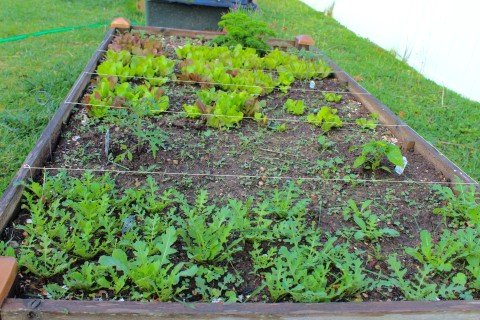
Over the last five years I’ve grown some great crops in my three-style garden. I have my raised beds, all five of them, four Earth Boxes, and a strip of dirt along the fence that separates our neighbors driveway and ours. It’s the raised beds that jump into action first into the new growing season and the crop is mostly greens. I usually plant 8-12 kinds of greens and they do well in the cooler spring weather in planting zone 7 where I live. With an abundance of Arugula last year the AAA Grilled Cheese Sandwich was born.
Once the greens get going I have more than my wife and I can eat so I give away plenty. I also look to use them in new ways. When salads weren’t enough to use up the Arugula I started piling it on sandwiches bursting with green goodness. While the AAA Grilled Cheese Sandwich is no low-fat sandwich, I find it a great lunch item to have once or twice during the few short weeks my Arugula crop is putting forth gobs of great greens. Arugula is full of vitamins and minerals as well as fiber. So whatever the fat content of this sandwich is would be offset, somewhat, by the health benefits of Arugula.
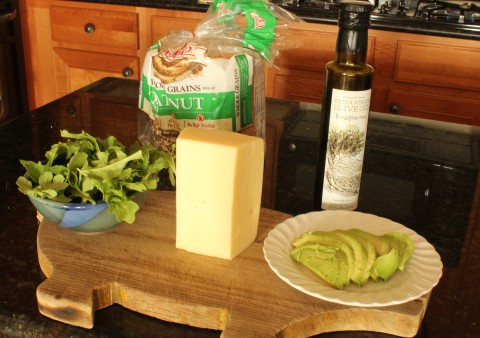
It’s simple as can be to make with just five ingredients, Arugula, avocado, Asiago cheese, oil or butter for the grilling, and whatever your favorite bread is. Just follow this easy recipe and enjoy one of the best greens out there.
2 slices of sandwich bread for each sandwich
2 teaspoons olive oil or butter for each sandwich
2 slices Asiago, or your favorite cheese
½ sliced avocado for each sandwich
1 handful of arugula for each sandwich
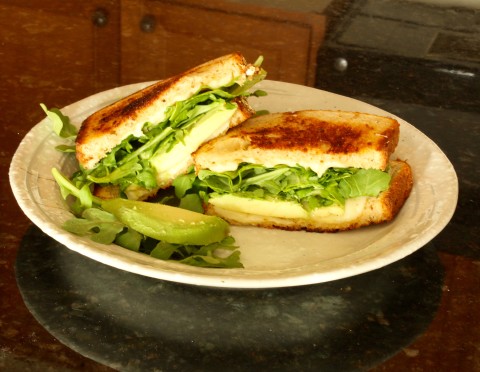
Brush olive oil on one side of each slice of bread and cook, oil side down with cheese on top, on medium heat in a cast iron skillet, or similar frying pan. In 3 minutes rotate bread 180 degrees to achieve even browning and cook for 3-4 minutes or until nicely browned.
Top with arugula and avocado, close it up and cut in half if desired before gobbling it up like it was the best sandwich ever!
Note: If you toss the arugula in a bowl with a bit of Italian Dressing, before piling it on the sandwich, it packs even more flavor.
A slice or two of fresh tomato would be great with this sandwich. Problem is they have distinctly different growing seasons and are usually not available at the same time in home gardens.
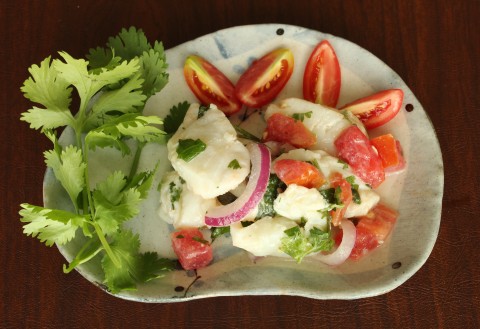
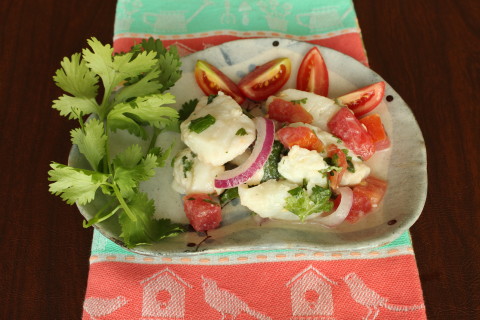
Halibut Ceviche
Halibut Ceviche
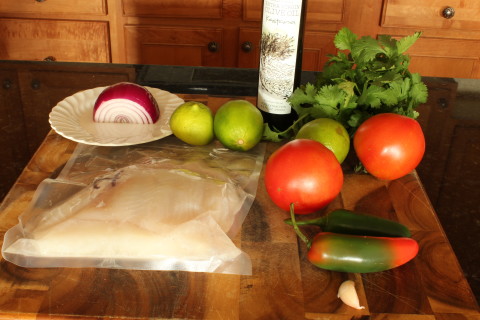
1 pound halibut filet
1/2 cup lime juice
1/2 cup chopped or sliced red onion
1-2 fresh jalapeños sliced thin
1 small clove of garlic minced
1 1/2 tablespoons extra virgin olive oil
1 cup chopped cilantro
1 1/2 cup diced tomatoes
1 -1 1/2 teaspoons kosher salt
Cut halibut in pieces 1 1/2 inch long by 3/8 inch thick and however high that particular filet is.
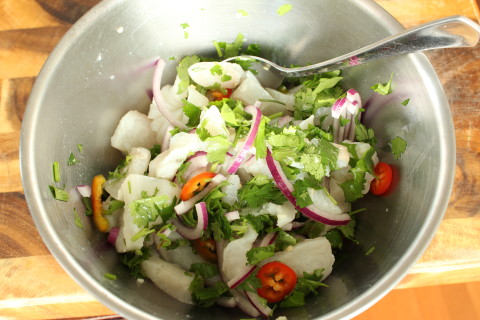
Put lime juice, jalapeños, olive oil and garlic in a medium sized mixing bowl and mix briefly.
Add halibut, onion and cilantro and mix.
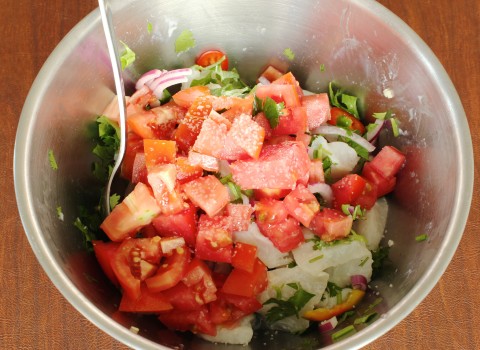
Add tomatoes and salt mixing gently to not break up the tomatoes.
Store in fridge covered for 24-36 hours mixing three times about every 8-12 hours.
Serve with tortilla chips and sliced avocado garnished with fresh cilantro.
Serves 6-8
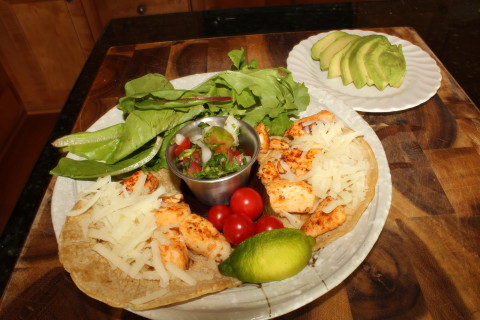
Halibut Tacos
Halibut Tacos
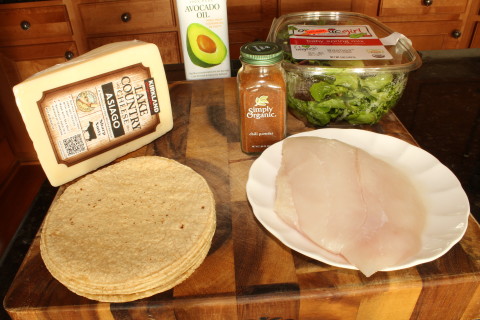
1 pound halibut, cut into bite size pieces
1 tablespoon oil, avocado or regular olive oil
1 tablespoon blackening spice or chili powder*
4 ounces shredded asiago cheese
4 ounces of salad greens, or arugula
8 taco shells, hard or soft
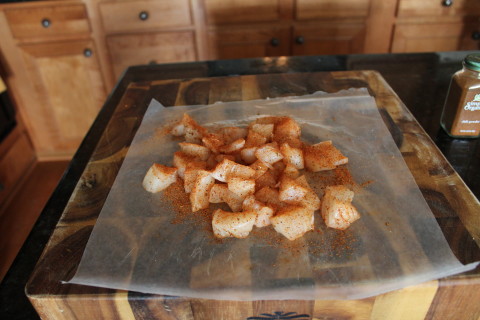
Spread halibut out on a large plate or sheet pan and dust with blackening spice.*
In a 10-12 inch saute pan heat oil on med-high heat just until it starts to smoke.
Add halibut and cook for 1-2 minutes before turning or stirring halibut. You want to get it cooked on all sides but don’t overcook it. After turning the halibut it only takes 2 minutes for it to be cooked.
Add cooked halibut to taco shells and then add cheese. Cook under a broiler for 1 minute if you want the cheese melted. I just let the heat of the halibut warm the cheese.
Add greens and serve with a side of salsa, or pico de gallo.
Serves four.
If you are using frozen halibut it is usually quite wet and needs to be dried on paper towels before dusting with blackening spice.
You can use just about any commercially available blackening spice blend sold in grocery stores. If not available here is a simple recipe to make your own:
1 T salt
1 T chili powder
1 t dried oregano
1 T paprika
1-2 t cayenne pepper
1 T granulated garlic
1 t onion powder
1 t dried thyme
2 t ground black pepper
Mix all ingredients together and you have your very own blackening spice.
Alaska Salmon Recipe
Alaska has been a big part of my life ever since 1974 when I first set foot on Kodiak Island. I wasn’t sold at the beginning but that first step planted the seed. What really did it was moving to the Kenai Peninsula in 1984, and learning how to catch salmon.
Back then the Kenai Peninsula was a wonderland of all things wild. There were moose in our yard all year long nibbling on just about anything green. Wolves followed their ancient ways in the nearby mountains and hills. Salmon crowded the Kenai River in numbers that blew my mind, and the Cook Inlet waters yielded monster sized halibut and tasty cod for my freezer. I no longer call the Great Land my home but I manage to get back at every opportunity. Since 1995, when I moved to Colorado, I have hardly missed a fishing trip to that magical place.
If I had $5,000 – $10,000 to spare, I’d just go to one of the fishing lodges where they do everything for you except hook and reel in the fish, but the lottery did not smile on me this year so that trip will have to wait. For six days this summer my family and I will head up to Alaska for a week at a DIY fishing camp. We will pursue the mighty King Salmon, halibut, rockfish, and lingcod to bring back for a year’s worth of the best seafood you can imagine.
I am so lucky to be able to afford and tolerate the rigors of a fishing vacation in Alaska year after year. It’s a lot of physical work to captain an 18 foot skiff in the open ocean or rivers in Alaska, and I’m not quite as strong as I used to be. Strength is important when fighting a 50 pound salmon or a halibut weighing over 200 pounds!
I hope we are spared the six foot seas on this trip, tough. If you have never been in an 18 foot skiff in rough Alaskan seas, you are missing some serious adrenaline! My brother and I barely made it around Danger Point near Angoon, Alaska on our last self-guided fishing adventure back in 2002.
This year, I expect to shoot hundreds of pictures and have my brother video parts of the trip. Watch for postings about this wilderness paradise of the Inside Passage, either on this blog or in travel media.
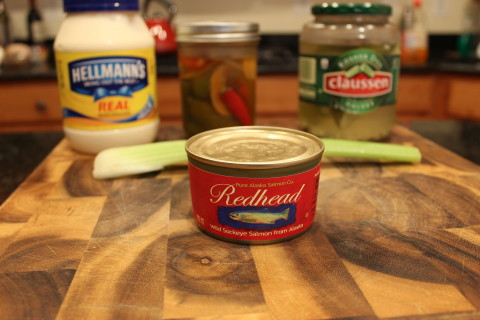
While I wait for the first fresh Alaskan Salmon to hit the local stores, canned salmon is a good thing to have in the pantry. Pure Alaska Salmon Company is as good as anything I have tried and it’s ultra-convenient to pop open a can for salmon cakes of salmon salad sandwiches. Pure Alaska’s salmon is processed just hours after being caught, and provides a lot of flavor and nutrition. It tastes as good as the last of my catch from last year, now frozen for ten months. athttp://www.purealaskasalmon.com/our-story-pure-alaska-salmon-company.
If you try their salmon, please let me know if you agree this is the best canned salmon out there, and please share this salmon salad recipe with friends and family. If you have not left a comment to enter last week’s post on Aztec Turkey you can still get in as the drawing is tonight for the box of hot pepper goodies from Melissa’s Produce!
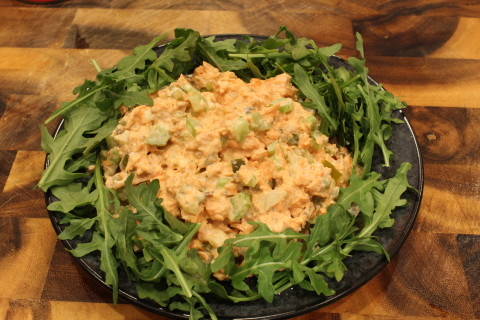
Canned Salmon Salad
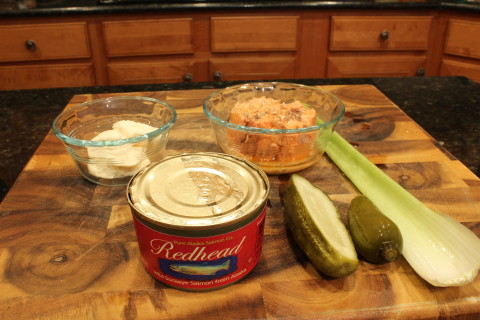
1 7.5 oz. can of red salmon, or 8 oz. fresh cooked salmon
1/4 cup chopped celery
2-3 tablespoon diced dill pickles
2 tablespoons of mayonnaise
1/4 teaspoon Spike seasoning salt
1 minced jalapeño, optional
In a 2 quart mixing bowl break up salmon into flakes, and remove bones if desired -I leave them in when using canned salmon.
In a small bowl mix mayonnaise, Spike, and jalapeño.
Pour over salmon.
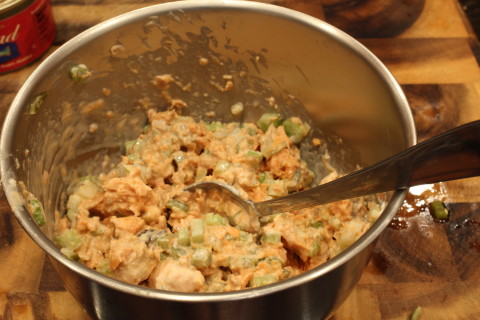
Add celery and dill pickles.
Mix well and chill for an hour if you have the time to do so.
Serve over salad greens, on bread with some lettuce, or wrapped in a tortilla with salad greens.
Serves two but is easily doubled.
Even though Pure Alaska Salmon Company gifted me some of their canned salmon my opinions are my own.
Aztec Slow Cooker Turkey
I have been reading award winning Precious Cargo by Dave DeWitt about how foods brought back from the New World by the Spanish and other explorers changed the way Europeans ate. I already knew how popular turkey is in the United States, but was amazed to read how much is consumed in modern Europe. The top five turkey consuming countries are: U.S.A., Canada, European Union, Brazil, and Mexico.
Before reading Precious Cargo, I didn’t think the French liked turkey at all. DeWitt writes of French recipes for truffle-stuffed turkey, and if you know how expensive truffles are you know this is one pricey dish! The English bought about ten million turkeys for their Christmas feasts in 2008, according to Precious Cargo. Italy is the fifth largest producer of turkey meat in the world with France and Germany coming in second and third. Who knew?
Precious Cargo has totally changed my perspective on the versatile turkey. I have started testing recipes using ingredients found by European explorers in Mexico. The experiments are going very well and I love the taste of slow cooked turkey with tomatoes and dried chilies. But, just so you know, there are so many varieties of chilies it will take a long time to test and compile all the recipes!
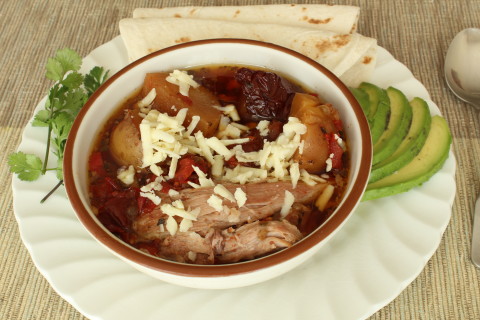
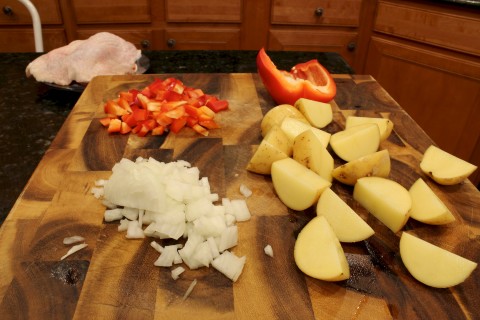
Since I’m all about fast, healthful and easy cooking, what could be easier that putting a turkey thigh or drumsticks in a slow cooker with tomatoes, potatoes, chilies, onions, garlic and herbs? It is wonderful to come home and open the door to this exotic fragrance wafting from the kitchen and enveloping you. With a few tortillas on the side you have a delicious meal ready to eat that took no more than ten minutes to toss in the slow cooker.
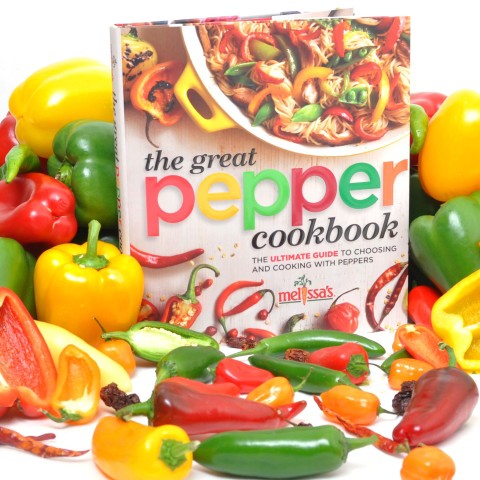
If you don’t like the heat from dried peppers there are a few not as hot varieties available like: Anaheim (California), anchos, guajillo, mulatto, or Oaxaca. If you can’t find these in your local grocery store, they are available online. My favorite online place to find dried peppers is Melissa’s www.Melissa’s.com. Once you taste turkey with dried peppers and tomatoes, you will be hooked. Melissa’s has a hard to find mild dried pepper – the Oaxaca, full of rich smoky flavor that makes the turkey taste like it was cooked in a smoker or on a BBQ grill. To support your chili explorations, Melissa’s is providing a box of goodies including “The Great Pepper Cookbook”, and an assortment of their pepper products to one lucky reader. If you don’t like the hot ones, don’t worry – they can send you hot or not-so-hot products. Just leave a comment on this post to be entered. For an extra chance at winning, leave a comment on my Facebook fan page about this post or peppers https://www.facebook.com/FastAndFuriousCook .
Get started with this turkey treat and see for yourself that it can be enjoyed year round and in ways you never thought of. Please let me know what you think of this recipe by leaving your comments, and please share with family and friends.
Aztec Slow Cooker Turkey
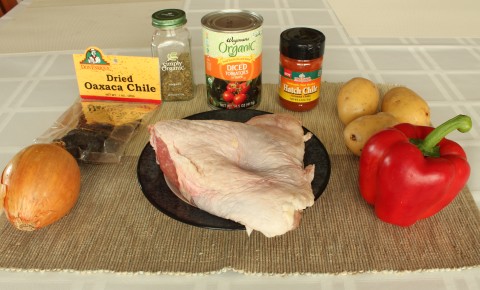
1 turkey thigh or leg about 1 1/2 pounds*
1 cup diced tomatoes, canned or fresh
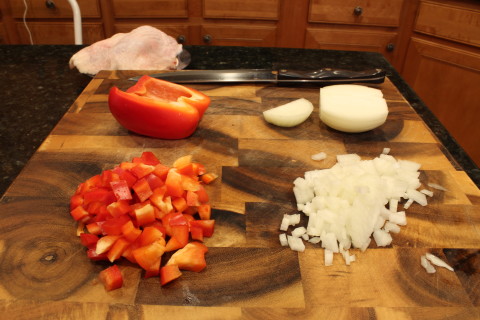
1/2 cup minced onion
1/2 cup chopped red bell pepper
1 clove fresh garlic, minced, about 1 teaspoon
1 cup turkey or chicken stock
1 teaspoon dried oregano
1/2 oz. dried Oaxaca chili peppers, broken into one inch pieces
1/2 teaspoon Hatch™ chili powder, or regular chili powder
1 pound potatoes cut into one inch cubes*
1 cup frozen corn, optional
1/2 teaspoon salt
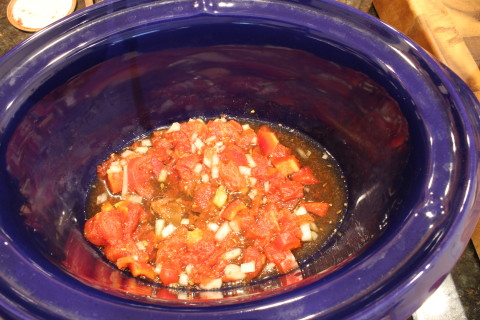
In a large mixing bowl, combine all ingredients except turkey and potatoes.
Put about 1/4 of the mixture on the bottom of the Crockpot™.
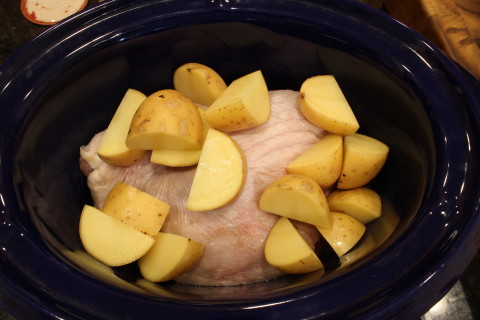
Add turkey
Add potatoes
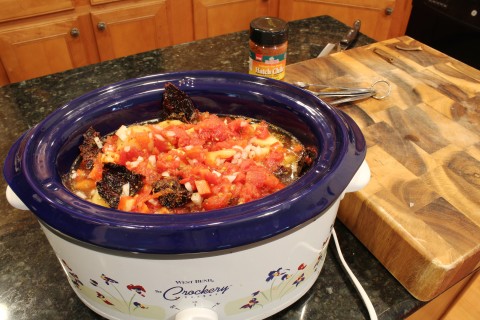
Pour the rest of the ingredients over the potatoes.
Cook on low for 7-8 hours.
Serves 4 to 6
Note:
•I don’t skin or bone the turkey before cooking, but do remove skin and bone before serving. I also skim the grease off the top just before serving as the skin does leave a fair amount of fat.
•I keep the skin on organic potatoes, but peel them if they are non-organic.
Even though Melissa’s Produce gifted me some of their products to try my opinions are my own.
Asian Noodle Bowl
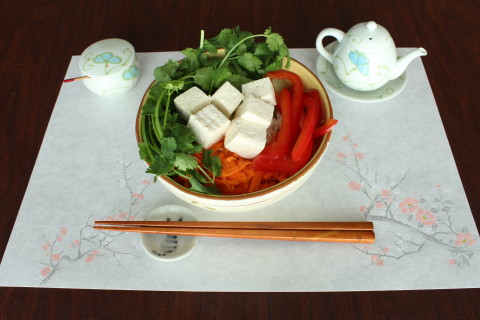
Back in the 1990s, there was a great little hole-in-the-wall Vietnamese restaurant in Boulder, Colorado that served one of my favorite dishes. For $3.95, they served a lunch special simply called Grilled Chicken. They would marinate, then grill boneless chicken, getting just the right amount of flame to brown it perfectly. The chicken was served it on top of rice noodles with bean sprouts and gobs of cilantro, making it hard to beat. They went out of business after a three year run, but I have never forgotten how much I liked that combination.
That taste memory came back when I was in Orlando recently, and had a tofu noodle bowl at the hotel café. When I got back home, I worked up a great noodle bowl idea for a fast and healthy lunch or dinner.
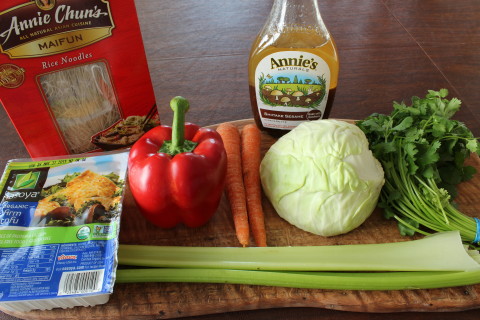
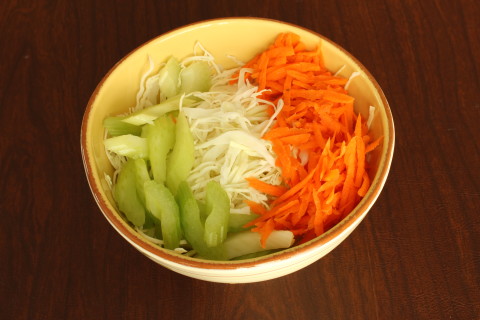
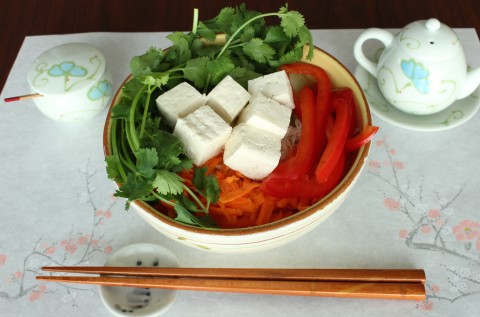
You can make it less work if you are firing up the grill the night before – just add a couple of boneless chicken thighs or breasts to the grill, then refrigerate overnight. The next day all you have to do is boil some rice noodles for two minutes and chill them with cold running water. After the noodles are drained put them in the bottom of a bowl and top with shredded cabbage (green or Napa), shredded carrots, bean sprouts and cilantro. Cut up the cooked chicken and put it on top of the noodles, and veggies. Then top this with an Asian salad dressing (Annie’s Shiitake Vinaigrette is a good choice), and you have a winner.
This recipe of noodles and vegetables is versatile and works well with grilled shrimp, beef, pork, duck, chicken or tofu. For the final touch the noodle bowl can be topped with scallions, toasted sesame seeds or dried bonito flakes (katsobushi). If you like it hot, try kicking it up with Sriracha hot sauce or jalapeno slices.
With the heat of summer not far off, this will shorten your time in the kitchen without sacrificing flavor or healthfulness. It is a low-fat, gluten-free dish that makes a good packed lunch or sit down meal for a hot summer’s day. As always please leave comments and forward this on to friends and family.
Asian Noodle Bowl
4 oz dry rice noodles, the thin type
2 cups fresh cabbage shredded
1 cup carrots, shredded or in long threads
1/2 bunch fresh cilantro
1/2 cup red bell pepper, sliced thin longways
2 stalks celery sliced at an angle 1/4 inch thin
2 cups tofu, or cooked chicken*
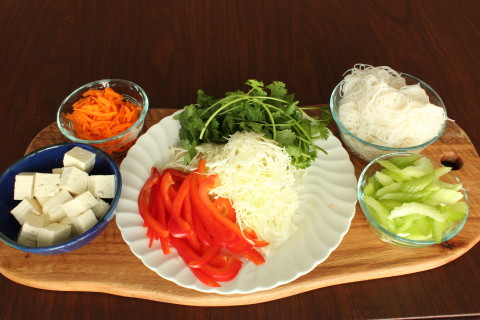
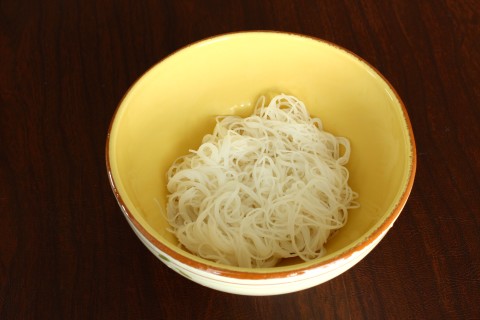
Cook rice noodles per package instructions, about 2 minutes then rinse with cold water and drain well.
Place half of the noodles in each bowl, or plate.
Top with half the shredded cabbage.
Top with carrots and celery.
Arrange cilantro on one side and red bell peppers on the other leaving a space in the middle for the meat.
Add tofu or chicken.
Serve with your favorite Asian style salad dressing.*
Serves two as an entree or four as a starter salad.
Note
*Grilled chicken, beef or pork hot off the grill goes well on top of this dish. Even though the veggies and noodles are cold or at room temperature the hot meat doesn’t adversely affect its quality.
If you want a cold or room temperature dish use chilled tofu or chilled chicken.
*For this recipe I like Annies Shitake Vinaigrette salad dressing or try my Asian dressing recipe at:http://www.fastandfuriouscook.com/spring-greens-great-salad-dressing-recipe/
Cream of Broccoli Potato Soup
Easter Sunday was pretty mellow this year. My wife and I went to see and sniff the lilies at Longwood Gardens in Kennett Square, Pennsylvania, then came home to a lovely dinner of homemade pita bread and baba ganoush for an appetizer, followed by quinoa topped with sautéed onions, mushrooms, and bell peppers. On the side were pan braised Brussel sprouts in garlic infused olive oil and a special Californian red wine to round it out.
After our fine dinner it seemed only natural to watch Julie and Julia- since I had recorded it on the dvr. I saw the movie only once when it came out, and it was the inspiration for my own food blog. What impressed me most about the movie is how Julia Child overcame such odds to get Mastering The Art of French Cooking, one of the most important cookbooks in America for the last hundred years, published! I was so impressed that she stuck with the project after all the problems with one of her two co-authors, and the disappointment that editors and publishers didn’t see the importance of this bold new book for American cooks. Lucky for Julia and for all of us that editor Judith Jones at Knopf saw the book for what it was worth!
Once this amazing cookbook was in their hands, American cooks confidently graduated from beef stew to Beef Bourguignon, and Raspberry Bavarian Cream took the place of raspberry pudding. Mastering the Art of French Cooking stepped up the game for home cooks and fostered an age of creativity in home and commercial kitchens.
I’m always learning new techniques and exploring new cuisines. Recently, I have been experimenting with potato-thickened soups. This can make a soup gluten-free, and it simplifies the time and effort it takes to make a homemade soup.
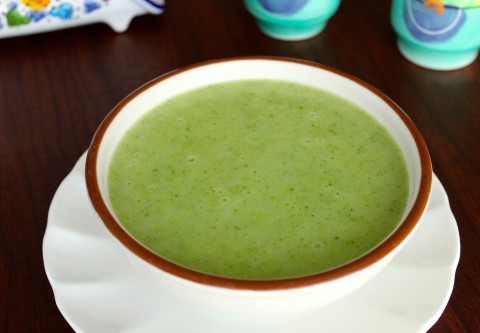
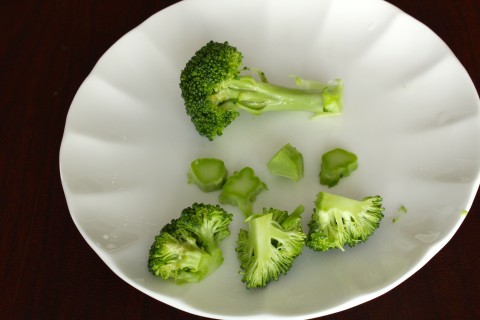
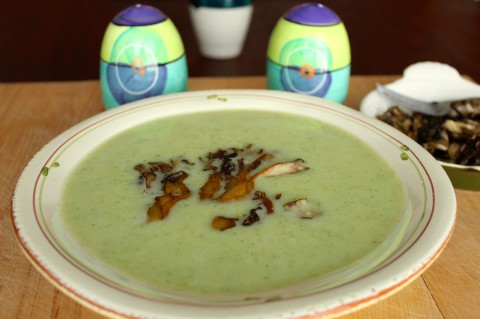
This week’s recipe shows off broccoli, one of my favorite vegetables. With asparagus season near, this could easily be cream of potato asparagus soup, too. Don’t be afraid to be creative and tweak it your way. I found the leftover soup to be excellent and topped with sautéed maitake mushrooms for a nice variation. White mushrooms would work well too since Maitake are not widely available. Either way I hope you try this cream of broccoli and potato soup and let me know how yours turned out.
As Julia would say,”Bon Appetite” and don’t forget to enter the giveaway from the good folks at Melissa’s. They will bestow upon one lucky reader a box of mixed produce from their 280,000 square foot warehouse in California.
Follow this link to enter by leaving your comment on my last post about Oven Roasted Dutch Yellow Potatoes, and good luck!
http://www.fastandfuriouscook.com/oven-roasted-potatoes/#comments
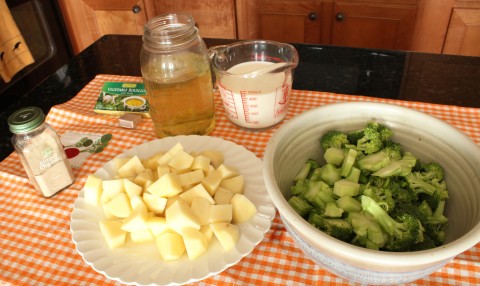 Cream of Broccoli and Potato Soup
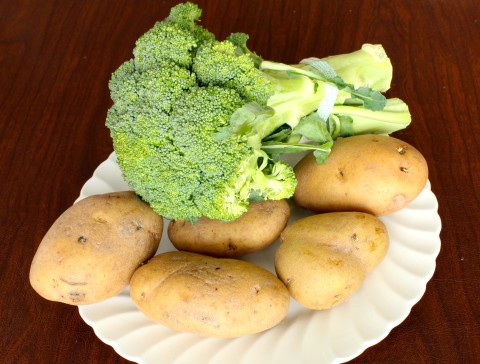
1 3/4 pounds fresh broccoli
1 1/4 pounds russet potatoes
2 1/2 cups vegetable stock*
1 3/4 cups 2% milk
1/8 teaspoon ground white pepper
1 teaspoon salt, optional
Wash potatoes, peel and cut into 1 inch cubes. Hold potatoes in a bowl of cool water until ready to cook.
Wash and trim leaves off the broccoli.
Cut stems off below the crown.
Peel the stems and cut into 1/2 inch slices and set aside.
Cut the crown into golf ball sized florets then cut the floret stems into 1/2 inch slices.
Cut the florets into the size of a grape and set aside.
In a 3 quart pot add vegetable stock and potatoes. Cook on high, covered, until it comes to a boil, then reduce heat to maintain a simmer, cooking for 7 minutes.
Add broccoli, cover and bring back to a boil, then reduce heat to a simmer cooking for another 7-10 minutes or until potatoes are fork tender.
Remove from heat and add milk.
If using a tabletop blender put soup in blender in two batches mixing until it is smooth, about 1 minute.
If using an immersion blender you can keep the pot on the stove, turn heat to low, add milk and blend until smooth.
Add more milk to thin, if necessary.
Adjust salt.
Makes about 10 one cup servings.
* Rapunzel vegetable bouillon cubes can be used, instead of vegetable stock. Chicken stock would also work well.
Blackened Tilapia Recipe
On my morning dog walk today I saw several robins hopping about looking for worms and other avian culinary delights. I expect this is a sure sign that a long awaited spring is just around the corner. On the morning weather forecast I heard encouraging words I haven’t heard in a long time-“Highs in the lower sixties today and mostly sunny by the afternoon.” Such sweet music to my ears was this news that I feel compelled to start work on my veggie garden. I’ll sort my seeds and start planning my crops for the year. Somewhere on the internet is a site with tools where I can map, by square feet, my garden layout for the spring and summer. This is most helpful in designing a well laid out garden that takes advantage of my gardening space and sun fully. After all, I would not want my tall pea vines to block out the sun on my lettuce and herbs. With a well planned garden all the plants are arranged as if in a large family picture with the short ones up front, the mid-sized in the middle and the tall in the rear.
In a day and age when you hardly ever know what goes into your food it is important to grow what you can in your own yard, community garden, or patio. Even when I lived in a rental town home before moving to my current house I had Earth Box container planters on my deck and grew tomatoes, herbs and peppers in a small space with good results. With just a few hours per week you can take control of some or most of your produce needs. It is so gratifying to provide for yourself and family fresh grown tomatoes, peppers, herbs and more. With a bit of luck you might even have a surplus to share with neighbors and food banks. I have had bumper crops for the last three years and wander the neighborhood looking for someone at home to gift my excess crops to. It is a wonderful thing to share that which we have brought about using our own two hands.
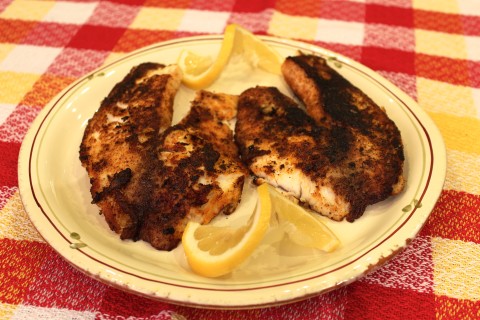
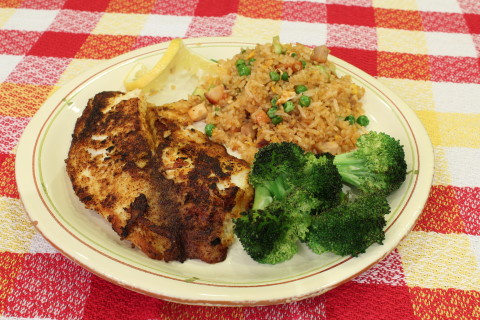
Speaking of sharing, today I have one of my favorite very fast and quite healthy recipes to give to you. Blackened fish, whether it be catfish, salmon, halibut, redfish, or tilapia is an excellent choice for those in a hurry wanting to eat healthy. This blackened tilapia recipe uses very little oil on lean pieces of fish and takes less than ten minutes to prepare, and cook. It goes well with fried rice, Spanish rice, or steamed rice. Add a side salad, steamed green beans or broccoli to round it out as a full meal.
When the weather gets a bit warmer and drier I like to use my charcoal grill to cook it on outside.
With just three ingredients this is about as simple as a main dish gets and is bursting with spicy good flavors of chilies, cumin, garlic, herbs and black pepper. Give it a try with tilapia, the “aquatic chicken” of aquaculture. Easily grown in controlled fish farms tilapia has exploded on the American food scene over the last fifteen years. It is healthy, tasty and relatively easy on the environment, as well as reasonably priced. With a wide presence you should be able to find it in your grocery store. If you can’t find tilapia try this recipe with catfish or salmon. Please share with family and friends and leave your comments to help me continue improving my website and recipes.
Blackened Tilapia
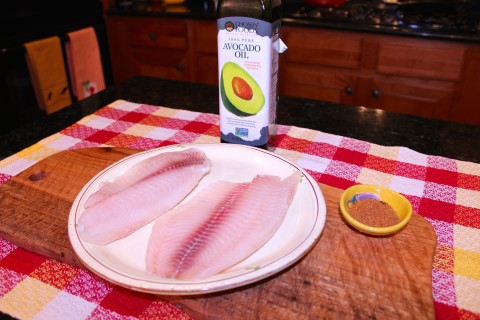
1 6-8 ounce piece of tilapia per person
1 1/2 tablespoons of high heat tolerant oil, see note
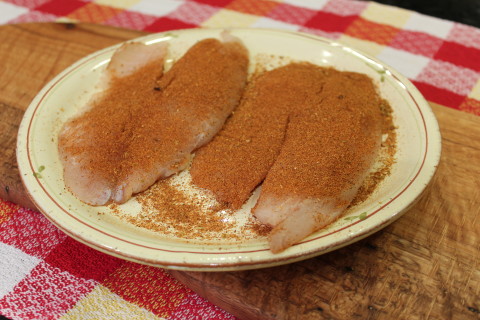
1 tablespoon of blackening spice per piece of fish
Dry of fish with a paper towel then dust with blackening spice on both sides.
Heat heavy skillet and oil, cast iron is preferred, using high heat. When oil just starts to smoke add fish and cover with splatter guard.
Cook for 3-4 minutes then flip and cook for 3 more minutes. Hold in a warm oven if necessary to finish additional pieces.
Note:
I use avocado oil or refined peanut oil that can handle heat over 400 degrees. Some light olive oils can take heat over 400 degrees too but don’t use extra virgin.
You can use just about any commercially available blackening spice blend sold in grocery stores. If not available here is a simple recipe to make your own:
1 T salt
1 t dried oregano
1 T paprika
1-2 t cayenne pepper
1 T granulated garlic
1 t onion powder
1 t dried thyme
2 t ground black pepper
Mix all ingredients together and you have your very own blackening spice.
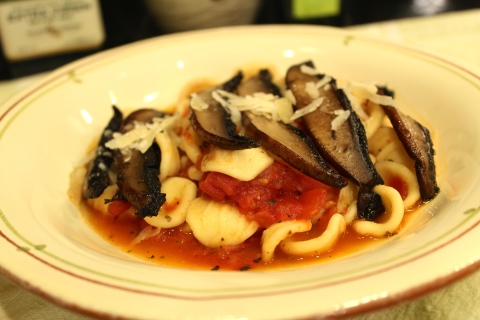
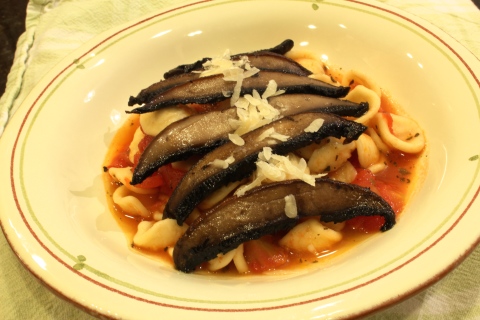
Pasta Portabella
With a busy schedule that has me out of town one or more days for each the next five weeks I don’t want to spend any more time than needed in the kitchen. Don’t get me wrong. I still love to come home from a trip and cook, but it has to be quick and healthy like this Portabella Pasta dish. When I’m on the road I get to eat at some great restaurants. Take for instance the Wicked Spoon in Las Vegas at the Cosmopolitan Casino last week. The food was amazing and they have a bottomless glass of wine special too. When you order a glass of wine the waiter will ask, “Would you like our bottomless glass of wine for just $4 more?” to which I said, “Hell yeah!”. The catch is you have to get your wine drinking done within two hours. That is not a problem for most of us, certainly not me. After three tasty glasses of Prosecco I had enough food and wine for the day and was off to enjoy the sunshine.
Once I get home I look forward to cooking in my own kitchen again. I might have even picked up some ideas from dinning out on the road. This week I went up to Phillip’s Mushrooms in Kennett Square and picked up a load of portabellas, shitake and maitake mushrooms to use in my test kitchen. I had some ports leftover and decided to share this recipe that I wrote two years ago but had lingered on the back burner awaiting a final test. I learned this type of cooking while visiting Ostuni, Italy. That region of Italy is known for simple dishes made with just a few ingredients. Their thumbprint pasta called “ orecchiette” is found often and usually served with some sort of tomato product, and maybe some fresh herbs. We loved every dish we tasted with orecchiette in it and I have used it occasionally since that visit.
In your kitchen you can substitute orecchiette with bow tie pasta or a gluten-free pasta and I suspect it will still turn out quite well. Use the best canned or fresh tomatoes you can get your hands on for best taste. If you want to make it a meaty entree just add Italian sausage in it or on the side and you will have the full meal deal. Pair it with a nice Chianti or Cabernet Sauvignon for dinner Italian style. It beats Spaghetti O’s any day! Please leave your comments so the world knows I have a gazillion readers/followers. Until next time, eat well and drink well my friends.
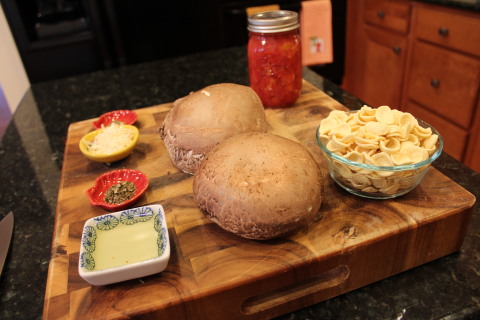
Pasta Portabella
2 cup orecchiette pasta, or bow tie pasta
1 16 oz can diced tomatoes
3/4 teaspoon dried basil
1/4 teaspoon dried oregano
5-6 teaspoons garlic infused olive oil
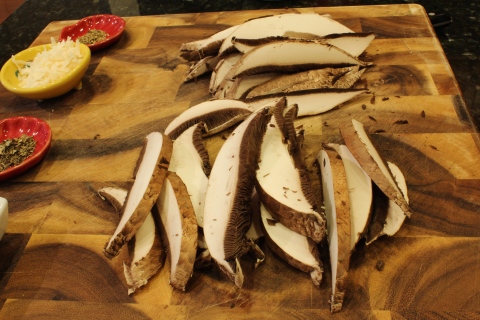
1 portabella mushroom sliced in 3/8 inch slices
2 tablespoons fresh parsley chopped,optional
3 tablespoons grated parmesan cheese
salt and freshly ground pepper to taste
Heat to boiling 8-10 cups of water with 1 tablespoon of salt.
While water is heating sauté portabella slices in a sauté pan on medium heat until lightly browned. It may take two rounds as the portabella slices should not be touching. After browning set aside in a warm oven.
Cook pasta when water boils.
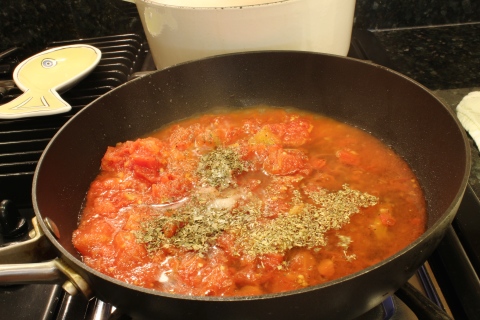
Use same sauté pan to heat tomatoes and herbs to a simmer.
When pasta is done cooking, drain and toss with tomatoes.
Add chopped parsley and arrange on individual plates.
Add salt and pepper to taste.
Top with sautéed portabellas, and parmesan.
Serves 2 as an entree or four as a side dish, but easily doubles to serve more.
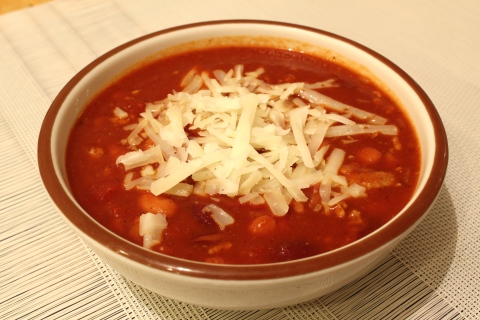
A Turkey Chili Story
Once upon a time there was chili and chili was good. Back then chili was always made with beef or pork for the meat component, and it was good. For many years all the people in the land ate of the usual beef and pork chili and all was well. Then one cold day came strangers to the world of chili and proclaimed that there are other meats that are good in it. These strange people put ground turkey in their chili much to the surprise of the beef and pork chili eaters. As if that wasn’t enough strangeness they would also use bison instead of the age old method of beef and pork to make matters more unsettling. The “old school” beef and pork chili eaters were upset by this oddness and said, “woe is thee who eateth the turkey or bison chili” and they refused to eat it. This did not bother the “new school” turkey and bison chili eaters, and they blended in as best as they could in the world of the “old school” crowd.
Many years passed and the “old school” chili eaters had children who grew up alongside the children of the “new school” chili folk and in time they became friendly towards each other. It was bound to happen that one day the child of an old school chili eater was visiting his friend who’s parents were of the “new school”. It was cold and nasty outside and the “old school” child was invited to stay for dinner. Lo and behold the family served nothing for dinner but turkey chili. The “old school” child thought it was better to eat of the strange turkey chili than go hungry and upset his hosts so he bravely tried this new chili. What a surprise to his taste buds this milder flavored meat had! It was delicious in a most agreeable manner and he ate much of this warm and satisfying bowl of hot red goodness. He couldn’t wait to go home and tell his parents about what was once thought of as sacrilege amongst chili eaters, was indeed quite tasty. He asked his hosts for the recipe to take to his parents so they too could sample this new chili. When he arrived home with chili smeared on his happy little face he told his parents of the wondrous chili at the “new school” chili eater’s home. He presented them with the recipe and the parents tried it and liked it. Soon all the land was rejoicing in the bliss of two new chili recipes and all was well in the land.
Today I share with you that amazing turkey chili recipe that brought peace and harmony to the land of chili eaters. May it keep you warm and happy.
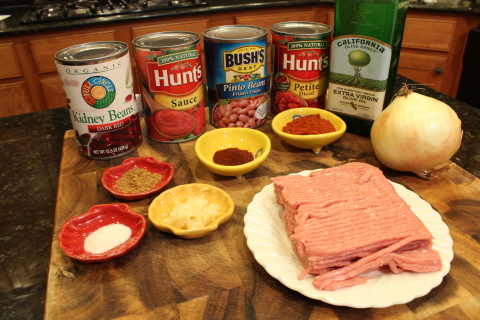
1/2 pound ground turkey
1 cup diced yellow onion
1 tablespoon minced garlic
1 tablespoon olive oil
1 15 oz can of diced tomatoes
1 15 oz can of tomato sauce
1 can of pinto beans
1 can of kidney beans
2 tablespoons paprika
1 teaspoon ground cumin
2 teaspoons chili powder
1/2 teaspoon salt
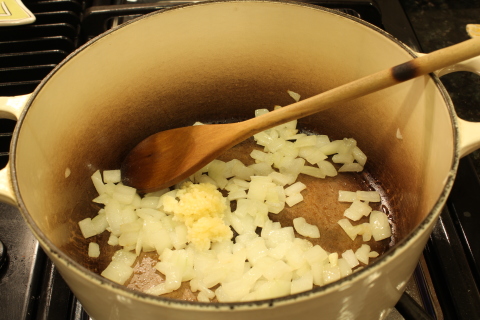
In a 6-8 quart pot add olive oil, onions and garlic, and cook on medium heat for 3 minutes stirring often.
Add garlic and continue cooking for 2 more minutes stirring often.
Add ground turkey, turn heat up to med-hi and cook for 5 minutes stirring every 30 seconds until turkey is no longer pink.
Add rest of the ingredients, cover and bring to a simmer. Cook at a slow simmer for 20 minutes stirring every 5 minutes or so.
Chili is ready to eat after 20 minutes, but improves if cooked for 45 minutes, the last 25 minutes should be with the cover off. Like most chili recipes this one improves the next day.
Serves 4-6


