Summer Salads
There is a whole world of salads out there in food land for us to choose from. Since it’s summer I like to make salads as a main dish once and a while. I have had a bean salad idea brewing in my mind for the last three days and today I put it into a recipe for myself and my readers. When I was starting out in the cooking business as a young cook in the US Coast Guard I had to make many a dish that I didn’t like.
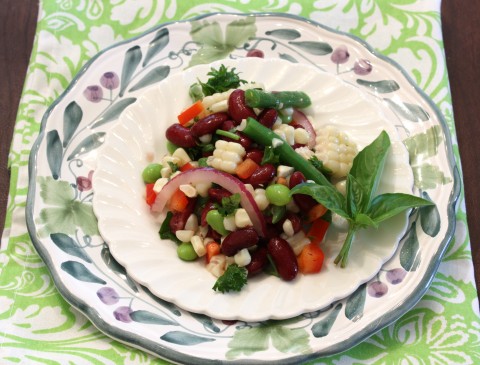
Three bean salad was one of those. It didn’t help that all the beans were canned. I didn’t like it until just a couple years ago when I tried one that was pretty good, and that got me thinking of ways to make my own version of this common salad. I set out to make it uncommon though, and today I whipped up what’s sure to be a classic(Three Bean Salad with Sweet Corn) for you all to try.
Hopefully you all are staying cool enough to go into your kitchen and make something quick and healthy from scratch like I do here at the Fast and Furious Test Kitchen. It’s important to have dishes like this one that you make once and can eat two or three times over the course of four to five days.
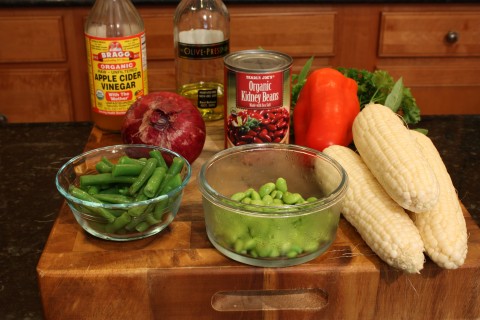
This isn’t just your every day three bean salad. I sought to make it healthy, quick and delicious while being different too. I decided to use fresh green beans, and edamame to make it non-conforming. Then I added fresh basil for another twist. I thought about using garlic infused olive oil, but will try adding that some other day to see if it adds or detracts from the overall taste.
Usually I would add hot peppers to something like this but I wanted a baseline recipe first to see how it tasted before tweaking it much. After all one could add hot sauce or peppers at the table and it would still get the job done. Since we are in the third day of a heat wave it’s a great time to make a refrigerated salad that can have the hot stuff added later on the whim of the person eating it. So give this one a try, and tweak it if you want. Please leave feedback so I can gauge how popular this recipe is. Stay cool until we meet again and look for my Facebook posts from Alaska starting July 25th.
Three Bean Salad with Fresh Corn
1 1/2 cup green beans, fresh, frozen or canned
1 can of kidney beans rinsed and drained
1/2 cup ready to eat edamame beans, or frozen
1/2 cup diced red bell pepper
2 cups fresh cooked corn off the cob
1/3 cup chopped parsley
1/3 cup fresh basil sliced thin or left whole
1/4 to 1/2 thin sliced red onion
2 tablespoons olive oil
2 tablespoons natural apple cider vinegar
1/4 teaspoon salt
1 avocado for garnish
1 fresh tomato for garnish
If using frozen edamame heat 4-5 cups water to boiling and cook for 3 minutes. If using frozen or fresh green beans cook with edamame. Drain and cool. Add all ingredients except oil, vinegar and salt in a mixing bowl. Sprinkle with salt and stir it in. Add oil and vinegar and mix well. Refrigerate for 30 minutes or more and serve with sliced tomatoes or avocados for garnish.
Hot Summer’s Day Food
Black Bean Tostadas With Cherry Tomatoes
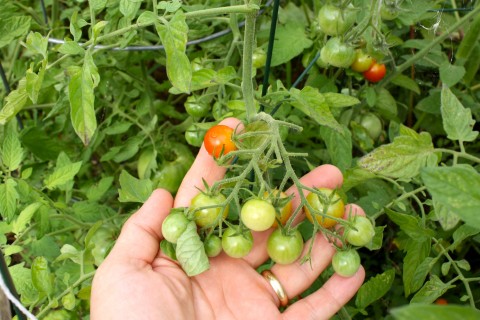
I admit it. I love black beans! I eat them once or twice every week in one way or another. I cook up a batch in the crock pot overnight on Monday and have them available all week. Lately I have had an abundance of cherry tomatoes from two Sweet 100 plants in my garden. Tomatoes love these hot summer days in Baltimore and reward us with plenty of great produce for about three months.
This Sweet 100 is a new variety I decided to try this year from my favorite plant and vegie farmer at the Baltimore “under the bridge” farmer’s market. They started out slow but by June I could tell these were going to be big. Apparently the bushes get up to 7 feet tall! And boy are they sweet and delicious!
With all these cute tasty little tomatoes rolling about I have used them in new and fun ways every week since they started producing 10-15 tomatoes per day. Yesterday I wanted something to use my hot red habenero sauce on so I dug the corn tortillas out of the freezer and when they thawed out the fun began. Now I rarely fry anything, but I figure it’s no big deal to do up these corn tortillas in one and a half tablespoons of olive oil. Especially since about half of it remains in the pan after frying them. I’m sure the oil I use is better than the oil used in most restaurants the fry tortillas.
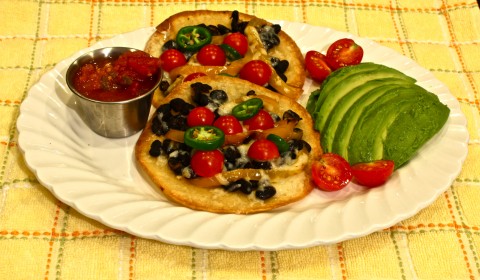
So fry I did, and in no time at all I was munching these colorful discs of tastiness and spice. These tostadas can be a starter, a lunch main dish, or party food. You can add green chiles, squash, corn, or even kale. You can make them hot, or not. Goat cheese, and fresh basil would work well with olives thrown in for a Greek flavor treat. Just let your creativeness flow on this one and have fun. Nothing like hot and spicy food on hot summer days.
Black Bean Tostadas with Cherry Tomatoes
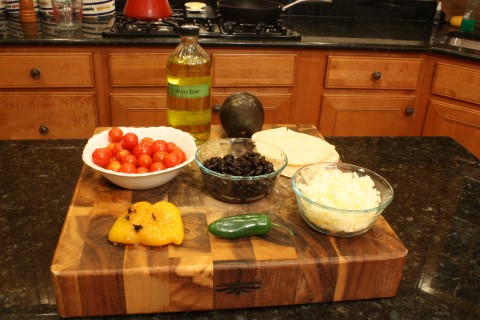
4 corn tortillas
1 1/2 tablespoon olive oil
1 cup cooked black beans
1 cup shredded cheddar cheese, white or yellow
1/2 grilled bell pepper, red or green sliced thin
12 cherry tomatoes cut in half
1 jalapeno sliced thin, optional
In a saute pan cook the tortillas one at a time in the oil on medium to medium high heat just until brown on the edges. This takes about 2 minutes on the first side and a little less time on the second side.
Drain on paper towels.
Drain oil out of the saute pan and heat the black beans for about 2 minutes. This is a good time to add some cumin or chili powder if you like. A 1/4 to 1/2 teaspoon should be enough. Add salt and pepper to taste.
Now it’s time to build your tostadas. Put 1/4 beans on each, followed by cheese, tomatoes and jalapenos. Bake in a 400 degree oven for about 4-6 minutes until cheese is melted. Serve with a side of sliced avocado, shredded lettuce, salsa, black olives or any combination of these ingredients.
Serves two.
Note:
These can be cut in half or quarters for a nice party snack.
Pinto beans/refried beans would be good in place of black beans.
Canned beans can be used if you don’t want the bother of waiting for the crockpot beans.
Crockpot Black Beans
2 cups dry black beans
6 cups water
1/2 yellow onion chopped
1 clove garlic minced
1 teaspoon cumin
2 teaspoons chili powder
1 teaspoon salt
Put all ingredients in a crockpot and cook on low for 7-9 hours.
You can shorten this time if you start out on high and reduce to low heat an hour later. This cuts about an hour off the total cook time.
Peach Daiquiri Time
One of the best parts of moving to our home in North Baltimore almost three years ago was being across the street from a 150 year old peach orchard(Moore’s Orchard). Each summer around the Fourth of July the peaches are ready for us lucky consumers. When the first peaches become available one has to be vigilant, because instead of the usual sandwich board sign advertising said peaches on busy Joppa Road there is a less visible sign that goes up on the less busy Peach Blossom Road. This is because there aren’t a lot of early peaches to be had and the rush of buyers would wipe out the store in no time at all.
This year I was looking most every day from the first of July on and was thrilled when I spied the sign pronouncing the beginning of the season on July 5th. These first peach varieties are small but very juicy and tasty indeed. I promptly bought two $5 bags of each type (yellow and white), and took them home to wash them up and test. Even though they were only the size of a tennis ball they packed big flavor.
Way back in 1979 I lived in the small mountain town of Frisco, Colorado amongst an assortment of old hippies, ski bums, old timer locals, and people fleeing the boredom of the plains states. They were an interesting colorful bunch indeed. It was there on a warm summer’s day two of my new found friends invited me across the street from the Moose Jaw to partake in a party with daiquiris made from scratch. It was there that I learned the right way to make a daquiri with fresh lime juice and honey instead of sweet and sour mix. Sure you could use the sweet and sour mixes sold in liquor stores to whip up one of these frozen drink delights, but once you taste this method you will never again want that sweet and sour chemical crap in your daiquiri again.
It was at this party that we indulged in peach daiquiris and strawberry daiquiris until the perfect mix was obtained. Sure it was tough duty testing batch after batch, but we were young and full of ambition. The end result other than getting our daily requirement of fruit for the week was all of us agreed this was the way to make a frozen daiquiri hence forth. Therefore I will now share with you the magic recipe for the best frozen daiquiri you will probably ever taste.
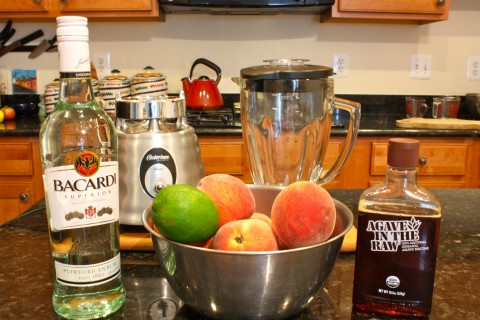
I have made some changes in the recipe, actually just one change. For sweetener I had previously used honey, but it was always difficult to get it to blend into a frozen drink properly. Now I use Agave Nectar that the good folks at Sugar in the Raw gifted me at Eat, Write, Retreat food bloggers meeting in Philadelphia last month. Agave Nectar dissolves much better than honey and works as well or better in this drink. Rum is optional if you don’t drink alcohol.
Frozen Peach Daquiris
2 cups peeled and sliced fresh juicy peaches
2 to 2 ½ cups crushed ice
1 tablespoon fresh squeezed lime juice
1 tablespoon agave nectar
4 ounces rum
In a capable blender add the peaches first, then the ice, lime, agave and rum. Blend until all ingredients are pureed. This will vary depending on your blender and size of crushed ice. Top with a slice of fresh peach and enjoy. Repeat if hot and thirsty.
Serves 2-4.
Note:
Strawberries work well with this recipe too.
You can use frozen peaches or strawberries with half the ice and enough water to make it all blend properly.
My new Osterizer classic beehive blender that I just bought worked great!
Even though I was gifted Agave Nectar from Sugar in the Raw the ideas and recipe expressed are my own.
Spiked Baked Chicken Breast
Here’s one of the fastest easiest chicken dishes from my recipe files. There is a youtube video of it too at:
https://www.youtube.com/edit?video_id=W7sL5ubTLvM&feature=vm&ns=1
Give it a try when you want a great tasting chicken dish in less than 30 minutes. This is a lowfat, super healthy dish suitable for family or friends.
Spiked Baked Chicken Breast
2 skinless boneless chicken breast about 8 oz each
1/2 teaspoon Spike Seasoning Salt
1 teaspoon olive oil
salt and pepper to taste
Sprinkle spike over chicken breast and then drizzle olive oil. Bake uncovered in a 400 degree oven for about 18-20 minutes or until a thermometer reads 165 degrees inserted into the thickest part.
serves 2
Note:
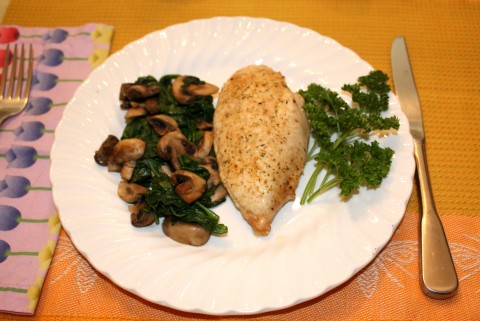
Serve with sauteed mushrooms and spinach.
Cook more than you need to use for tomorrow’s lunch.
Can be grilled too when it’s too hot to cook inside.
Grocery list
2 skinless boneless chicken breasts
Spike seasoning salt
light olive oil, not extra virgin
Farmer’s Market Italian Green Beans
Farmer’s Market Italian Green Beans
Baltimore’s farmer’s markets are in full swing now that summer is here. I took full advantage of this on Sunday by buying all we could carry. We started out with fresh garlic and pole green beans then moved on to yellow squash and zucchini. Next stop I spied Italian Green Beans and had to have them. The mushroom folks had fresh chanterelle mushrooms so in the bag they went. We also bought two kinds of bread from the Breadery which grinds the wheat for their bread. The buying frenzy continued when I bought more garlic, this time heirloom garlic from my favorite organic farmer Rudy. The bags were getting heavy but I couldn’t pass up a ghost pepper plant for $2 and a couple of jalapeno plants too. Last but not least was fresh sweet corn on the cob to make a grilled corn salad with.
Now it is one thing to buy and carry all that good stuff, but the real work begins when you get it home! There is the cleaning, cutting, canning and cursing to be done. It does take a lot of work but once you taste the freshness of real food fresh from a farm it’s hard to pass it up.
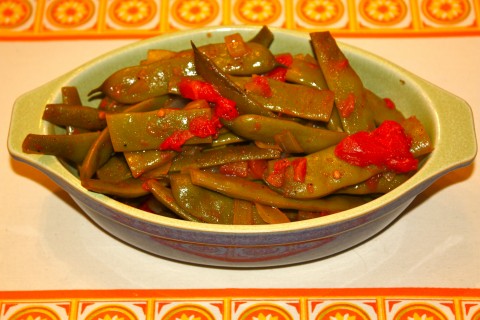
My favorite buy of the day so far was the Italian Green Beans. I used to love the frozen version and would cook them in about a total of two ways. Today I made the version with tomato that is fast and furious and will have you eating these yummy beans in no time at all. Give this simple recipe a try with either Itaian or regular green beans soon.
Farmer’s Market Italian Green Beans Recipe
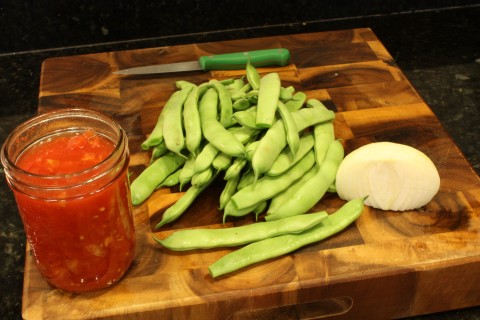
1 pound fresh Italian Green Beans, or regular green beans
1 can of diced tomatoes
1 teaspoon garlic infused olive oil, or olive oil and 1 clove minced garlic
1/2 cup diced yellow onion
salt and pepper to taste
1 tablespoon fresh oregano minced, optional
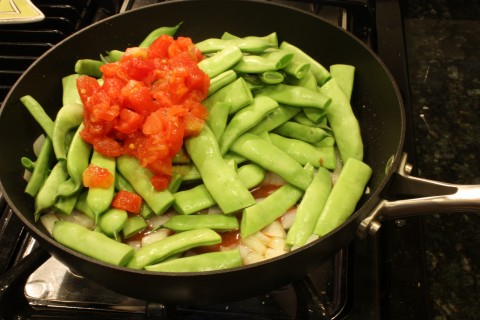
Wash and trim the beans then cut in half. Saute onions in a saute pan with oil for 5-7 minutes on medium low heat. Add the green beans, tomatoes, and cook on medium low for 15 minutes covered stirring once, or twice. Continue cooking uncovered until desired doneness is achieved(about 5-8 minutes)and add fresh oregano if using 1-2 before serving .
Serves four.
Note:
You can use 1/2 teaspoon dried oregano in place of fresh by adding it in the beginning.
Chopped fresh parsley is a nice addition too. Add 1-2 minutes before the beans are done cooking.
For an extra healthy version omit the oil and saute onions in 1/4 inch of water.
Bison Black Bean Chili
On the Road Again
I travel 10-15 times per year and 2-3 of those trips are without my wife. Since she doesn’t cook I cook up several meals ahead of time for her so she can do the heat and eat thing. I suspect some of you have this sort of situation come up too? Today I’ll share with you the 4 days of meals my wife will eat while I’m gone as this might help you plan for a similar event. After all we want the ones we love to eat healthy delicious meals when we aren’t there to cook for them don’t we!
First thing I cooked this morning was poached Alaskan Red Salmon for a salmon salad. This can be packed in lunches in a wrap with greens or served on top of a green salad in a nice scoop.
Next on the list was to steam some rice in the rice cooker while doing outside garden chores. This was then allowed to cool so I could make vegetarian fried rice. This will re-heat easily on the stovetop in a saute pan or in the microwave.
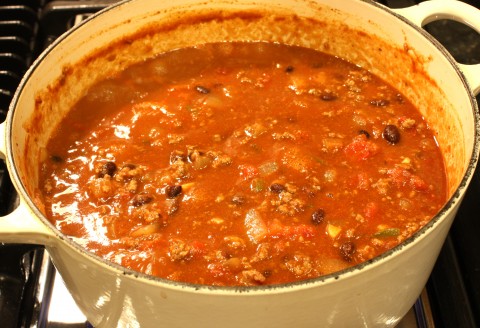
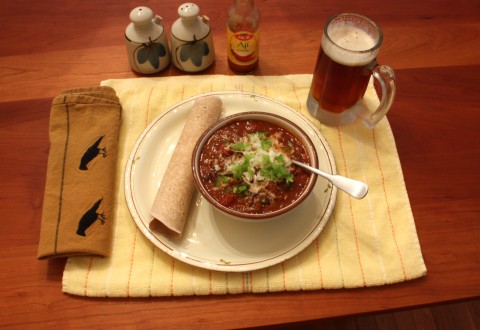
Next on the list was Bison Black Bean Chili. This wonderful chili is a meal in itself, but with the addition of a scoop of brown rice is more nutritious and filling too. It re-heats easily on the stovetop or microwave, and topped with grated cheese is mighty tasty. If you have never tried bison/buffalo instead of ground beef you are missing out on a healthy source of protein that usually doesn’t have the fat or additives of ground beef. I’ve been eating it for well over 25 years in tacos, burritos, stroganoff, meatloaf and burgers. I’d much rather eat a meat that doesn’t have growth hormones, and antibiotics especially when it tastes great!
Tonight I’ll cook Sauteed Swiss Chard and Mushrooms on linguine for dinner and make enough that my wife can have it tomorrow night for dinner too. I’ll also make a mushroom soup for later in the week.
I have a few bean and brown rice burritos(http://www.fastandfuriouscook.com/spicy-black-bean-brown-rice-lunch-wraps/) in the freezer for lunches that microwave in a minute or two. These are great as they last for up to three months in the freezer and ready to pack in lunches when I am too busy to cook, or for my wife when I’m out of town. They can be made with or without meat, and portabello mushrooms are quite nice in them also.
So here’s what the menu looks like for Tuesday through Friday.
Tuesday:
Breakfast, oatmeal with walnuts and raisins
Lunch, salmon salad wrap with fresh lettuce from our garden
Dinner, leftover mushroom pasta, and a green salad
Wednesday:
Breakfast, oatmeal with walnuts and raisins
Lunch, bison black bean chili in a thermos
Dinner, vegetarian fried rice
Thursday:
Breakfast, frozen fruit smoothie with almond butter toast
Lunch, green salad with a scoop of salmon salad on top
Dinner, bison chili with a scoop of brown rice
Friday:
Breakfast, oatmeal with walnuts and raisins(hey we like oatmeal a lot)
Lunch, mushroom soup and garden salad with our just ready cherry tomatoes
Dinner, vegetarian fried rice with maybe a few shrimp from the freezer tossed in at the beginning for a twist.
There you have it a full four days of meals thought out for my wife so that she doesn’t miss me too much while I’m off to help my parents out a bit in Colorado. All of the cooking I did today totaled no more than 2 hours in the kitchen, and if my wife forgets what’s for lunch or dinner all she has to do is go to my blog and find the menu there. You might notice I didn’t cook up anything for breakfast, and that’s because most breakfast meals are quick and easy while not requiring much experience with cooking. Although I did bake the bread that she will use for toast two weeks ago and took it out of the freezer two days ago.
I hope this helps some of you out there in foodland plan meals for your loved ones that either don’t cook or are too busy to cook. This way while you are out of town your family will eat well, because you don’t want them to eat junk, do you?
Bison Black Bean Chili
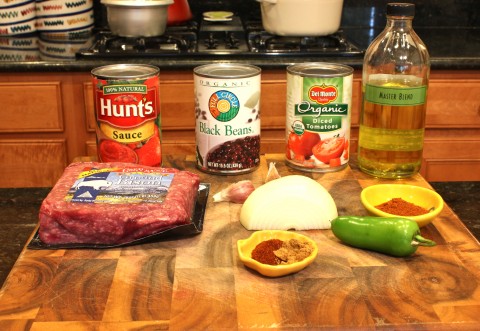
1 pound ground Bison/Buffalo
1 teaspoon olive oil
1/2 yellow onion diced
2 cloves garlic minced
1 jalapeno diced small
1 15 ounce can diced tomatoes
1 15 ounce can tomato sauce
1 15 ounce can black beans
1 tablespoon paprika
1-2 teaspoons chili powder
1/2 teaspoon ground cumin
1/2 teaspoon cayenne powder, optional
1/2 teaspoon salt, optional
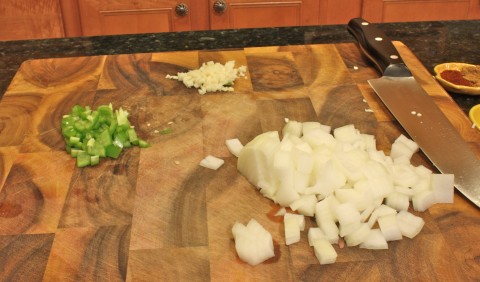
In a 3 quart or bigger pot brown onions in olive oil on medium to medium high heat for 3 minutes stirring often. Add garlic and jalapeno and cook for 2 more minutes stirring often. Add ground bison and turn up heat to medium high or high for 2 minutes just to get it going to brown it a bit then turn the heat back down to medium and cook for 8 minutes. Add the rest of the ingredients and bring to a simmer cooking for 10 minutes at a simmer uncovered stirring every 2-3 minutes. Serve with grated cheddar or Manchego cheese and minced jalapenos on top.
Serves 4-6
Note:
A #22 LeCruset round cast iron French oven pot is perfect for cooking this chili in.
If you love onion like I do feel free to increase it to up to 2 cups.
If you like a lot of beans double the black beans or add a can of red kidney beans.
A scoop of steamed brown rice goes real well with this chili whether you add it last or pour the chili into a bowl with the rice as a base.
Bison and buffalo are the same thing when it comes to shopping for this recipe.
Summer Bliss
I’m from Colorado but I’ve lived in Baltimore going on 5 years this November. I grew up not knowing much about humidity. Baltimore has furthered my education in humidity though. In the almost 5 years here in humidity central I have learned to deal with this minor nuisance. After all, my garden is quite happy with the way the weather is here, and the tomatoes seem to love this hot humid weather the best. About every 5 to 8 days we tend to get a gift from drier climates west of here and dry air blows in from somewhere out there.
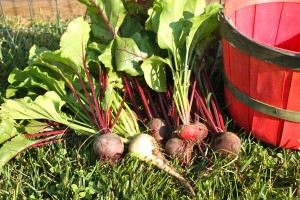
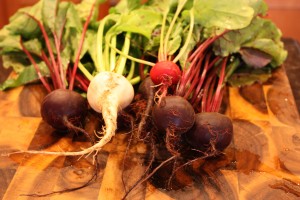
On these special days I pay extra attention to what chores there are to do outside and I also like to go for a good hike while this gift of great weather is with us. My wife and I celebrate these special days and say something like, “wow, it feels like Colorado weather”, or something like that. This summer is different though. So far it seems there have been twice as many dry weather days than the first 4 summers had, and they string together for 2-3 days in a row instead of 1-2. We are in the midst of one of those stretches now with 3 in a row and counting. To celebrate the great weather I already played in the vegie garden and harvested a mixed bag of beets for a special salad, and plan to hike the Gunpowder River later today to celebrate this wonderful dry and not too hot day.
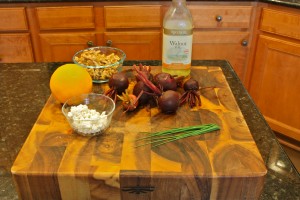
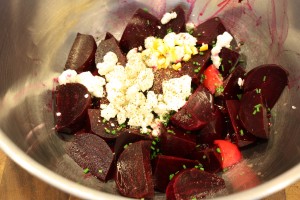
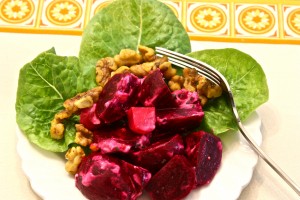
Before going off on a hiking adventure with my 14 week old German Shepard puppy Tucker I decided to test a beet recipe that was forming in my mind. I suspect there may be a similar recipe out there in foodie land, but it’s a first for me. I wanted to join beets, goat cheese crumbles, fresh squeezed orange juice and toasted walnuts together to make a salad fitting for a beautiful summer day. This salad will grace the dinner table alongside fresh green beans from Huber’s Farm just up the road in Kingsville, sauteed Swiss Chard from my garden, and King Salmon from Alaska.
All of these foods are summer foods, and go great together. The citrus in the beet salad will complement the salmon nicely, the chard will be good and full of galrlic goodness, and the green beans will add a nice color to the plate.
Even though the salad is not as fast and furious as I would usually do I don’t mind waiting 35 minutes for the beets to simmer. After cooking and cooling the beets the salad goes together quickly, and some things just can’t, or shouldn’t be rushed. It should turn out to be an excellent summer meal, and with any luck we can enjoy it ourt doors on our patio. Now that it’s officially summer I wish you the best of fun and food with family and friends, and be sure to celebrate beautiful weather where ever you live, or vacation.
Beet Salad with Goat Cheese and Curry Roasted Walnuts
1 bunch of beets,about 1 1/2 cups cut into bite sized pieces
1/4 cup goat cheese crumbles
1 teaspoon minced chives
2 tablespoons fresh squeezed orange juice
1/2 teaspoon minced orange zest
2 teaspoons walnut oil
salt and pepper to taste
1 cup walnuts
1/2 teaspoon curry powder
Trim and boil or roast beets, about 35 minutes, then cool, peel and cut into bite sized pieces.
While beets are cooking toast walnuts in a saute pan with 1 teaspoon of the oil. This takes about 6-8 minutes on medium to medium low heat stirring or tossing often. Add curry powder, salt and pepper after 5 minutes of cooking.
Cool walnuts.
Mix beets, orange juice, orange zest, goat cheese, 1/3 cup walnuts, chives, salt and pepper until just combined. Serve on top of leaf lettuce or shredded lettuce with a few more walnuts for garnish.
Note:
I call for 1 cup of walnuts so you have extra for snacking on as they are delicious.
Salad oil, or olive oil will do instead of walnut oil.
Dessert Emergency, Strawberry Shortcake to the Rescue!
Ah the special foods of summer call each and everyone of us to remember why we love food so much. We all draw pictures in our minds that connect us to food and family memories, and love to re-live those memories. I can see in my mind’s eye that flagstone patio in Lakewood, Colorado where I grew up, and the table with all the yummy things mom put on it throughout the summer. There was home made ice cream, blueberry pies, cherry pies and more. One dish in particular has the ability to take me back to that flagstone patio and that’s strawberry shortcake. Now even though my mom was a good baker she usually bought the spongecake type of shortcake from the local grocery store for the ground floor of our strawberry masterpiece. It wasn’t until I was 15 and spent most of the summer at my Aunt and Uncle’s house south of Cleveland I learned about the biscuit dough type of shortcake. It changed my mind for ever on what was the best base layer in this favorite American Strawberry dessert. I like the way the biscuit dough soaks up the juices and still have a wonderful texture to it. It does add a bunch of calories though so I don’t have it very often like that. My wife on the other hand likes pound cake on the base layer. On Saturday night we had a dessert emergency. You know the kind where dinner is over and there is nothing suitable in the house for a special weekend dessert. My wife decided it was time for Strawberry Shortcake and wanted her version on poundcake served with real home made whipped cream. Resistance was futile, and off I went to the local grocery store to buy the goods. I brought it all home and set to work on 15 minutes of Fast and Furious style dessert prep. Photos were not part of the prep but I’m glad I shot the finished product. Here’s what went into it:
one pound strawberries sliced
one half pint heavy cream whipped with a bit of powdered sugar
one small package of Monkfruit in the raw, for the berries
one half teaspoon of Grand Marinier
a touch of ground nutmeg for garnish
I laid the foundation of poundcake and poured on top the Grand Mariner.
Next I piled sliced sweetened strawberries on top.
Then I piped the whipped cream through a pastry bag on top of the berries.
Finally the nutmeg graced the the top of the whipped cream.
The result? It was fabulous! The Grand Marnier gave it a lovely orange spice that set the pace for the sweet, crisp strawberries to mix with. The whipped cream created a smooth silky binder to keep it all together and the nutmeg added an exotic complexity to tantalize the palate. This was the first time I made the version of strawberry shortcake. It might make another appearance later this year, but even if it doesn’t it created a memory of a perfect late spring day enjoying fresh fruit gifts of the season.
Disclaimer:
I was gifted some Monkfruit in the Raw from the good folks at In The Raw at the recent Eat Write Retreat bloggers event, however their gift did not influence my opinion.
Disclaimer:
I was gifted some Monkfruit in the Raw from the good folks at In The Raw at the recent Eat Write Retreat bloggers event, however their gift did not influence my opinion.
Some Like It Hot!
My love affair with hot spicy foods began when I was a teenager eating chips and salsa in a real Mexican Restaurant in Alamosa, Colorado. I would dip the chip just enough to get a kick but not go to the painful levels of the Scoville scale. Heck, I hadn’t even heard of the Scoville scale invented by Wilbur Scoville to measure the hotness of peppers back in 1912 until I’d been eating hot peppers for 20 years or so. Over the years I kept upping the heat and trying new types of ethnic foods that incorporate peppers to expand my pepper experience.
Since then I have used the scale many times over the last 15 years to look up the heat ratings of my favorite peppers. It seems the more new and different hot pepper varieties I try, the more I love hot peppers. They taste great and contrary to public opinion they are good for you! I think I could devote a whole month to hot pepper folklore, recipes and new recipe research on my blog. The most important thing about cooking with, growing and eating hot peppers is they must taste good! I don’t care how hot it is if I don’t like the taste.
Why Habaneros?
It’s kind of funny that I would plant habaneros in my first garden project here in our backyard in Baltimore, Maryland since I had not really liked them much up to that point in my life. I thought I would plant them and see what might happen when I saw a six-pack of small plants for $2.50, and was blessed with one crazy little bush out of that Habenero six-pack that gave me more than a hundred peppers! Not wanting to waste the beautiful peppers I set to work to find a way to eat them and made this delicious, but very hot homemade Habenero Salsa (http://www.fastandfuriouscook.com/habanero-salsa/).
You can cook down a whole bunch of Habeneros into a couple of half-pint jars and store them for a long time if you do the canning process correctly. After that first year’s success, I was hooked on growing and eating Habeneros and bought a few Caribbean Red Habaneros to plant as well as the yellow variety. They did ok in the garden and I used them for many a stir fry and also made hot sauce from them. What an amazing flavor they have. They aren’t quite as pungent as a regular yellow Habenero, and not scorching hot like a Ghost Pepper. Red Habaneros have an exotic flavor that conjures up visions of hanging out under an umbrella, stretched out on a lounge chair, at a Caribbean beach with a cold beer and a nice breeze.
How Hot Can You Stand It?
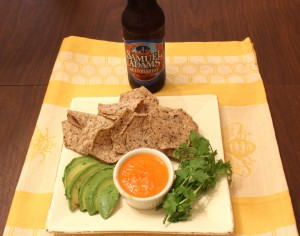
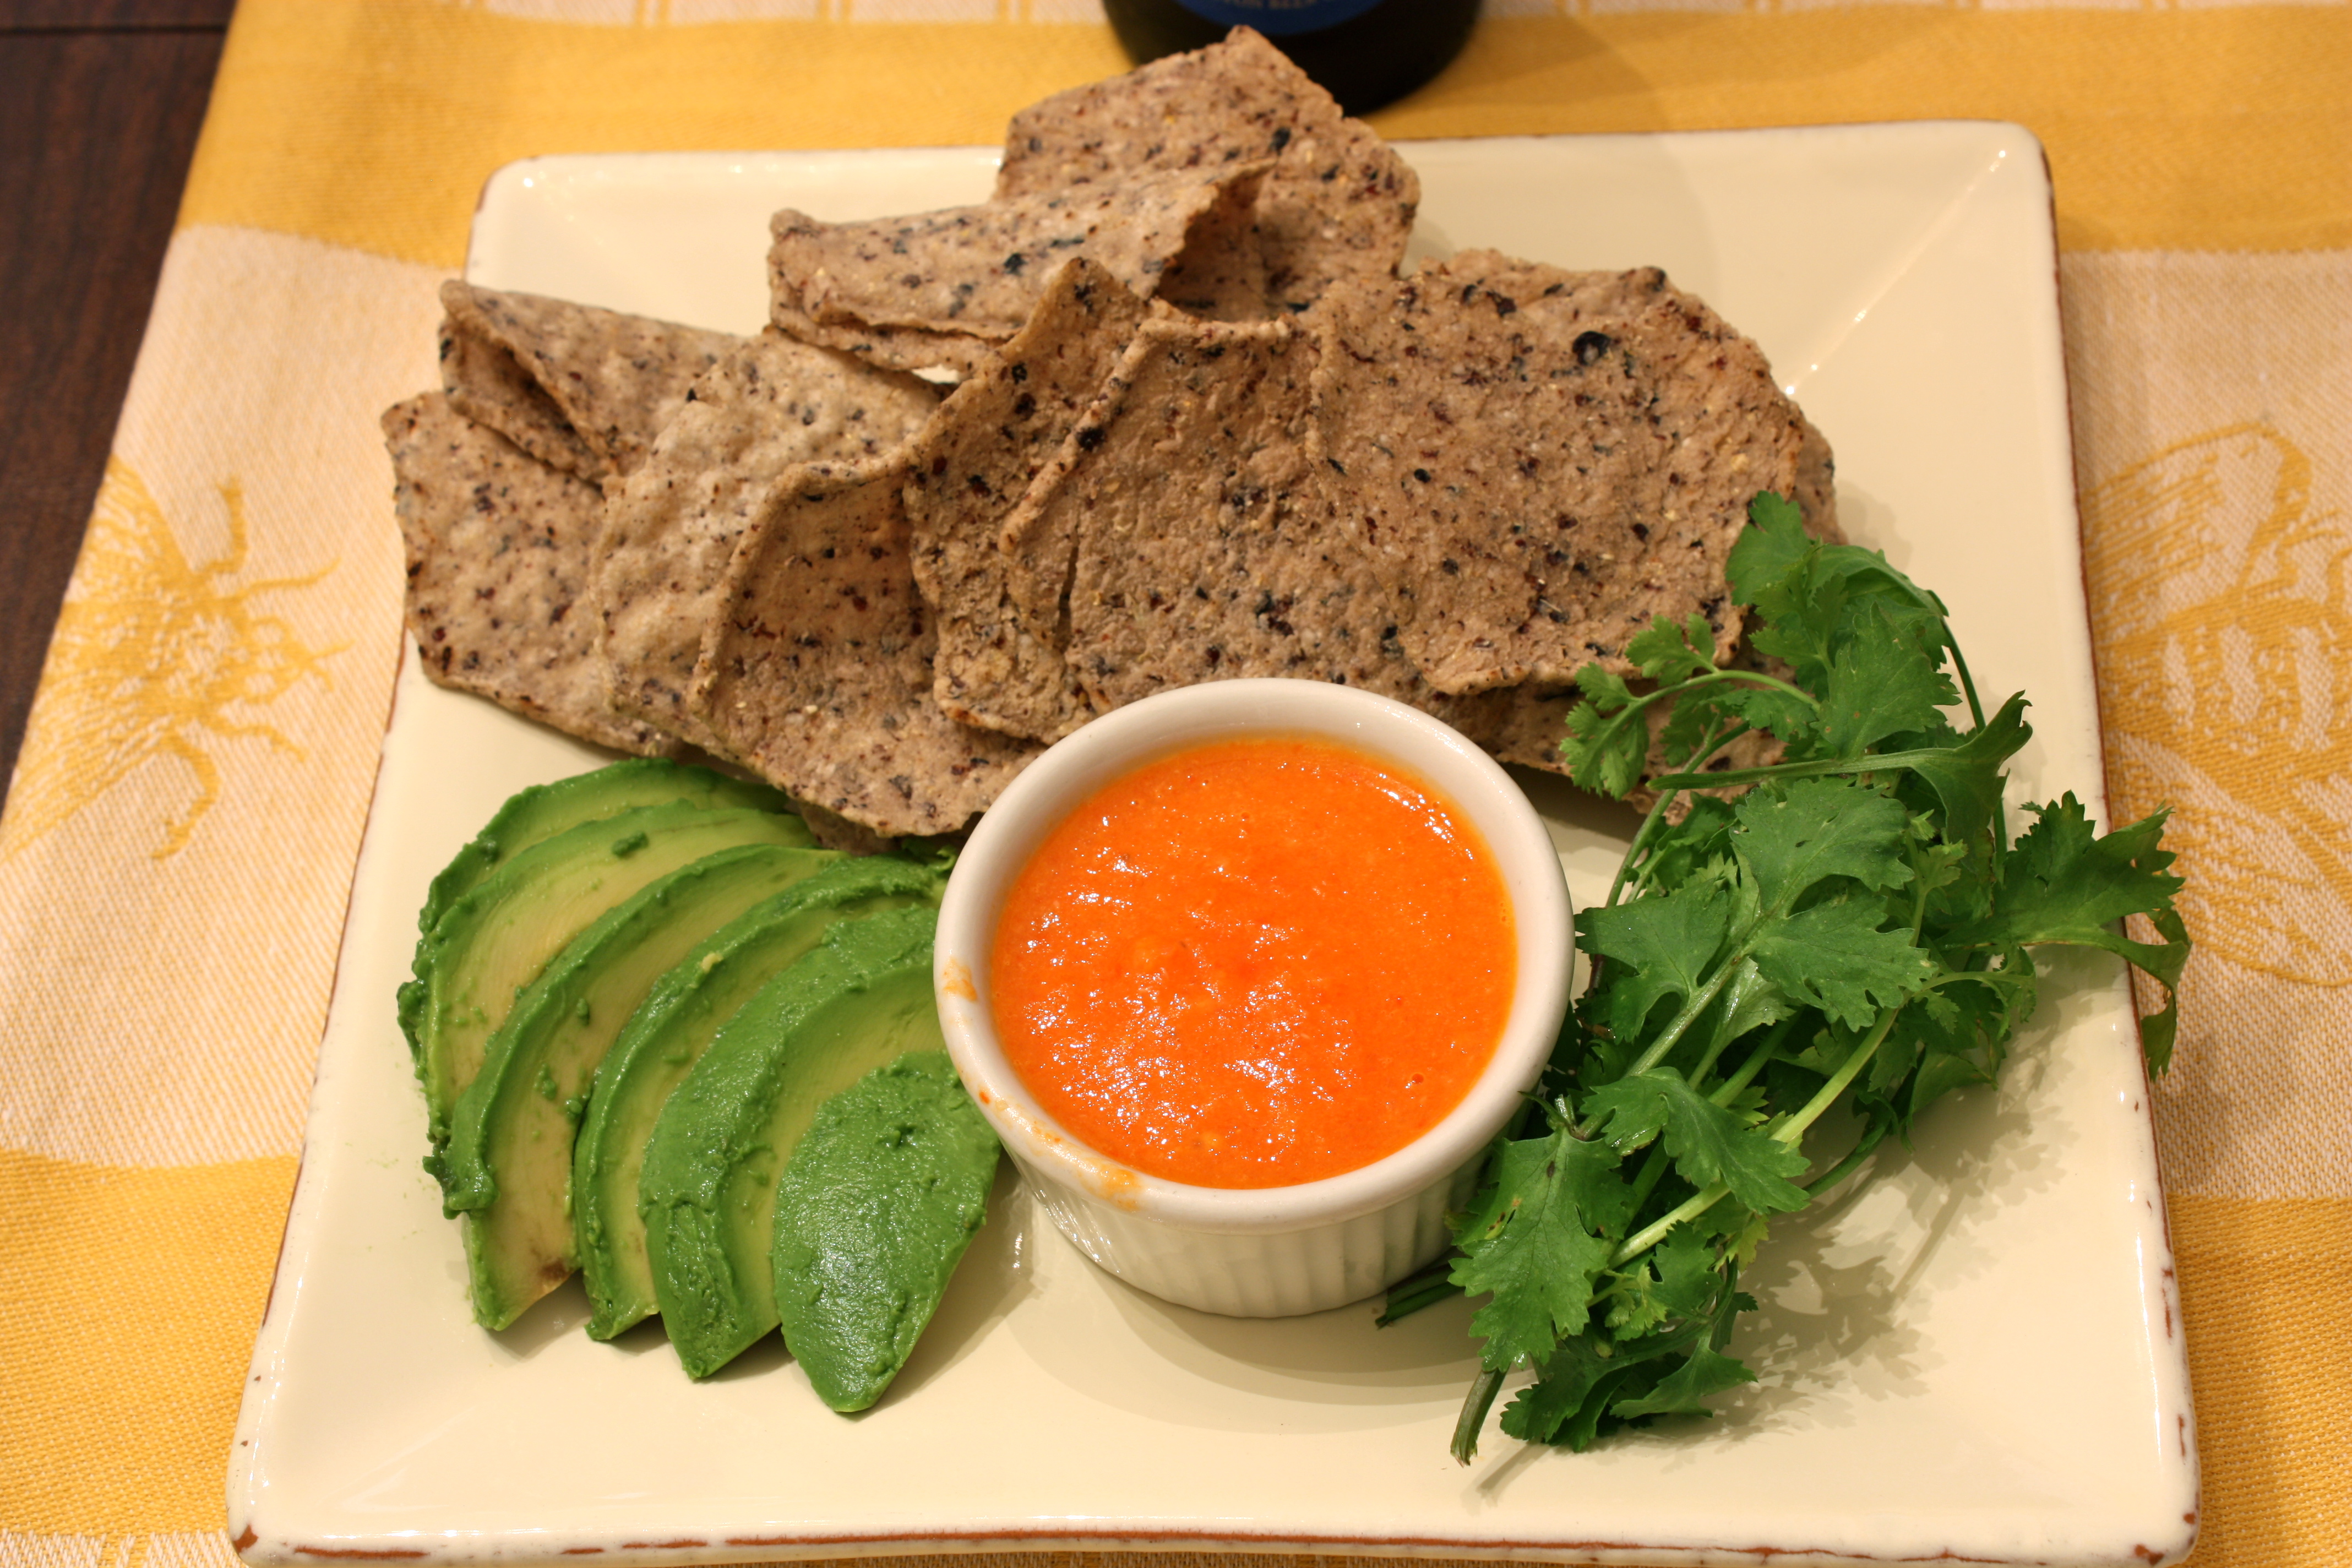
For most people one or two drops of my red salsa on a tortilla chip is enough and gives a flavor explosion as well as raise the internal temperature of the mouth. Last year when my in-laws and my nephew were visiting for Thanksgiving I held a taste test with three kinds of salsas I had made from the summer’s pepper crop. Everyone picked the Caribbean Red as there favorite. It’s not super hot, only 120,000 to 400,000 on the Scoville Scale, and goes well with many different types of food.
You can put it in a meat marinade, stir fry recipe, salad dressing, tomato salsa, or put one in a jar of pickles. Next time you are in your favorite grocery store ask if they carry Red Habaneros. I was surprised to find them in two different grocery stores in my area recently, and of course, I had to buy them. I had just run out of my homemade red salsa from last year and needed to make a new batch. Today was the day and I’m happy to say it came out good and hot. Just remember to handle with care as they are hot! I use plastic food handler’s gloves or even dishwashing gloves when I prep these little firebombs.
Red Habanero Salsa
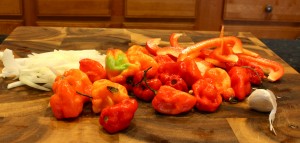
1 1/4 cup Red Habaneros sliced thin
1 cup yellow onion sliced thin
1 cup red bell pepper sliced thin
1 clove garlic minced, about 1 teaspoon
1 tablespoon olive oil
1/2 teaspoon salt
Water to cover
2-4 tablespoons Bragg’s or Spectrum Apple Cider Vinegar
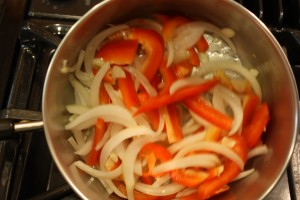
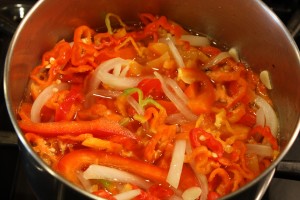
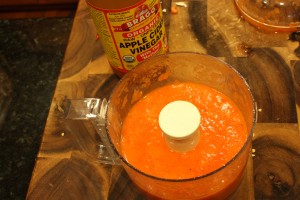
In a 1 1/2 quart pot saute the onions, bell peppers and garlic for 3-5 minutes on medium heat stirring often. Once the onions, bell peppers and garlic are softened add the habaneros and water to cover. Cook on medium-low to medium maintaining a simmer for 20-25 minutes stirring about every 5 minutes until all but about a half cup of the water is cooked off. Cool for 5 minutes and blend well in a food processor adding vinegar until desired twang id achieved. I like the lesser amount of vinegar, but if you want a Tabasco sauce like twang you will probably want to use the larger amount of vinegar. I have kept this type of sauce fresh in my refrigerator for up to 6 months. It lasts a long time as a little goes a long way. Be sure and gift some to your friends and family who like it hot!
Note:
You can drain off most of the liquid after cooking/cooling before blending and add it back bit by bit to get your desired consistency.
Yellow habaneros work just as well but have a slightly different flavor.
Lemon-Cumin Marinated Grilled Salmon
I was at a food bloggers event, (Eat, Write, Retreat), in Philadelphia over the weekend and had a great time learning from the pros. There was so much knowledge at this event I feel like I learned as much in two and a half days as I have in my first 6 months of blogging. We were bombarded with good information and gifts from Kitchen Aid, Jarlsberg Cheese, Lentils CA, Safest Choice Eggs, OXO, California Raisins, United States Potato Board, Watermelon.org, California Ripe Olives, Canadian Beef, Gerolsteiner, California Figs, Attune Foods, In The Raw Sweeteners, and more. We were well fed and even had a signature cocktail hour the first night. One of my favorite talks was To-Jo Mushrooms featuring Tony and Joe D’Amico from Avondale, PA. I already know a bit about mushrooms from my many trips up to Kennett Square, PA the mushroom capital of the world, but these guys talked about how much work goes into producing the schrooms I love so dearly. It was at the end of their talk that I won a Kitchen Aid food processor by answering the correct mushroom trivia question, ”what is the proper temperature to store mushrooms at”? The answer is 35 degrees, which is printed on the bigger boxes of mushrooms that most people never see. Since most of us don’t buy mushrooms that are being displayed at this optimal holding temperature it’s best to eat the schrooms within a day or two of buying them for best quality.
Tony and Joe gifted all of us mushroom growing kits and fresh mushrooms for those who could take them home without having them spoil. I hope to start my mushroom kit tonight and grow some lovely oyster mushrooms.
Another one of my favorite sponsors was one I had never heard of. Gerolsteiner Mineral Water. They gifted us with pretty much all the good clean sparkling water we could drink at the event. I have been a fan of bubbly water ever since I was a kid and liked to drink plain old club soda from the can. I would even bathe in the stuff if I could only visit the Vichy Hot Springs in Ukiah, California more often. I was a Perrier drinker for many years, and drank lots of club soda with a lime when bar tending back in the 1980’s and 90’s at The Moose Jaw in Frisco, Colorado.
I do believe that Gerolsteiner has the others beat for taste, and I love the fact that they use glass not plastic bottles. Plastic bottles pretty much suck and are an environmental blight upon the planet since only about one in six get recycled. Gerolsteiner not only gifted us plenty of water, but they also gave us a booklet that talked about the source of this clean tasting mineral water. Even though I was way busy at the event I read some of this booklet that included many recipes from chef Kurt Gutenbrunner, and one caught my eye. Who knew there would be good looking recipes like Lemon-Cumin Marinated Arctic Char in this mineral water booklet? It looked like one I had to try at home soon.
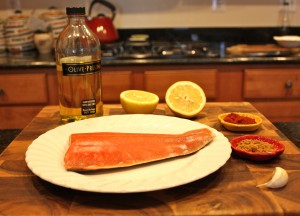
I wasn’t going out and buying Arctic Char to try, even though I like that type of fish. No dear readers I have salmon in the freezer from last year’s Alaska fishing adventure that needs to be cooked up before this year’s fishing adventure in Alaska. Salmon is close enough to Arctic Char in taste and where they live for trying this recipe. I liked this marinade enough to do it again soon with fresh salmon, instead of frozen. I didn’t do the whole recipe that called for grilled vegetables, just the marinade part which I reprint from the Gerolsteiner recipe booklet, by permission, for your enjoyment.
Lemon-Cumin Marinade
2 teaspoons ground cumin
1 tablespoon Hungarian paprika
1 lemon zested and juiced
1 garlic clove minced
5 Tablespoons olive oil
Salt and pepper to taste
2 skin on Arctic char or salmon, 6 ounces each
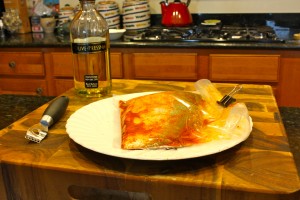
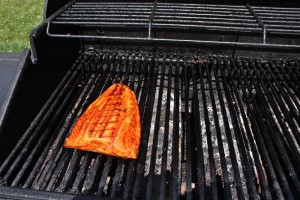
Mix all ingredients, except salmon in a suitable container and add salmon or char. Let stand in refrigerator for 1-3 hours. Place fish on a well oiled grill skin side down and cook for 2-3 minutes. Flip and continue to cook for 1-2 minutes. The recipe called for grilled vegetables, and that looked like a good choice to go with this dish.
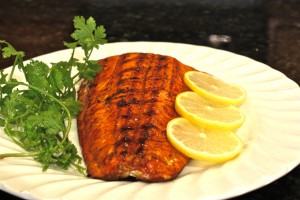
Even though I was gifted the little recipe booklet and some bottled Gerolsteiner Mineral water at the event I would have shared this recipe anyway because it’s a great recipe for salmon, Char or other firm flesh fish.


