Asian Broccoli Salad
Last local broccoli of the year
Even though it is soup season there is still time to check out this Asian broccoli salad recipe. Since my Maryland gardening adventure began three years ago I’ve become much more knowledgeable about the growing seasons for vegetables. Before my gardening education I didn’t realize how well broccoli grew in the fall. It thrives in the cooler weather and lack of bugs. If the weather is cool enough, broccoli planted in August and September grows fast and full. Big thick crowns of this healthy vegetable flourish in cold weather and can even withstand a bit a frost without damage.
The weather forecasters are really loving this big winter storm coming down on the bulk of the US earlier than usual. Almost everyone has heard of winter storm Astro by now. It has dumped up to sixteen inches of snow in parts of Minnesota and is just getting started. While us lucky folks in Maryland won’t get that type of winter weather, it is going to bring a hard freeze. Therefore it is time to get out to your local veggie farms and buy the last of the fresh broccoli, cauliflower, kale and other fall vegetables before it turns into frozen veggies!
I went off to Wilbur’s Farm yesterday in Kingsville, MD, just up the road from my home to buy what was left of their fresh veggies. I bought great looking broccoli that was just cut, and a sack full of various peppers. Knowing that it will be many months before I can buy fresh locally grown vegetables I made it a priority to get what I could before the big freeze comes on Thursday and Friday nights.
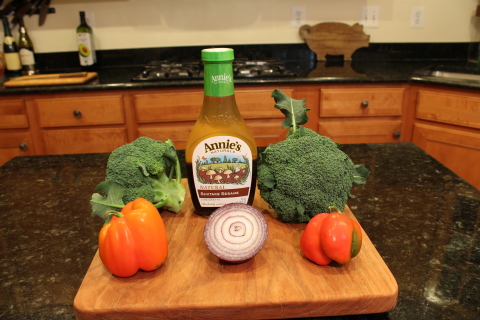
With the broccoli and peppers safely back home in my kitchen I knew what I wanted to do with them. If you have not made a home made broccoli and bell pepper salad with an Asian vinaigrette you are missing out on one tasty salad. I usually make my own dressing but I had a bottle of Annie’s shitake vinaigrette salad dressing and put it to work. This is one of the easiest and healthiest salads out there. It shouldn’t take more than ten minutes to make, and can be eaten right away or chilled for 1-4 hours for optimum flavor. So before we get all the way into soup and hot foods season I hope you try this simple and delicious recipe. Don’t forget to subscribe to my newsletter if you haven’t already, and please share this with friends and family.
Asian Broccoli and Bell Pepper Salad
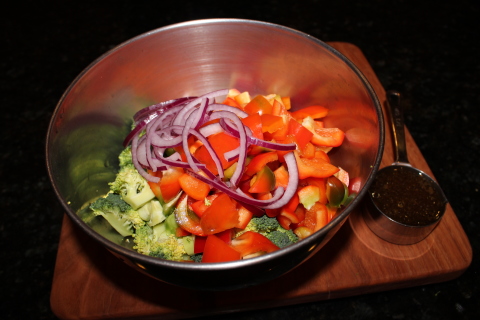
2 cups of broccoli florets, cut into bite size pieces
1 1/2 cups red bell pepper diced large, about the size of a nickel
1/3-1/2 cup Annies shitake vinaigrette salad dressing, see note
1/4 to 1/2 cup thin sliced red onion
1-3 jalapeños sliced thin, optional
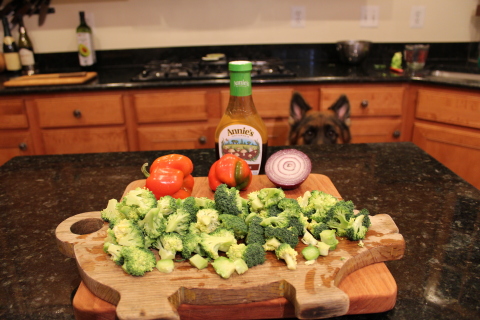
Mix all ingredients in a large mixing bowl.
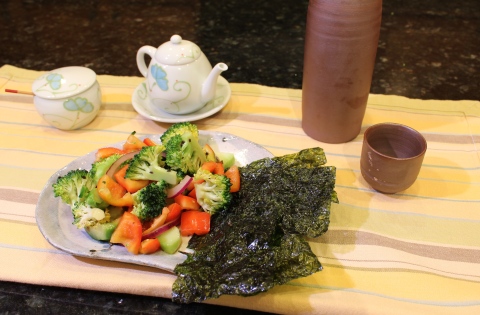
Serve right away or chill up to four hours for best flavor. Roasted seaweed goes well with this as an edible garnish. Try the wasabi flavored seaweed for some added spice!
Serves six to eight
Note:
Try an Italian vinaigrette salad dressing for a nice variation and grate some parmesan cheese into it if you like.
Cauliflower goes well with this too. Try adding a cup of bite sized florets and reduce the broccoli to one cup.
Sweet Potato Hash
One person’s idea of fast meal preparation is different from another’s. Many of you use your microwave oven often and I use mine about once a year. Without the use of a microwave to speed things up fast meal prep is a bit more difficult but doable. For example, take the humble crockpot. Many recipes for a crockpot meal take less than ten minutes to prep and when you get home just like magic you have a house that smells like mom has been in the kitchen cooking all day and it is ready to eat!
Stir fried meals are quick and easy if you buy your veggies and meats already cut up and ready for the wok. You would also have to have leftover rice to make this method fast or, god forbid use microwaved heat-and-eat rice. Overall a stir fry meal is healthy and fast.
You can take a steak or chicken breast that has been pounded out real thin and it cooks in five to six minutes on the grill or in a frying pan. With some steamed fresh or frozen veggies and a salad you have a winning combination that if seasoned right should taste great. Blackened catfish, salmon or tilapia also cook very fast due to the high heat used in the blackening method.
All of these should take about ten minutes which I believe most of us would consider a fast meal.
With all these types of fast cooking I believe you can eat well without going to the aid of frozen dinners, or eating too many canned foods. Life is too short to eat crap food! With that in mind I’ll share a fairly quick breakfast meal that even though it takes about twenty minutes it’s delicious and healthy. No recipe needed on this one that I’ll call Southwestern Sweet Potato Hash.
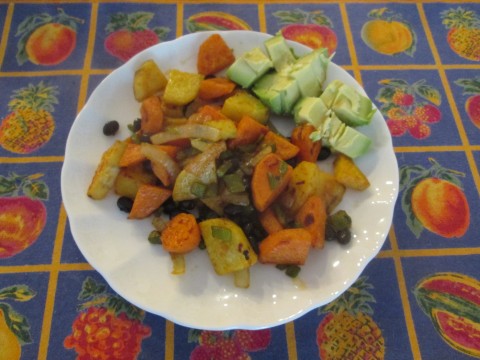
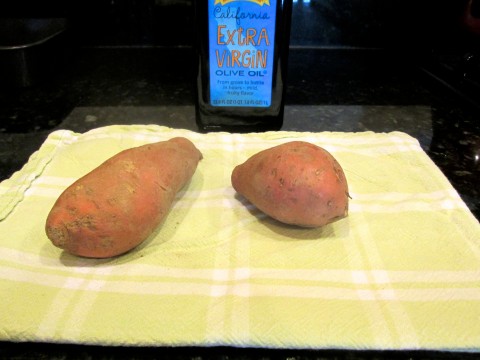
Just get about one sweet potato per two persons peeling and cutting it into bite sized bits. Put it into a pot and cover with water. Add a bit of salt and bring to a boil. Simmer until just about tender. While it’s simmering cut up bell peppers(or jalapeños if you like it hot), and onions. Sauté them in a bit of olive oil on low while the spuds are cooking.
If the onions and peppers are soft before the potatoes remove them to a plate. When the spuds are done drain them and add to the pan the onions and peppers were in with a bit more oil. Cook for about eight minutes stirring/flipping every three or so minutes. About five minutes into this add back to the pan the onion and green peppers. If you like add a few tablespoons of cooked and drained black beans. At this time add some ground cumin, paprika, and Lawrey’s Seasoning salt. Just before serving adjust salt and pepper if needed.
Your breakfast is just about ready now and if you want you can cook up some over easy or scrambled eggs to go with it. You might even want to add some grated cheese on top of the hash. Serve with a side of avocado slices and salsa. This filling and healthy breakfast was made from scratch by you in less than twenty minutes and is better than just about any breakfast joint’s food. Give it a try and let me know how your version turned out in the comments section. If I get more than ten comments on this one I’ll give away a $50 Whole Foods gift card to a winner chosen at random. If you don’t have a Whole Foods nearby I’ll change it to a local grocery store gift card.
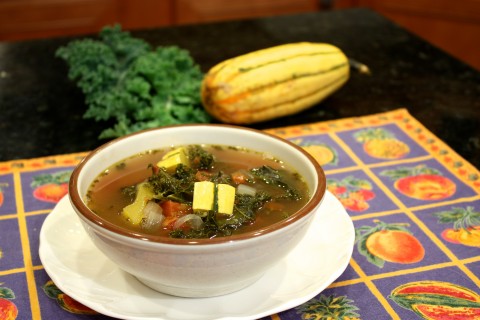
Delicata Squash and Kale Soup
October Harvest
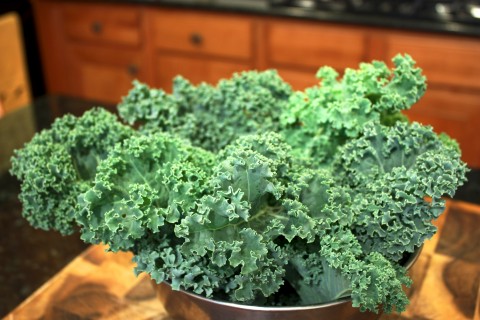
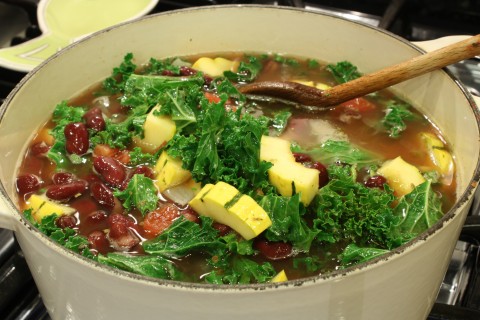
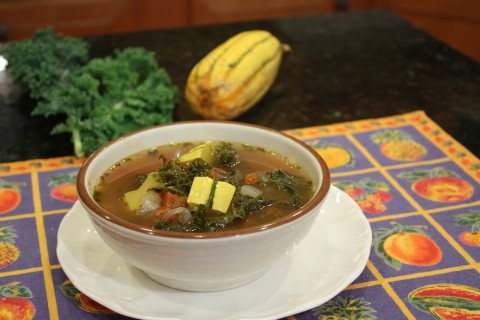
With the cooler weather some of the remaining veggies in my garden are rebounding from the summer heat. The kale crop is growing like crazy after just pluggin’ along the last two months. With so much kale coming out of my garden I felt the need to create a new soup using it. My friends at Wilbur’s Farm have not had much luck selling their gorgeous Delicata Squash and gifted me about fifteen pounds of it recently. With these two ingredients abundantly crowding my storage facilities I set out to make a healthy, great tasting soup that most people would love, not counting picky kids of course.
Back when I was a kid I wanted nothing to do with any kind of squash. I think there was an unspoken rule to be cool you had to hate all squash as a kid. It was one of the few rules I had no problem adhering to. However I eventually started to eat squash when as a twenty something year old cook one of the restaurants I worked at served acorn squash, and later on zucchini sautéed with onions and mushrooms. Both of these veggie dishes met with my discriminating approval and opened the doors to more squash appreciation and experimenting.
Delicata squash was not on my radar until I tasted it at a Whole Foods produce section about ten years ago. They were sampling it to stimulate sales of this relatively unknown squash. My wife and I tasted it and pronounced it excellent. I’ve cooked to for many people since then with rave reviews. It has been only recently that I started putting it in soups. Delicata works well in soups as long as you don’t put it in too soon. It can turn to mush if overcooked, just like most vegetables. When cooked properly it adds color, flavor and texture that is quite good in many a soup and veggie dish.
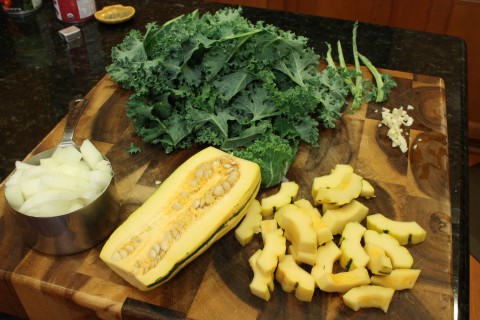
October is a great time to buy winter squash and you will find Delicata in many grocery stores. To pick a good one select a firm squash with no big wart like blemishes. When you are ready to cook it run it under cool water with a veggie brush to clean off any dirt clinging to it. Dry it, cut off a half inch on both ends and then cut it lengthwise for seed removal. A soup spoon usually is best for scraping out the seeds which can be cleaned and roasted for a great tasting snack.
At this point your Delicata is ready for what ever recipe you want to try on it. So get out and buy some of this great little squash as I think you will find it to be one of your favorites due to its taste and ease of preparation.
Delicata Squash and Kale Soup
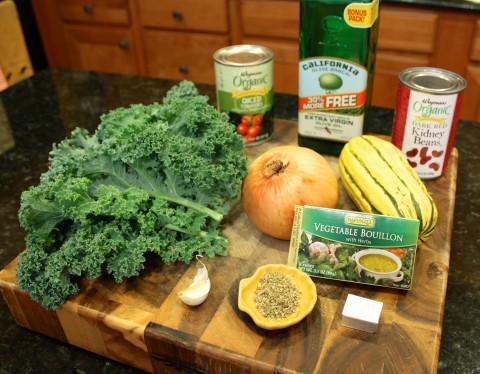
1 delicata squash cut into bite size pieces, about 2 cups
1 cup yellow onion, diced
1 tablespoon olive oil
1-2 teaspoons minced garlic
2 teaspoons oregano
1 can kidney beans, 15.5 oz size
1 can diced tomatoes, 14.5 oz size
5 cups water
1 vegetable cube or chicken bullion
2 cups chopped fresh kale, if buying whole leaf kale instead of chopped, cut out the tough spine.
salt and pepper to taste
In a 3-4 quart pot sauté onion for three minutes in olive oil on medium heat stirring often.
Add garlic and cook stirring two more minutes.
Add the rest of the ingredients and bring to a boil.
When it reaches a boil reduce heat to a simmer and cover.
Cook for fifteen to twenty minutes or until vegetables are soft.
Add salt and pepper to taste
Variations:
Chili variation:
2 tablespoons of chili powder
1 teaspoon ground cumin
1 tablespoon paprika
1/2 teaspoon ground red pepper, optional
use four cups of water instead of five
reduce oregano to 1 teaspoon
Super veggie variation:
1 cup of cut green beans
1/2 cup sliced carrots
1/2 cup frozen peas, added towards the end
1 teaspoon basil
add all of the above, except peas, after the onion and garlic have been sautéed
Meat variation:
By adding meat this can become a main dish. Use 1 pound Italian sausage, or ground beef. Start by browning the meat in oil for five minutes, then add onion and garlic cooking on medium heat stirring for five more minutes.
Add rest of ingredients and cook as directed in original recipe.
Simple Butternut Squash Soup
 I love fall in North America! The weather is great and all sorts of seasonal veggies and fruits crowd farm stands across our nation. Butternut squash is abundant now and is getting almost as popular as kale. Butternut squash is versatile as well as delicious. It’s weird looking back on my life as a confirmed squash hater. That is until just about ten years ago. Part of that affliction was from not finding or trying many a tasty recipe for this wonderful food. There are so many recipes available for this funny looking squash variety. With butternut squash you can make a lovely salad with walnuts and kale, mash it like mashed potatoes, or make many great tasting soups with it.
Peeling a butternut squash is not for just anyone. It’s about as easy as giving a cat a bath and just as dangerous. Luckily most grocery stores sell peeled and cubed butternut squash. This no doubt will save many a home cook a visit to the emergency room. When you buy it already peeled and cubed you can make a soup like this one in minutes! You can also tweak it in many ways to suit your taste. You can add carrots, chili powder, garlic, turmeric, or your choice of herbs to make this personalized. You could also make it with the simple healthy ingredients listed here and have a great soup made from scratch.
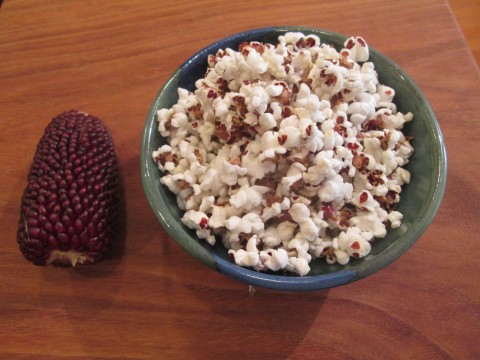
Give this fall soup a try soon and see if you agree with me that it’s a keeper. To celebrate fall harvest I am giving a way to two lucky readers some of my heirloom Strawberry Popcorn. This yummy little corn was grown organically with no chemicals or sprays of any kind and produced over a hundred cute little red ears. I have already tested a batch on my stove and pronounce it yummy. To enter this giveaway leave a comment on what your favorite way to season popcorn is and good luck to all who enter.
Simply Delicious Butternut Squash Soup
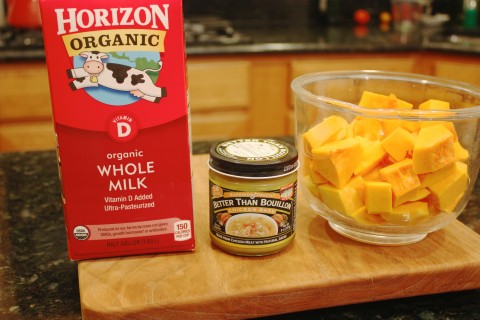
4 cups butternut squash cut into about one inch cubes, about 19 ounces
1 teaspoon better than bouillon chicken base, see note
1 cup milk, either coconut or cows milk
salt and pepper to taste
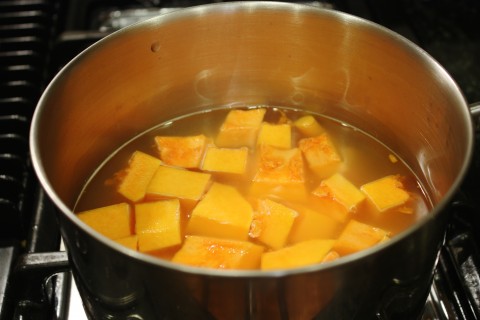
Cover squash with water in a 2 quart pot and bring to a boil.
Reduce heat and add chicken base.
Cook for ten minutes or until soft.
Drain off about one cup of the liquid and reserve it.
Add the milk and blend with either a table top blender or immersion blender until smooth.
Add some of the reserved cooking liquid if needed for a thinner soup.
Season with salt and pepper and serve with a sprinkle of sweet Hungarian paprika.
Serves four
Note:
If you want a vegan style soup use a vegetable bullion cube in place of the chicken base.
Curry powder( one teaspoon) is a nice spice blend to add to this soup for an exotic flavor.
What’s a Parsnip?
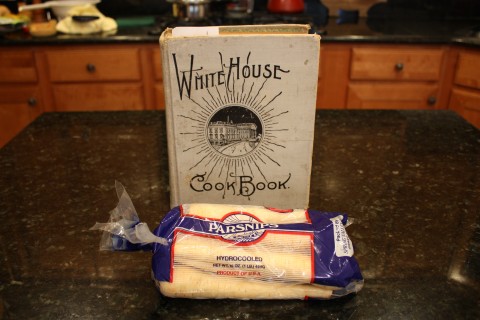
I recently bought a copy of the White House Cookbook to replace the one I had back in the 1970’s and 80’s. This one seems the same except instead that Ida Saxon-McKinley is replaced by an inset photo of Edith Boling-Wilson. The recipes crack me up with the less-than-specific directions, but it still proves useful in searching out ideas for farm fresh foods. Back in the 1880’s when it was originally written I suspect all food was either fresh, dried or canned as freezers were not in common use until around 1913, and even then only a few owned such a luxury.
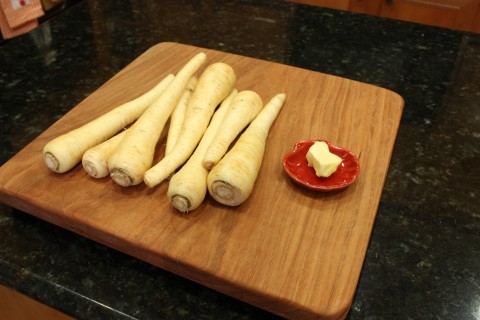
While flipping carefully through the brown and easily cracked pages I found several parsnip recipes. Parsnips are not a vegetable most of us know well, or eat often. They are related to carrots and have the same shape, but are white. Unlike carrots parsnips are not eaten raw often. Parsnips have a wonderful flavor similar to a turnip but milder and sweeter. Parsnips cook fairly quick and are versatile. You can add them to soups, roasts, mash them, sauté them, or stew them like in The White House Cookbook. Here is what the recipe from over a hundred years ago looks like:
Stewed Parsnips
After washing and scraping the parsnips slice them about half of an inch thick. Put them in a saucepan of just enough water to barely cook them; add a tablespoonful of butter, season with salt and pepper, the cover closely. Stew them until the water has cooked away, watching carefully and stirring often to prevent burning, until they are soft. When they are done they will be of a creamy light straw color and deliciously sweet, retaining all the goodness of the vegetable.
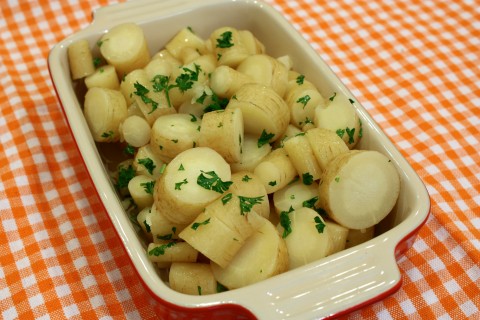
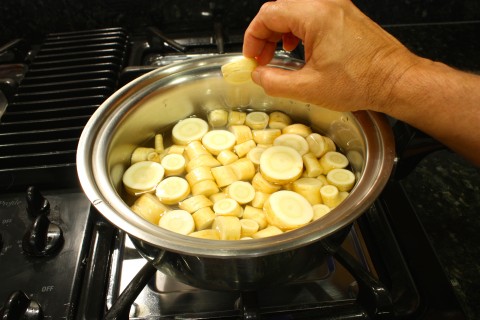
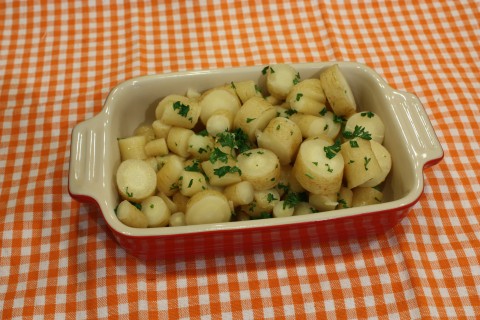
Curious about this recipe I proceeded to sort of follow it finding that if I would have cooked it until most of the liquid had evaporated I would have had very overcooked parsnips. It’s tough to cook out that much water with a pot that is covered! I also opted out on scraping my lovely organic parsnips wanting the nutritious skin to be intact. I found that the pound of sliced parsnips took less than 15 minutes from cleaning to serving which is pretty quick. I started them in cool water to cover with a bit of salt, pepper, and half the butter with a pot tightly covered and within eight or nine minutes they were soft. I poured off the water, then added 1 teaspoon butter and one tablespoon of chopped fresh parsley for color. I was pleased with the result and think you will be too. If you want some more color try cooking with sliced carrots(equal in amount to parsnips) in the pot and cut the carrots smaller then the parsnips so they cook in about the same amount of time. Parsnips go very well with just about any chicken, or pork dish as a side.
Give it a try and let me know what you think of parsnips, and this recipe. As always feel free to share and comment.
Chicken w/Shallots Under 20 Minutes
I’ve been a known hater of microwave ovens for years. Why you might ask? It’s because I have seen many a food item destroyed in the microwave, and they are over used in many homes and some restaurants. As for the argument they change the molecular properties of foods and make those foods harmful to our bodies, I’m not a scientist so who really knows? What I do know is I may not be quite as fast in preparing meals without a microwave, but I’m sure the quality and health benefits are better with my conventional way of cooking. If you can’t part with your microwave that’s fine with me, but consider other fast options here on my blog because I believe your food will taste better if spared the micro-zapping torture.
I’m a busy guy at home with many responsibilities like most of you. It’s very important to me that we eat well, and that I spend as little time in the kitchen as possible. It helps that I worked in over thirty restaurants in my chef career where I learned many ways of preparing foods in an environment where time is of the essence. It wasn’t until I walked away from professional cooking that I truly started to develop ways to speed things up in my home kitchen to share with you. My idea of a quick dinner is total prep/cooking time of twenty minutes or less. Almost all of the meals I cook at home are twenty to thirty minutes or less and I use very few convenience items.
Today I want to give an example of a meal you can do in about twenty minutes that tastes great and uses whole natural foods. This chicken recipe cooks quick due to the thickness of the chicken breast and if you time things right the other two items will be done at the same time. Here are the dishes and how it flows:
succotash (lima beans and corn)
sautéed mushrooms
chicken breast with shallots
Start the lima beans cooking in enough salted water to cover plus an inch more. If you don’t like lima beans go with steamed green beans and toss them with a few cherry tomatoes cut in half during the last minute of cooking.
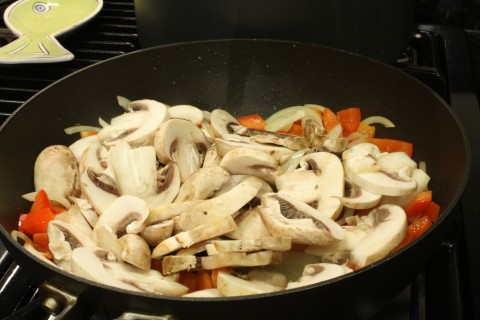
Start the sliced mushrooms sautéing on medium heat, if using onions start them first and add mushrooms two minutes later. If these get done way before the rest just turn off the heat until the other dishes catch up, then reheat for a minute or two.
Follow the recipe in this post for the chicken breast starting it after the mushrooms and lima beans are cooking.
Twelve minutes or so after the lima beans have been cooking add as much corn as lima beans to the pot. At this point it only takes two-three minutes to finish cooking and it can wait up to five minutes for the other two dishes to be done without hurting it a bit.
By now the chicken breast has been flipped and is almost done.
Get your platters if serving family style ready, or get dinner plates ready for dishing up.
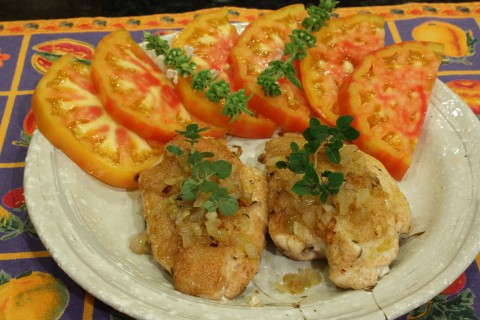
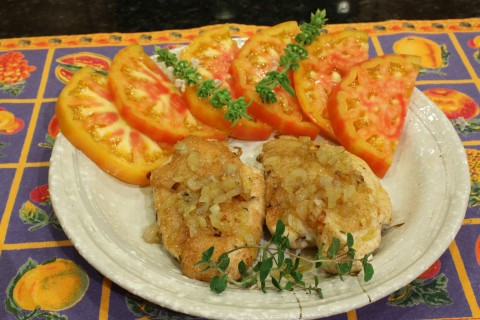
Plate up the finished items and garnish with sliced fresh tomatoes.
All this should be easily done in twenty minutes, and you have an attractive healthy meal that tastes great. If you don’t want to use chicken the recipe works well with pork loin too. You could substitute beef, omit the thyme and use Lawrey’s Seasoning Salt instead with good results. The options are many, but I hope you get the picture of a quick healthy meal without taking up too much of your precious time at home. Please feel free to comment on, and share this recipe.
Sautéed Chicken Breast with Shallots
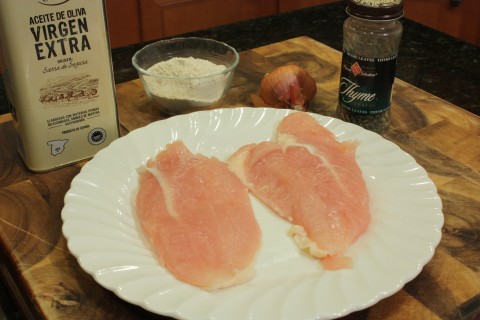
2 skinless, boneless chicken breast
1/3 cup flour
1/4 teaspoon dried thyme
1/4 cup chopped shallots
1 tablespoon olive oil
salt and pepper to taste
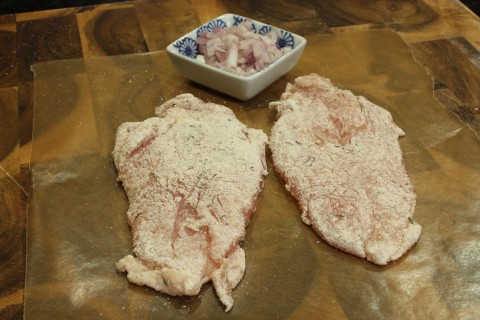
Using a meat tenderizing hammer pound out the chicken breast to a thickness of one half inch or less.
Sprinkle thyme, salt and pepper on the chicken then dredge in the flour.
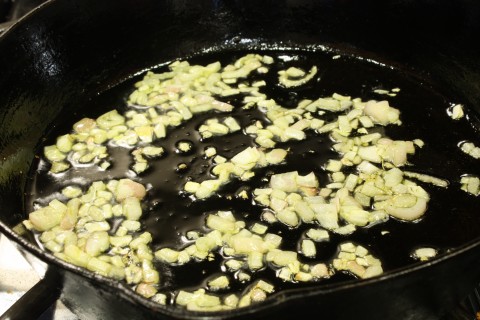
In a sauté pan on medium heat add half the oil and cook the shallots for three minutes, stirring often.
Remove shallots from pan and set aside.
Turn the heat up to medium and add the rest of the olive oil and chicken breast.
Cook for six minutes then flip and cook for five minutes or until chicken reads 165 degrees on a meat thermometer.
Add shallots to the hot sauté pan and cook for a minute or two then top the chicken breast with them.
Serves two but is easily doubled or tripled to serve more.
Note:
Not all chicken breast are the same thickness. Modern intensive raised chicken breast are twice the size of traditionally raised chickens and require a bit more pounding with the meat tenderizing hammer. I prefer the smaller traditional chickens.
To speed things up a bit I’ll take a piece of aluminum foil and set it on top of the sauté pan loosely to reflect the heat. Don’t use a tight fitting lid as that would trap in steam and make the chicken breast tough.
This dish goes well with sautéed mushrooms and succotash for side dishes.
Great food at 8,000 Feet
Aspen Colorado is one of the most beautiful places on the planet! What do you think when you hear about Aspen? It’s too expensive, it’s a place for millionaires/billionaires, it’s too far, it’s too cold? Aspen can be all of those things but here’s what I’ll tell you about my experiences in Aspen. It doesn’t have to be too expensive to visit or stay here. If you come in the off seasons like just after Labor Day, or early June, many decent hotels offer rooms for under $100. For $200 or so we have stayed in some of the best Aspen hotels in the off-season in the past like the Hotel Jerome, and The Limelight Hotel if you want luxury. The Limelight is our favorite with its friendly staff, comfy lounge, free breakfast buffet, and great location.
There are several restaurants we saw yesterday that had happy hour specials, the best being a pizza and two glasses of wine for under $30, and it was yummy! Ajax tavern at the Little Nell offers a double cheeseburger, fries and a pint of beer for $17 which is not a bad deal in Aspen. No doubt the are several more places that offer good deals, but I only have three days here to research the restaurant scene.
If you visit Aspen in June through September the daytime highs can be in the 80’s or more. Today is much like other years when I have visited in September with a daytime high expected to be in the high 70’s and sunny. Even in the winter I find Aspen warmer than many Colorado ski areas where I have worked and skied over four decades. I think most visitors sleep better in a lower altitude. Places like Breckenridge and Copper Mt are at 9,600 feet base elevation making them much colder than Aspen winter and summer.
As for the distance it’s only three hours and twenty eight minutes from Denver Intl. Airport, and that takes you through Glenwood Canyon, one of the most spectacular drives in the U.S! Since many of us don’t have a private jet driving is the way to go. Highway 82 south from Glenwood Springs has been improved over the years and is safe and quick now. Amtrak offers rail travel from Denver to Glenwood Springs if you are in no hurry, and from Glenwood Springs you can hop the RAFTA bus or rent a car.
Aspen is a fun place for just about everyone. I’ve skied here back when I was a line cook making very little money, and have come here for other special deals that have always been affordable, and fun spanning over twenty five years. Spring skiing special abound in late March and early April for fun in the sun without the crowds of the I-70 ski areas. Beyond skiing there is so much to do with miles of bike paths, both paved and dirt, as well as world class hiking and climbing. The fishing is worth noting too with the Frying Pan River and Roaring Fork River boasting great trout fishing.
The biggest attraction I think for a summer visitor is a trip to the Maroon Bells high above Aspen. Just catch a RAFTA bus up from downtown Aspen and you will be there in less than twenty five minutes. It has been said that the Maroon Bells are the most photographed place on Earth according to Eastman Kodak. They should know as back when cameras used film and you had to get your pictures printed Kodak noted how often the Bells showed up in customers rolls of film. The Bells are drop dead gorgeous in all seasons with their majestic triangular high peaks, but to gaze upon them in fall when the aspen groves glow in the Rocky Mountain gold is to truly know stunning beauty. So if you have been putting off visiting Aspen, or never even considered it I hope I’ve changed your mind and you can visit as a regular Joe and enjoy Aspen like a millionaire.
Fresh Tarragon with Pasta
Summer Herbs
The leaves are turning color on the cherry trees across the street from my house and falling rapidly. It’s funny how the cherry trees are one of the first to bloom and stand out in the spring and now again in the fall they are vying for attention again ahead of the other trees. Dog and I walk under them daily and get an occasional decorative leaf or two falling on us while we walk. Soon there will be other trees and bushes joining the rush to fall season.
For now I’m still happily maintaining my garden and picking lots of tomatoes and hot peppers even though fall approaches. Most of my tomato plants are done for the year, but there are a couple of unknown heirlooms producing well. That’s the beauty of planting many types of tomatoes, you get to pick some throughout the season.
With this abundance of great tasting tomatoes I’ve been coming up with new ways to eat them. I have them with breakfast some mornings, especially if I’m eating eggs, and I also slice them up just for a snack at all times of the day. I’ve made, and posted gazpacho soup, gobs of salsa for chips and dip, and canned a bunch of diced tomatoes.
I figure I have two or three more weeks of tomato harvesting before I have to count on the local farms for fresh tomatoes. My herbs however will produce into October and beyond. One year I had fresh herbs right through November! As a chef it’s awesome to have a great little herb garden out back. For most of my life I lived in cold climates and had to resort to grocery stores for almost all my fresh herb needs.
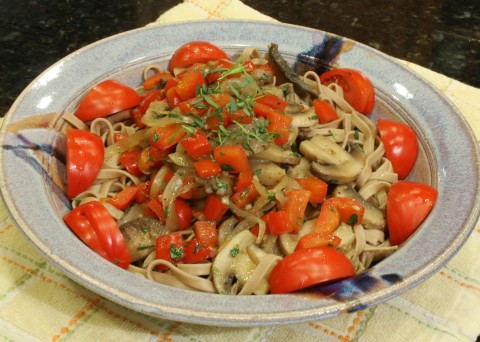
With my tarragon plant starting to look just a bit old I decided to start using more fresh tarragon. I made a fresh tarragon salad dressing this week and for today’s post decided to share with you a tarragon pasta dish that takes less than 20 minutes start to finish. If you don’t like tarragon just substitute fresh basil for this side dish and enjoy just the same.
Fresh Tarragon with Pasta
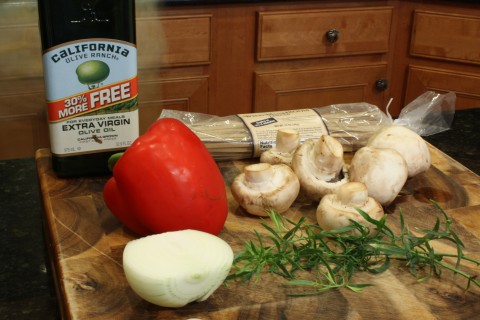
12 ounces pasta of your choice, I like fettucine for this dish
2 1/2 quarts of water
1 tablespoon salt
2 tablespoons oil
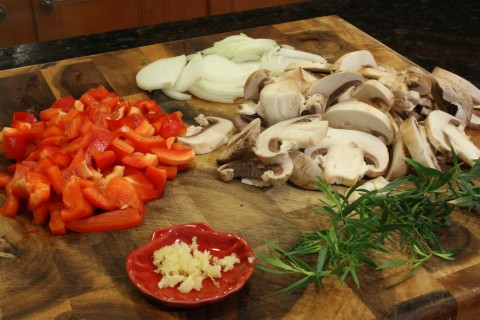
8 ounces sliced white mushrooms
1 bell pepper diced, green, yellow, or red
1/2 yellow onion sliced
1 clove garlic minced
1 heaping tablespoon fresh tarragon minced
Start pasta water, and salt boiling on high heat to get a head start. Cook according to directions on package.
In a sauté pan on medium heat cook onions, peppers and garlic for three to five minutes stirring often.
Add sliced mushrooms and cook for another eight to ten minutes.
If pasta is done it is time to add most of the tarragon to the mushroom mixture and cook for just one minute on medium heat stirring. Save a bit of tarragon for a garnish.
Arrange pasta on serving platter or bowl and top with mushroom mixture.
Sprinkle a bit of the leftover tarragon on top and garnish the sides with fresh tomato wedges.
Serves four as a side and two as a main dish.
Vintage Corn Recipe
When I was 19 years old my grand parents in St Louis gifted me a copy of the 1898 White House Cookbook written by the first lady Ida Saxon-McKinley. For those who don’t know about these treasures of Americana, the White House Cookbooks instructed housewives of the day in everything from home remedies, cleaning, etiquette, and of course cooking. This was ages before Julia Childs was on the scene to teach us American cooks recipes from Europe and beyond.
As a rookie cook I was amused by the cooking instructions from a time when pretty much all cooking was done on wood stove/oven appliances. The electric stove wouldn’t be in significant production until 1908 and even then it was rarely found in a home. So if you were baking biscuits the recipe would say something like “ bake in a fast oven until desired brownness appears” or something like that. There was no heat measured in Fahrenheit like we see in modern cookbooks, or exact time it took to cook.
I prepared very few of the recipes in this antique cookbook over the twenty plus years I had the White House Cookbook in my possession as they just didn’t fit what I was cooking in restaurants or home. On a few trips to Marble, Colorado we would stay at some cabins from the 1930‘s that had wood burning stoves and I loved baking in the oven using wood for fuel like in my antique cookbook. It was a bit tricky as I had very few reps in this type of cooking but it always turned out well. I would think back to the directions in the White House cookbook and roast a chicken with vegetables and then bake a cobbler for dessert.
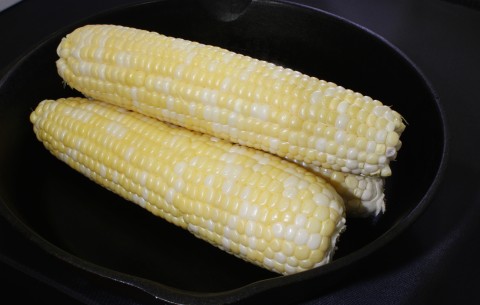
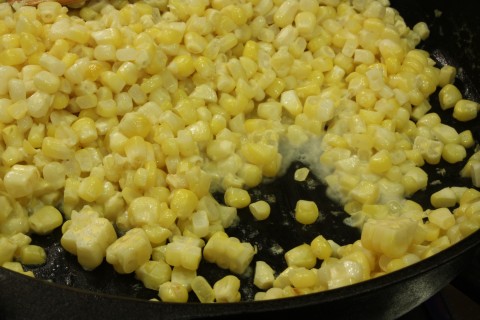
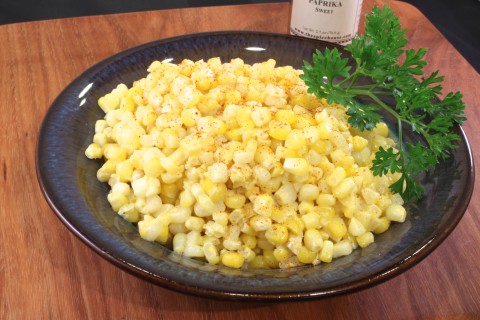
The cookbook mostly provided me with an interesting review of cooking history, and I read it often. One of the exceptional recipes was a fried corn dish that became a favorite vegetable of the day at a restaurant I worked at in Frisco. The cooks loved it because it was so easy to make. The management loved it because it was inexpensive, and everyone loved the taste. This tasty dish is accentuated by todays super sweet corn varieties whether you are using Silver Queen, or Peaches and Cream Corn this recipe lets the fresh summer corn taste shine brightly.
I also have my grand parents to thank for leaving me their entire collection of cast iron cookware that I use to this day. Some pieces are over a hundred years old and still quite functional. For todays post I think it’s appropriate to cook this dish in a pan from that era. I hope you give it a try with your favorite fresh or frozen corn to see how easy and delicious this antique recipe I’ve adapted from the 1898 White House Cookbook is.
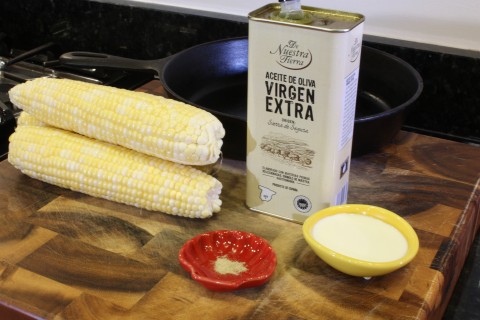
3 1/2 to 4 cups fresh corn cut off the cob, about 3 large ears
1 teaspoon olive oil
3 to 4 tablespoons half and half
pinch or two of ground white pepper
salt to taste
Heat sauté pan or cast iron skillet for two minutes on medium low heat.
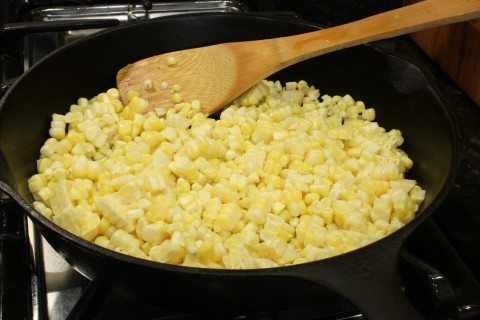
Add oil and corn and cook for five minutes stirring every 30 seconds or so on medium heat.
Kick up the heat to medium high and add half and half and white pepper cooking for one to two more minutes.
Add salt to taste and serve.
Serves four
Greek Style Green Beans
Six Little Tomatoes
This week I had a seven hour session of home canning where I made Kurt’s Killer Salsa(http://www.fastandfuriouscook.com/kurts-killer-salsa/), Red Habenero Salsa(http://www.fastandfuriouscook.com/some-like-it-hot/), and diced canned tomatoes. It was a lot of work, but well worth it come winter when I open a jar of home cooked goodness from the garden that the grocery store can’t compete with.
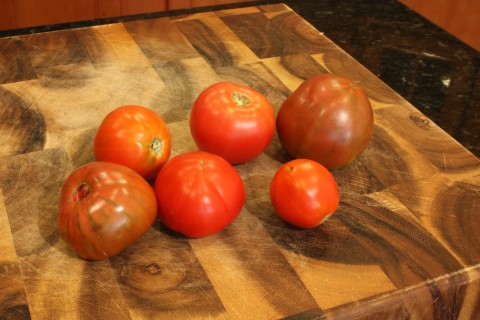
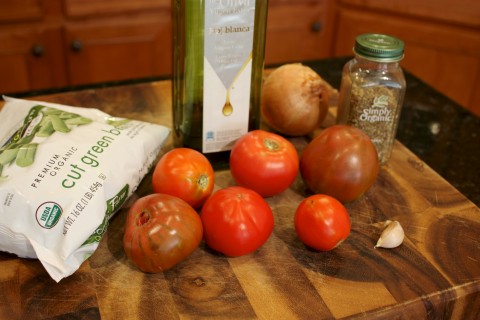
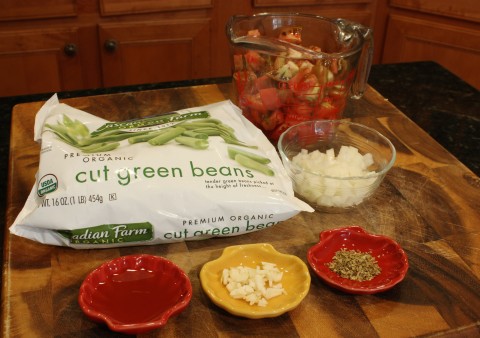
When all the tomato blood had cleared it was apparent that six little tomatoes escaped in the confusion. I was contemplating their fate when I thought of a trip to Greece a few years back and how I loved the fava beans cooked with tomatoes we had several times on that trip.
Being short on fava beans I opted for frozen green beans to pair with my six little toms and cooked them up while they were still in their prime.
If you are like me and through gardening or over indulging at your local farmer’s market has you experiencing no room in your fridge, or counter space you need lots of ideas for cooking veggies. Well, look no further for a tomato and green bean combo as I have a solution to your problem that takes less than 20 minutes to make, and is delicious too!
This is also a great veggie dish for re-heating so even if you are cooking for just two in your home this will provide you with green beans for two or more meals.
Greek Style Green Beans with Tomatoes
1 pound green beans, fresh or frozen
2-2 1/2 cups diced fresh tomatoes
1/3 cup minced onion
1 clove minced fresh garlic
2 teaspoons oregano
1 tablespoon olive oil
If using fresh green beans, wash and cut into three inch lengths. This will take longer, but will be delicious with fresh beans.
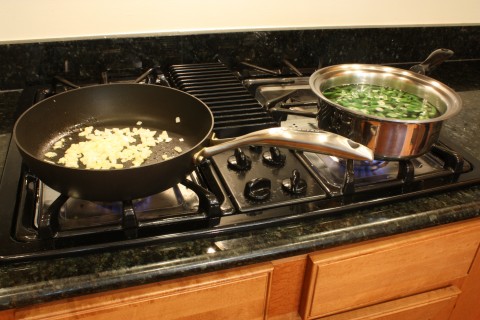
In a pot with water to cover bring green beans to a boil then cook for two more minutes covered.
Just after starting the green beans sauté onions and garlic in olive oil on medium low heat in a 12 inch sauté pan for five minutes stirring often.
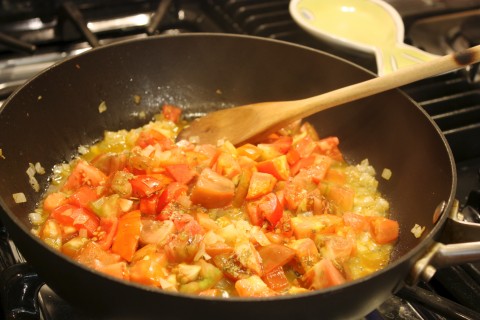
Add tomatoes, and oregano to the sauté pan and continue cooking on medium low heat for eight minutes. If green beans are not done yet turn off heat to the tomato mix.
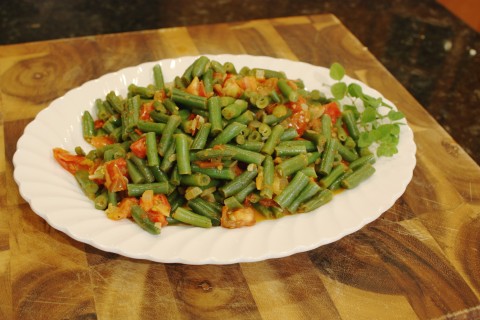
When green beans are done, drain and add to the tomato mixture and cook on medium heat for 2-5 minutes until desired tenderness is reached.
Add salt and fresh ground pepper to taste and serve with a garnish of fresh oregano if you have it available.
Serves 4-6.
Note:
Fresh oregano can be used but don’t add it until the last minute of cooking. Mince the fresh oregano, and increase to four teaspoons.


