What is Fast Enough?
When it comes to putting healthy food on the table what is fast enough? My idea of a fast dinner prepped and plated in twenty five minutes might be too long for some, just right for some, and too fast for others. Not to mention that some days you might have more time and inclination to cook than others. Some folks just can’t live without their microwave oven to facilitate fast cooking. To me, the microwave oven is a food destroyer, myself and other purists won’t use one.
What you will get from me is my original fast and healthy recipes using whole foods, and occasionally some healthy convenience foods to help you eat better while spending less time in the kitchen. I follow food news closely and read many a book on diet and nutrition every year. With all the food news out there it can get downright confusing at times wondering what is healthy to eat. Not to mention all of us are different and don’t respond to the diet of the month the same as everyone else.
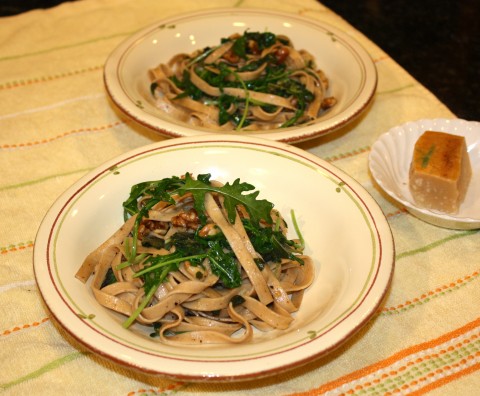
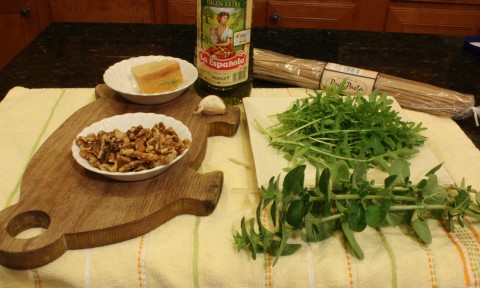
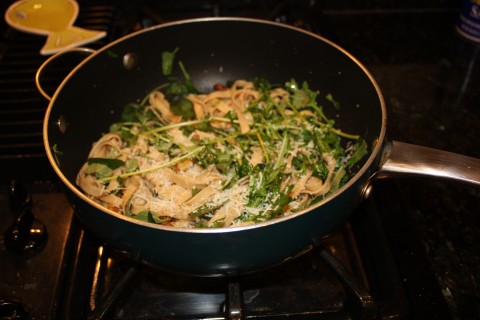
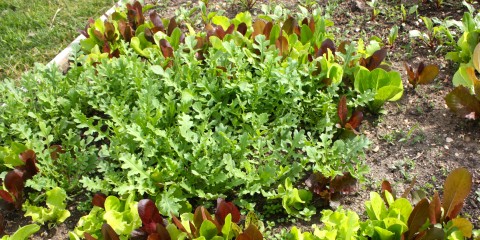
I like to write about, and eat healthy foods that are in season. Especially the ones I am growing in my own garden. This year I’m growing arugula for the first time. Arugula contains about 8 times the calcium, 5 times the amount of vitamin A, C, and K, and 4 times the iron of iceberg lettuce according to livestrong.com. I like the intense flavor that goes well in salads as well as hot pasta dishes. If you have never cooked with greens in your pasta try this simple dish in your home soon. Assuming your pasta takes ten minutes to cook, this dish takes less than twenty minutes from start to finish and wow does it taste great! Is that fast enough for you? Please leave your comments on what your idea is on fast food in your kitchen, and please share this with friends and family.
Fettucine tossed with Arugula
16 ounces fettuccine, or other pasta
about 3 ounces fresh arugula
2 cloves minced fresh garlic
1 cup walnuts, halves and pieces will do
2 tablespoons plus 1/2 teaspoon olive oil
1/4 cup parmigiano reggiano cheese, grated
optional, 1-2 ounces of fresh oregano whole leaves, or sliced
salt and pepper to taste
Start by heating water in a pot per pasta cooking directions.
On medium heat in a sauté pan toast the walnuts in 1/2 teaspoon olive oil for five minutes tossing or stirring often. Season with salt and pepper then set aside.
Cook pasta and when pasta is done cooking rinse and drain.
In a large sauté pan add garlic and oil cooking for three minutes over medium heat stirring once or twice.
Add pasta and cook over medium heat for three minutes stirring often.
Add arugula and continue cooking for two minutes stirring, or tossing.
Add walnuts, cheese, and oregano if using and cook one more minute stirring, or tossing as you go. Serves four.
Note:Makes a great entrée or side dish. Serve as a side with grilled chicken breast.
Fresh parsley may be used instead of oregano.
A bottle of Pinot Blanc would go great with this dish, or a Verdejo.
Spring Greens and a Great Salad Dressing Recipe
In many ways I’m new to vegetable gardening. Sure I helped my room mate in Alaska with his garden for a couple of years, and I grew vegies in the backyard where I grew up in Colorado. That was all just dabbling in gardening compared to what I’m growing over these last three years. I don’t just grow many types of vegetables in my garden, I preserve and can them, develope new recipes based on them and write about it the experience too.
The Mission of the American Community Gardening Association is to build community by increasing and enhancing community gardening and greening across the United States and Canada.
and it’s cool that they connect people through gardening. What a great way to meet people in your community through growing something healthy to eat. In a day and age when people are getting more and more detached from this amazing planet that gives us so much it’s important to get your hands dirty and grow something with yourself to enjoy at your table. It’s also a great opportunity to teach children seasonal cycles known to all just a few short generations ago when you didn’t get asparagus, or peaches year round. Many kids love to help in the garden, even in this day and age of video game addiction.
If you want to try the container method my favorite is Earthbox containers. The Earthbox website has tons of free information and a forum that will help you understand the concepts for just about any climate and types of plants as it pertains to using their planters. Check out their website at http://earthbox.com for more info. For the record they don’t pay me to talk about their products, I just love the results I get from my Earthboxes and want to share that with you. I used Earthboxes for four years now with great results, especially with tomatoes and okra.
For most parts of the country it’s not too late to get something planted. This week I’m planting tomatoes that I started from seed. I’ll put some in my Earthboxes and some in the ground and see which ones do best. I never know until I grow them in both places to see which plant prefers real dirt to the Earthbox growing medium(soil). It’s also time to visit local nurseries and farmer’s markets for the other vegie plants I’ll buy and transplant to my garden. I usually buy some of my tomatoes, peppers, and okra this way to get a head start.
So give it a try and let me know if I can help you in anyway to get started or maintain your very own vegie garden. I think you will love it!
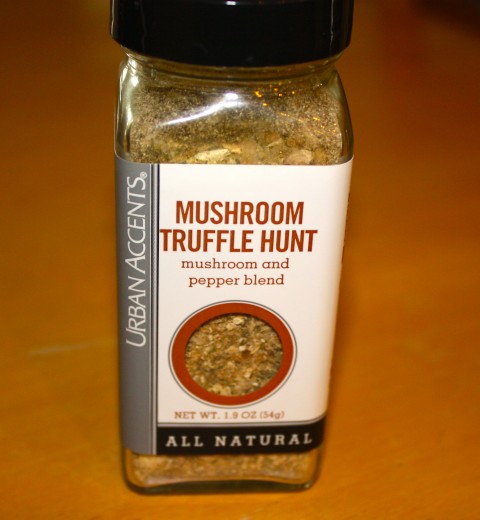
Here’s a recipe for a salad dressing that’s become one of my favorites. It calls for a special ingredient “Mushroom Truffle Hunt” by Urban Accents. This weeks give away will be a jar of Mushroom Truffle Hunt for three lucky winners who leave a comment on this post. Please enjoy this recipe of mine in either of it’s forms, Italian or Asian.
Mushroom Salad Dressing(Italian)
1 tablespoon Mushroom Truffle Hunt Blend
1 tablespoon red wine, or red wine vinegar, or white wine vinegar
4 tablespoons apple cider vinegar
1/4 teaspoon dried oregano
1/4 teaspoon dried basil
5 tablespoons olive oil
1 tablespoon finely grated parmigiano reggiano cheese
Soak Truffle Hunt blend in vinegar and red wine for 5 minutes.
Combine all ingredients and mix well by shaking in a jar or in a bowl with an immersion blender.
Enough for 6-8 salads.
Note:
Goes well on mixed baby greens or romaine lettuce.
Minced garlic or shallots(1 teaspoon) may be added for more zip!
Top each salad with 1 tablespoon feta cheese crumbles, and 2 teaspoons of toasted pine nuts for extra goodness.
For an Asian version omit oregano, basil and cheese. Use 3 tablespoons of olive oil and 4 tablespoons of sesame oil plus a tablespoon of soy sauce. Minced fresh ginger(1/2 teaspoon),and/or minced shallots(1/2 teaspoon) would work well too.
Even though Urban Accents has agreed to furnish me and the winners of the drawing their products for free my opinions are my own. The products I have tried from them over the years are very good and I can’t wait to try more.
Fast and Easy Avocado and Salsa Salad
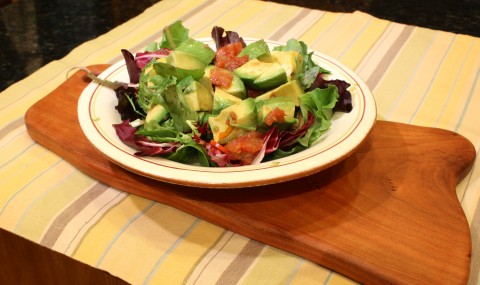
Avocado and Salsa Salad
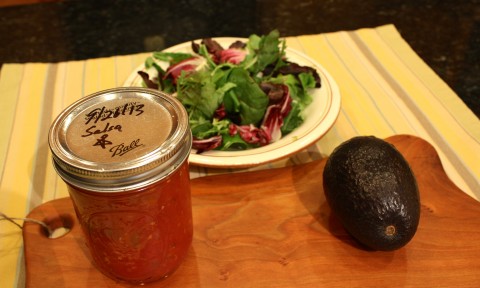
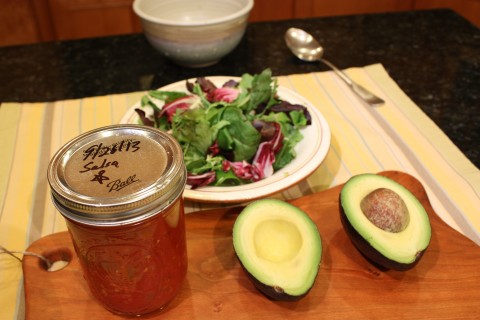
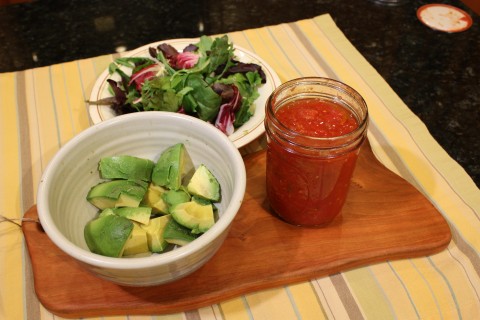
In the world of fast, and healthy recipes this original salad I made up is one of my favorites. It takes no more than five minutes to prepare and it tastes great. You can use almost any store bought tomato salsa or home made like I do to make this salad. I think a salsa that has a fair amount of tomato juice in it works best, but if you are using something like Pace picante that is a bit thicker just squeeze some fresh lime on the greens before topping them with the avocado tomato mix.
It can be a meal or just a salad starter for lunch or dinner. Add jalapeños for a kick, or even olives. Let your imagination play around with this one. You could snap peas, broccoli, or shredded cabbage in it also.
The recipe is a simple as it gets:
one ripe avocado, cut into one inch cubes
1/3 cup salsa
about two cups of your favorite greens
Mix the cut up avocado with the salsa in a mixing bowl and spoon it over your greens.
I love avocados so much I’m always looking for new ways to incorporate them in my diet.
This weeks giveaway is a beautiful solid cherry cutting/serving board that I bought in Fairhope, Alabama while there visiting my Aunt. It’s so nice I’m having a hard time parting with it, but someone will win it just for taking the time to comment on this post. Could it be you?
Well Hush My mouth and Pass the Shrimp
Fairhope, Alabama is different! In a good way mind you. It has an artist colony feel to it with lots of cute little shops and restaurants. This town’s motto is “You’ve arrived”, and indeed I have arrived with brother in tow to visit our 93 year old Aunt. Our Aunt has lived here twice in her long life but I never visited during her first residence due to my visions of Alabama as a place I would never want to visit. Lucky for me I grew up and got over my negative thoughts about the South, and it’s hot and humid weather. A sunset walk in Fairhope along the pretty waterfront park that looks out on Mobile Bay is one of the nicer walks I can think of in the U.S.
This is about my fifth visit and I have enjoyed every one of them by exploring the Mobile Bay, eating at very good restaurants, strolling the charming old downtown area and hanging out with my amazing Aunt. My aunt is one of my most important role models I have on how to retire right. Some of the key points she has taught me are to move to a town where you have a “sense of place” that you know you belong in. A place where you will already have or be able to build a social network to provide a rich life. A place that has a great variety of things of do is important too. Our Aunt is involved in a weekly writer’s group, has been in a singing group, a community band, and attends a church nearby. The weather suits her just fine too as she has never tolerated cold climates well and this is definitely not a cold climate.
I always visit before or after the hot season as I don’t do well in very hot and humid conditions for long. Each time I come down here I try and find new restaurants to eat at that will give me new ideas of healthy, simple recipes for my type of diet. When you think of the South you might think of fried chicken, shrimp and grits, fried catfish etc. You can find all of those here but you can also find a restaurant,(Sweet Olive) that serves a “Grain Bowl” special of the day, or a Mexican restaurant,(Agave) that serves excellent off the beaten path food beyond the regular tacos, burritos and enchiladas.
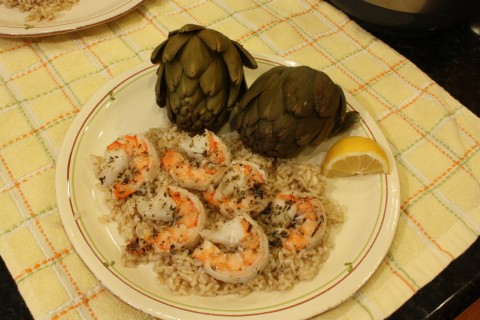
Every time I come down here Aunty lets me cook a meal or two and the supplies come from the local grocery stores that are plenty good. For regional delights I go to the Gulf Coast 15 miles away and hunt down fresh shrimp from one of the shrimper’s in the area. This trip I wasn’t able to find Gulf shrimp close by like I had in the past before the Gulf oil spill four years ago, but I did find good Florida pink shrimp at the Winn-Dixie and fixed us some fast and yummy shrimp scampi. It made for a great meal served on brown rice with a side of Italian seasoned baked green beans. When I got back home and went to buy shrimp for this post I wasn’t able to find Florida pink shrimp so I substituted tiger shrimp with good results.
For a special Fairhope themed giveaway I have two items from the area. I’m giving away a bag of B&B roasted and salted pecans to one lucky winner, and a fun book of short stories called Fairhope Anthology in which my Aunt is a contributing author. Two lucky winners will get one of these gifts by leaving a comment on this post. I’ll draw the winners randomly next week from all you faithful readers. Until then enjoy this simple recipe for shrimp scampi.
Shrimp Scampi
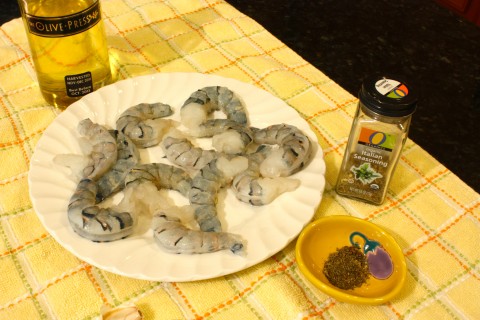
1 pound peeled and deveined shrimp
3/4 teaspoon Italian seasoning, or a combo of 1/4 teaspoon each of dried basil, dried thyme, and dried oregano
4 teaspoons olive oil
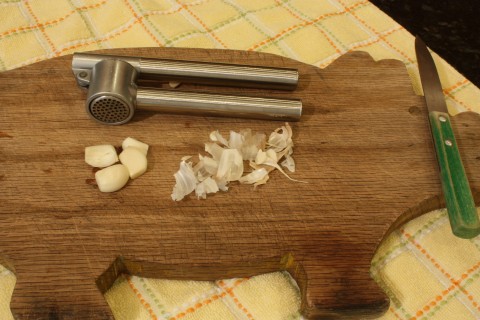
2-4 cloves minced garlic depending on how much you love garlic
On medium low heat add the olive oil to a sauté pan and mix in the herbs and garlic, distributing it well in the pan.
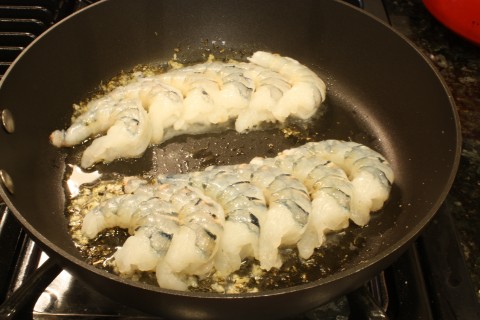
Carefully lay the shrimp in the sauté pan so they make good contact with the cooking surface and cook on medium heat for 5-7 minutes until they turn pink and start to curl up.
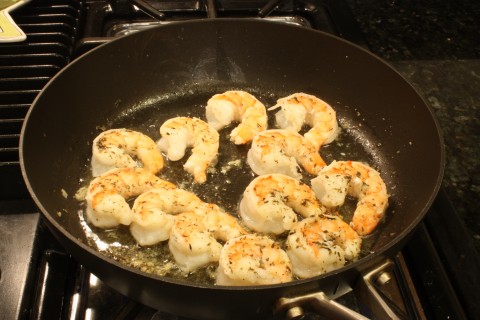
Flip and cook for about four minutes more.
Serve over steamed rice and be sure and pour the oil from the pan over the shrimp as it’s full of flavor.
Serves two, and is easily doubled if needed.
Note:
A bit of red pepper flakes are a good addition. Use about 1/4 teaspoon, and add with the herbs.
Can be served as a hot appetizer too.
Chili-Garlic Edamame Appetizer Recipe
The weather is beautiful and it’s time to think Spring. Do you like those simple at home happy hour appetizers? I’ve got a spicy good one for you that is very easy to make and goes well with beer, sake or wine. Edamame is just soy beans in the pod and when cooked right can be great! If you like sushi and have gone to a Japanese restaurant you have probably seen edamame on the menu. Lucky for us it’s easy to find it at most grocery stores in the U.S. and it’s easy to prepare. This little green taste treat is good for you too. Here’s the nutrition breakdown for plain edamame:
one cup serving has 8 grams total fat, 9 mg sodium, 676 mg potassium, 15 grams total carbs, 17 grams protein, vitamins C and B-6, minerals including iron, magnesium and calcium.
For years I have simply boiled edamame, drained it and sprinkled it with kosher salt, but for the love of all things spicy I came up with a bold and hot version that just takes a few minutes to make. Since you will want to be out on the deck in the sun using that nice outdoor furniture you bought why not decorate your table with this lovely duo of beans and beer for your outside happy hour? As always I welcome your comments and suggestions.
Chili-Garlic Edamame
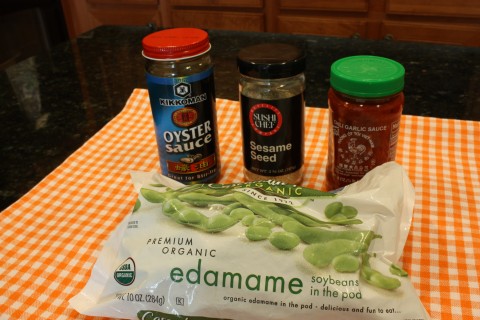
10 ounces frozen in-the-pod edamame
4 cups water
1 teaspoon salt
1-2 tablespoons chili-garlic sauce
1 tablespoon oyster sauce, or soy sauce see note
1 tablespoon sesame seeds, optional
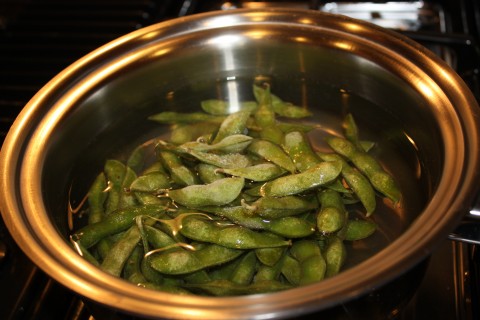
Cook frozen edamame in water per the directions on the package, and drain but don’t cool.
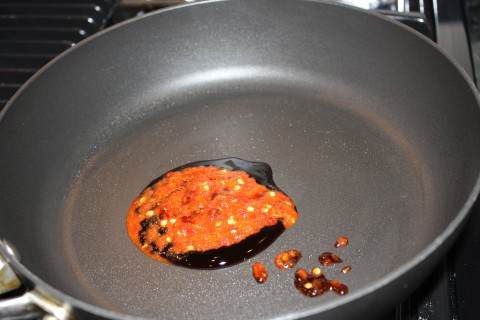
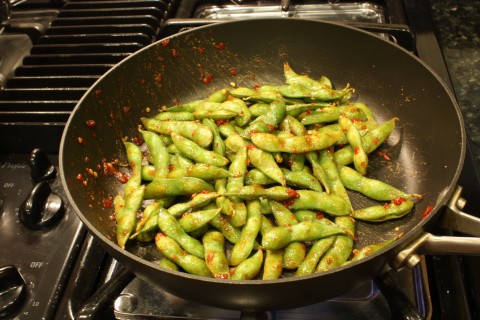
In a sauté pan add chili-garlic sauce and oyster sauce and cook while stirring for one minute. Add edamame and cook stirring for two to three minutes then transfer to a serving dish. Top with sesame seeds if desired.
Serves four
Note:
If you don’t have or can’t easily find oyster sauce regular soy sauce will work, but it will be a bit thinner sauce that you toss the edamame in. It will also be less sweet since oyster sauce has a little bit of sugar in it.
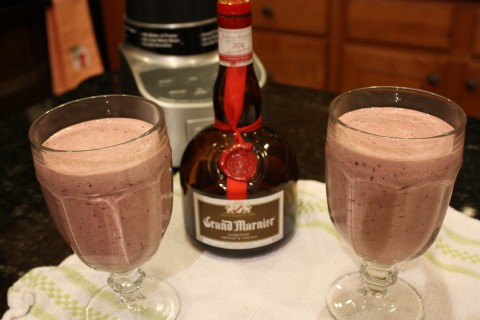
Behold, the Amazing Cherry Milkshake Sans Ice Cream
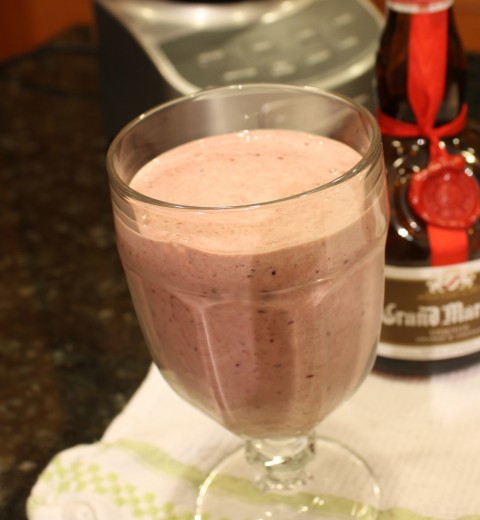
Most people young and old love milkshakes! I am certainly no exception to that, but for years have stayed away from this frozen treat most of the time due to the unhealthy nature of ice cream, milk and sugar. What if you could cut out the ice cream and most of the sugar while still having a fantastic tasting shake? Well look no more because I give you the amazing no ice cream milkshake! Yes deep in the Fast and Furious test kitchen I have developed the oh-so-versatile no ice cream milk shake that will rock the foodie world! You would not know in a blind taste test that this contains no Ice cream!
This milkshake can be made with whole milk , 2% milk, almond milk, coconut milk, or combination of any of the above with excellent results. It can be made with frozen cherries, frozen strawberries, frozen peaches,
frozen raspberries or a combination of the above. It just takes three simple ingredients, a decent blender and a bit of creative experimenting to see which combination you like best.
If you don’t drink alcohol, or are fixing it for children just use vanilla extract, orange extract or similar flavorings. If you do drink alcohol try it with different liquors like:
Frangelico, a hazelnut liquor that would work well with peaches.
Apricot brandy would go well with peaches, or a mix of peaches and strawberries.
Bailey’s Irish Cream, would go well with just about any frozen fruit combination.
Chambord, a raspberry cordial would enhance a raspberry milkshake.
Lemoncello might be nice with a strawberry, or peach shake if you love lemon.
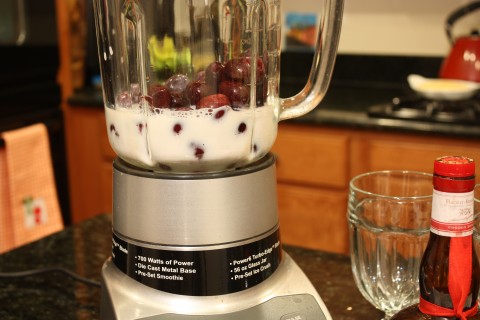
Depending on your blender this will take 1-5 minutes to blend properly. You may have to stop the blender, and stir with a spoon once or twice, and may need to add more milk or booze to get the consistency you desire. There will be variables in the ratios you use but the basic recipe is this:
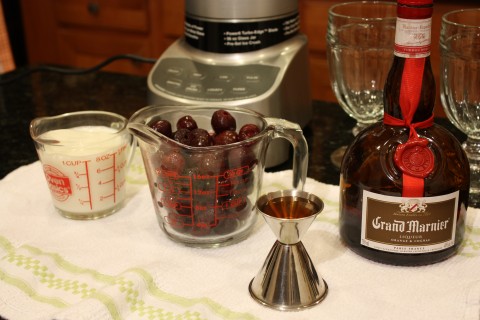
2 1/2 cups frozen fruit, see note
1 cup of milk, 2%, whole, almond or coconut
1 ounce of booze, liquor, cordial
substitute booze with 1 tablespoon vanilla extract or appropriate flavoring
Add all ingredients to the blender and blend to desired consistency.
Makes 2-4 servings.
Note:
I have used cherries with Grand Marnier for this recipe, but have also used a combo of raspberries, strawberries, and blueberries with Grand Marnier that tasted great!
If you are not driving after consuming this you might even want to kick up the level of the booze a bit:)
Grilled Portabella Sandwich
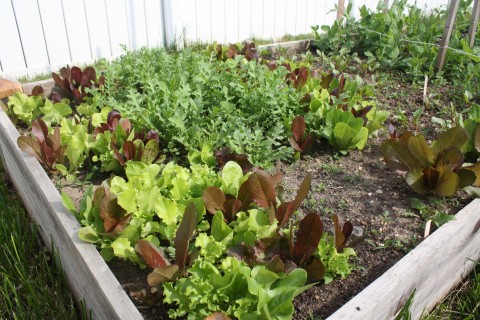
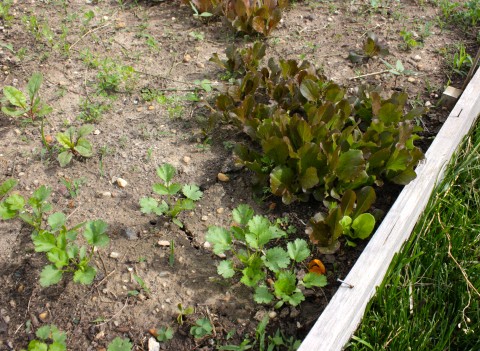
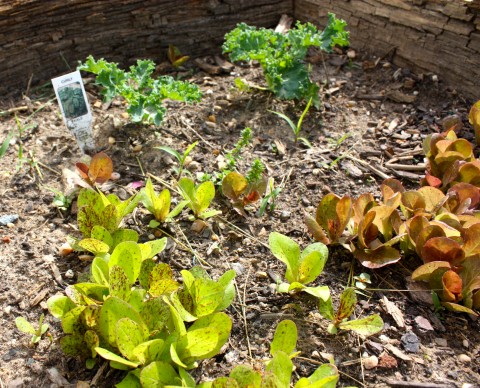
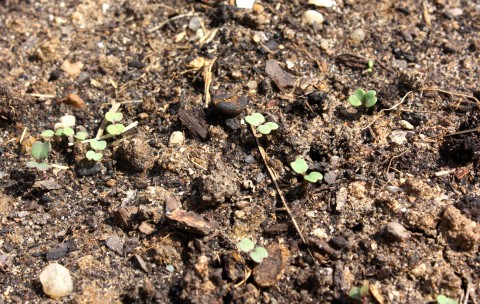
It rained lightly all day yesterday which is a good thing when you are trying to get seeds to sprout. I was looking out my second story window this morning at my raised garden beds wondering if any of my seeds sprouted overnight from last weeks planting. It was too great of a distance for me to tell for sure, but I thought I saw something green so I went out for a look. Sure enough I have several little Arugula sprouts showing off that they have beat out the other seeds for the honor of who sprouts first. I suspect my lettuce crop will show up next and then the beets and basil. Last but not least will probably be the peas of which I planted extra this year since they taste so good and grow so well here in the Spring.
If you haven’t planted a crop this year it’s not to late! Even if you think you don’t have space for such farming think again. Check out the concept of square foot gardening, vertical gardening, and container gardening, where most anyone can grow a bit of produce on their own. Here’s a link to the University of Maryland’s “Grow it, Eat It” article to get you started:
Here’s a bit from their article of one of the benefits to using these methods:
Better control over growing conditions (water, sunlight, nutrients) can lead to higher yields with less work than a conventional garden (10 sq. ft. can produce 50 lbs. of fresh organic produce).
With these types of gardening almost anyone can grow their own vegies and fruit. Just get on out to your favorite garden shop or big box hardware store and load up on the items needed for your space. You could even grow your own mushrooms if you want, but that’s an indoor crop.
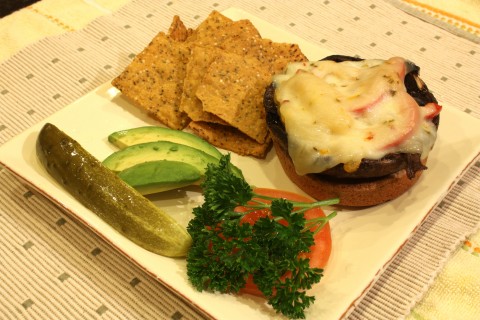
Speaking of mushrooms, I made Grilled Portabella Sandwiches last night, and boy are they good! They are just about as hearty as a burger, and super yummy. When you put them on a bun with sauteed onions and bell peppers topped with jalapeno jack cheese it makes a substantial sandwich. Served up with a side of potato salad, or cole slaw, and chips it makes a great summer lunch or dinner meal.
What about the time it takes to marinate the portabellas? Forget that time consuming step, because yours truly, the Fast and Furious Cook has come up with a way that produces a great tasting mushroom without marinating it. This recipe takes all of 15-20 minutes to prepare and cook. Give it a try and see if you agree that this is a great way to eat great tasting food that is quick, healthy and simple. And get that garden planted because Spring is here!
Grilled Portabella Sandwich
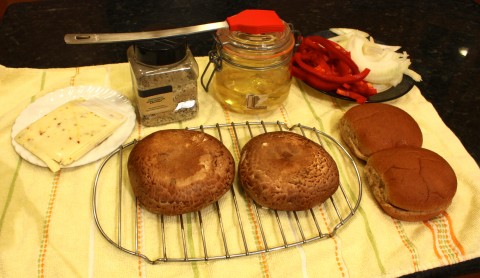
4 large portabella mushroom caps( about 4 inches across)
4-5 teaspoons garlic infused olive oil
your favorite steak seasoning salt
1 cup sliced onion
1 cup sliced bell pepper, red or green
1 tablespoon olive oil
To clean the portabellas pop the stems off the mushroom caps, then rinse them with cool water, and wipe the top of the cap only with a kitchen towel. Set aside to finish drying.
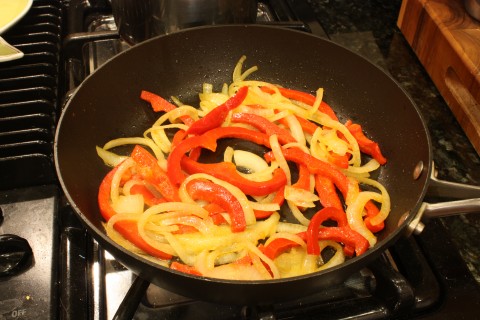
Saute onions and peppers in the plain olive oil and season with steak seasoning.
Cook on medium low heat until soft,(about 15 minutes).
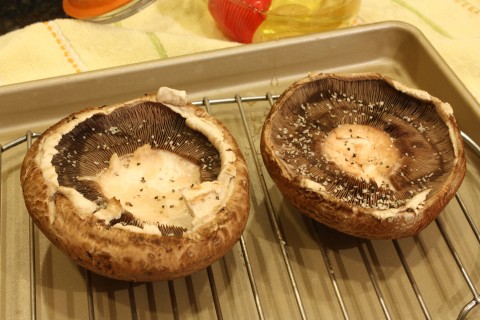
Brush top of mushroom caps with garlic infused olive oil then invert on a cutting board or other surface and drizzle the rest of the garlic infused oil on the insides(gills) of the caps.
Dust with the steak seasoning on both sides and grill cap side down/ gill side up for about 8 minutes, see note. Flip caps and cook for about another 6 minutes gill side down. Flip once more and divide sauteed onions and peppers on the gill side and top with cheese.
Continue cooking for about 1 minute until cheese is melted.
Serves four.
Note:
You can cook the mushrooms in an oven broiler, but if you do it works best to have a baking pan and rack combo the lets the mushroom juices drain. When using an outside gas or charcoal grill you don’t need to worry about the juices draining except that with charcoal the juices will put out some of your coals if your mushrooms are good and fresh!
Most steak seasonings work well with this recipe as they contain salt, pepper, garlic, onion and other herbs and spices that work well with portabella mushrooms. One of my favorites is McCormick’s Montreal Steak Seasoning blend.
I like to use jalapeño jack cheese, but use whatever is your favorite cheese. I think manchego, cheddar or swiss would be good too!
Gluten-Free Cream of Asparagus Soup Recipe
Hello Spring!
Due to a heavy travel schedule the last three out of four weeks and a computer crash I haven’t posted my usual once a week recipe. I’m glad to say the computer has been fixed and I’m up and running at full speed again!
I just came home from a lovely ski vacation in the Colorado Rockies Sunday night, and it’s great to be home in time for Spring! Never mind the fact that it was snowing when we landed in Baltimore as I’m sure it’s time to plant the garden and welcome in the warmer weather that is forecasted this week. While on vacation I had time to read the book Grain Brain by Dr David Perlmutter. It’s a very interesting book about how gluten messes with our brains by causing surges in blood sugar which in turn causes inflammation in the brain. That inflammation in turn causes Alzheimer’s and Dementia according to the good doctor.
Now I don’t know if the good Dr. is right on with his findings, but it does make for an interesting read. What is really interesting is his view on low fat/high carb diets. He promotes a diet low in carbs and fairly high in healthy fats like:
butter
nuts
olive oil
etc
He also says eggs are healthy to eat often. This seems to go in an opposite direction from current health guidelines, but then this morning on national public radio I heard a story on the low fat/high carb diet being unsuccessful in combatting heart disease. The story:
http://www.npr.org/blogs/thesalt/2014/03/31/295719579/rethinking-fat-the-case-for-adding-some-into-your-diet featured an interviewed with Walter Willett from the Harvard school of public health. Willett’s study was submitted for publishing but not accepted because it flew in the face of popular thinking at the time.
The story went on to say the healthy fats are butter, olive oil, nuts, and avocados. There seems to be a trend reversal in the works for our diets. You never know for sure with these kind of stories though. After all it has to stand the test of time, but it does confirm what Dr Perlmutter is saying about healthy fats and carbs. So in the interest of science yours truly is testing Dr Perlmutter’s diet plan to see if I feel any better on this diet. Not that I feel sick mind you but I am interested to see if the diet brings about any positive changes in my health. Especially the mild to moderate headaches I have had for years several times per week.
So far the gluten free diet plan that includes many things I have eaten sparingly previously has gone well. I have been eating eggs two to three times a week instead of oatmeal and toast for breakfast. I have brought butter back into my diet more than once a week, and have eaten a bit more meat than usual. I have noticed a decline in the occurrence of headaches and digestion has been better with a few exceptions.
It does help that gluten free products are gaining space in grocery stores so I’m not having much trouble staying gluten free. The only time I ate any gluten I know of is at dinner in Denver last week on of the items on my plate was cauliflower with a bread crumb topping that I was able to scrape off mostly.
In the near future I’ll be posting gluten free recipes that I aim to make attractive to those who need to avoid gluten as well as those who don’t. It will be interesting to see how far this gluten free diet goes as research uncovers the truth about gluten in our diets. After all you can’t believe everything you read. Remember when margarine was healthy!
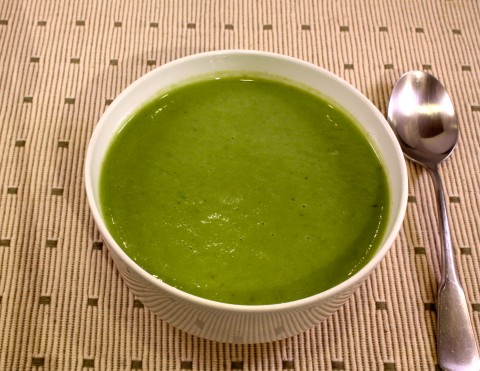
To start out my gluten free recipes I give you a cream of asparagus soup that even if you can tolerate gluten you will love this simple yummy soup. It came out great in testing using 2% milk, but if you use whole milk it’s even more rich and tasty.
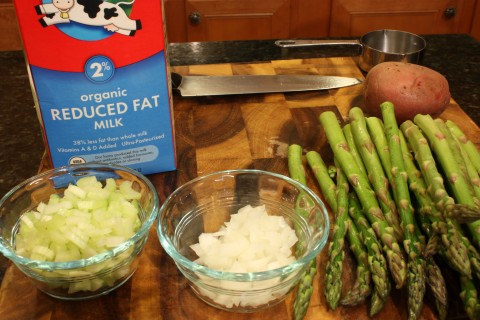
Gluten Free Cream of Asparagus Soup
1/4 cup chopped onion
3/4 cup chopped celery
2 cups water
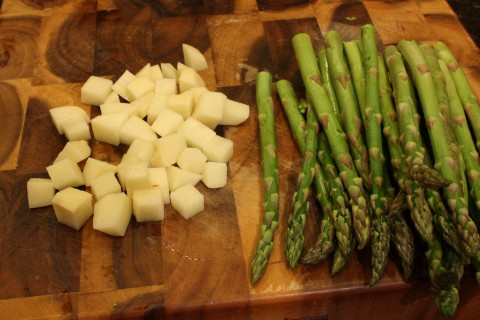
1 cup 1/2 inch diced peeled red potato
14 ounces fresh asparagus cut in 1 inch lengths, see note
1 1/2 cups milk, 2% or whole
1/2 teaspoon salt
1/8 teaspoon ground white pepper
optional, 1 vegetable bullion cube, or chicken bullion
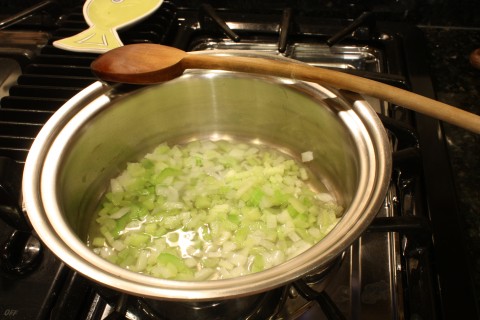
In a 2 1/2 to 3 quart pot sauté onion and celery in 1/2 cup of the water for seven minutes stirring once or twice. If you have never done this water method of sautéing, don’t worry as it’s easy.
Add the rest of the water, potato, and salt/ bullion if using and bring to a boil. As soon at it reaches a boil reduce heat and simmer for seven minutes covered.
Add asparagus, and white pepper, cover and cook for ten to twelve minutes covered stirring once halfway through.
Turn off heat and add milk. If using a tabletop blender, carefully add soup and blend in two batches if necessary. I prefer to use an immersion blender and blend it on the stove top. If eating soon, reheat to just a simmer and serve.
Serves four.
Note:
One pound of asparagus with the tough end cut off will yield about 14 ounces of tender asparagus.
If using a vegetable bullion cube or chicken bullion cube cut salt in half to 1/4 teaspoon.
Kale Chips
Today I am back in the kitchen after a four day trip to Monterey, California to see my nephew. I really enjoyed the redwoods in the hills above Santa Cruz, and the beach too. where he took us. It was great to bask in 75 degree weather before coming home to a high of 30 degrees with winds up to forty miles an hour. I believe it’s about the coldest day this winter when you figure in the chill factor. Where oh where is Spring?
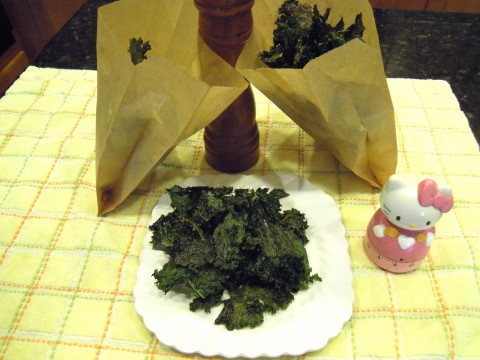
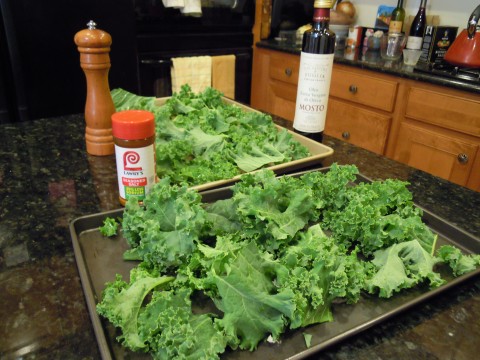
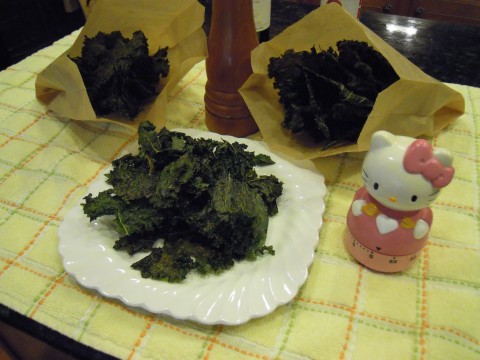
I have been super busy all day but found time on my trip to the bank and post office to get groceries for a couple of projects I had in mind. I wanted to bake more kale chips even though it’s not a typical fast and furious recipe. The secret is to do kale chips when you are hanging out by the oven to turn the chips halfway. The most work is cleaning and seasoning the chips which took me about 15 minutes. After that it was 30 minutes in the oven and now I have great tasting kale chips for the next few days unless they are munched in one session of mad munchies fever!
As for the recipe it is simple. Wash, dry and cut into chip size pieces. Drizzle about a tablespoon or two of olive oil on the chips that are spread out on a sheet pan. Sprinkle your favorite seasoning salt, or plain salt on them. Grind some fresh pepper on them, or use something fun like red pepper, or jalapeno powder. Toss them around in the pan almost like tossing a salad to distribute the oil, salt and pepper. You can even rub in the oil a bit while tossing. Pop in the oven at 300 degrees.
Turn the chips and arrange so they are not touching after 15 minutes in the oven. Rotate the pans at this point. Turn heat down to 250 degrees and cook until crisp(about 15-20 minutes) then remove from oven to cool. Now you have great tasting, healthy kale chips for lunches and snacks. They go great with red wine!
So give slow food a try if it fits your schedule, it’s worth it once in a while.
Cream of Broccoli Potato Soup
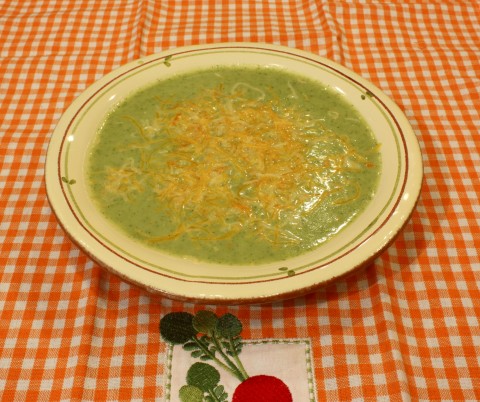
Here is another fast and healthy recipe from my kitchen to yours. It must be Spring because daylight savings time kicks in tonight. Not to mention it’s sunny and warm out today too! Pretty soon us vegie gardeners will be outside planting lettuce, beets, kale, peas, cabbage, and broccoli. Broccoli is one of my favorite healthy green vegetables to eat. I like it in stir frys, salads, casseroles, just steamed, and in soup. I have been thinking of making up a recipe for a gluten free cream of broccoli soup for all the gluten intolerant folks out there to enjoy. Most cream of broccoli soups contain roux, which contains flour. I figured that if I cooked potatoes with the broccoli it would thicken the soup quite well. So into the Fast and Furious test Kitchen I went and developed this gluten free cream of broccoli soup that so many gluten free folks can eat. You don’t have to be gluten intolerant to like this soup. The rest of you can give this a try too! It’s fast and easy, as well as healthy. You can try it with coconut milk to make it a Vegan soup, or lowfat milk to make it low fat and healthier. Please leave comments so I can continue to improve my recipes. Without your input I don’t know how well the recipe works in your kitchen.
Cream of Broccoli Potato Soup
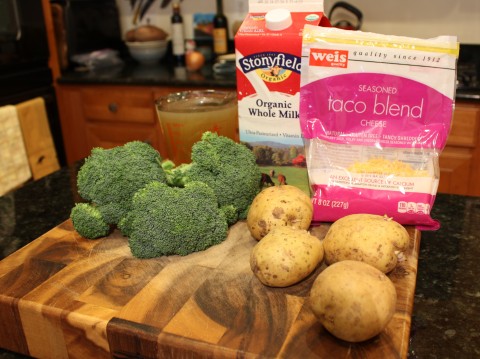
1 1/4 pounds fresh broccoli
1/1/4 pounds russet or Yukon Gold potatoes
2 1/2 to 3 cups vegetable stock
1 3/4 to 2 cups milk
1 teaspoon salt
1/8 teaspoon ground white pepper
Optional, 4 ounces of grated colby or mild cheddar cheese
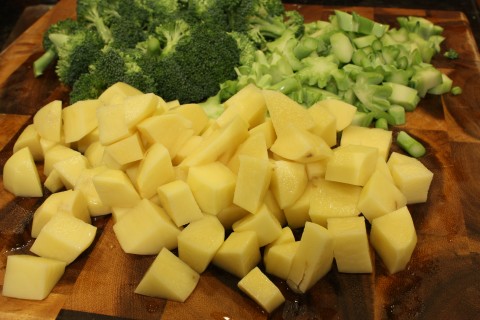
Cut potatoes into 1/2 inch cubes and put in a bowl of cool water until needed.
Trim broccoli and stems. Cut tops into golfball size florets and chop the stems.
In a 4-5 quart pot with a lid bring potatoes to a boil in vegetable stock. When it comes to a boil reduce to a simmer and cook for 10 minutes covered.
Add broccoli stems and cook for 4 minutes covered simmering.
Add broccoli tops and cook 4 minutes. Stir and cook 2 more minutes or until potatoes and broccoli are just tender.
Remove from heat and add salt, pepper, and lesser amount of milk and blend in a table top blender or use an immersion blender.
Taste and add milk, salt or pepper if needed.
Return to heat and bring it to a simmer just before serving.
Top with grated colby or mild cheddar.
Serves four.
Note:
Vegetable stock varies a lot, and you might not need to add any salt depending on how salty your stock is. I used a recipe from the Moosewood cookbook for my vegetable stock.
Chicken stock can be used also.
This can be a very thick soup or thin depending on how much stock and milk you use.


