Grandma’s Green Beans
A Farm to Table Story
I was lucky to grow up with an appreciation for fresh produce from farms and gardens. My grandparents in St Louis, Missouri taught me much about where food comes from. My grandfather, even though full-time employed with the St Louis Water Division, kept a garden in the back yard where I was introduced to veggie gardening. He grew a few tomatoes, okra, and string beans, but later on in life a friend of his gave him about a quarter of an acre on the edge of a large cornfield to grow a real vegetable garden.
In this large garden he grew tons of tomatoes, green beans, bell peppers, squash, okra, and corn. The summer of 1970 found me banished from my home and sent to Cleveland then St Louis where my parents thought my relatives would straighten my rebel fifteen year old self out. In St Louis I helped grandpa with the garden and would help grandma can green beans for their winter supply. She also canned corn, okra and tomatoes. I learned a lot from them that summer such as, four vegetable dishes on the supper table was just about the right amount, and that a troublesome fifteen year old can just about go through a wooden fence when tossed by a pissed off Grandpa. I also learned that leftover green beans or okra was just as good as the day before.
This was the real deal Farm-to-Table existence long before the current movement took hold. They didn’t know any other way as both of them grew up on farms. Yes they could have bought many of their vegetables from grocery stores back then but I think they knew the best flavor was to be found in veggies they knew the source from which they came. These were tomatoes with a rich sweet taste that smacked of the ground they grew in. That wonderful dark, almost fluffy soil made for some of the best vegetables I have ever tasted. The hot humid climate was perfect for the veggies grandpa chose to grow there, especially the tomatoes.
Twice a week during my extended stay in St Louis grandpa and I would go to the farm to weed, and harvest the crops. It was there that I truly learned what a good tomato tastes like. It would be a typical 90° day with high humidity and grandpa would call me over to the tomato patch he was working on. Then he would take out his razor sharp pocket knife and cut two large ripe tomatoes from the vine. In his other pocket he brought a salt shaker and after the red orb was cut in half would sprinkle his tomato with salt and eat it right on the spot with juice running down his chin. I would follow his lead and it was on that spot I learned that this was what a tomato was supposed to taste like. During tomato season almost every meal was supplemented by a plate of sliced tomatoes. Now that’s good eating!
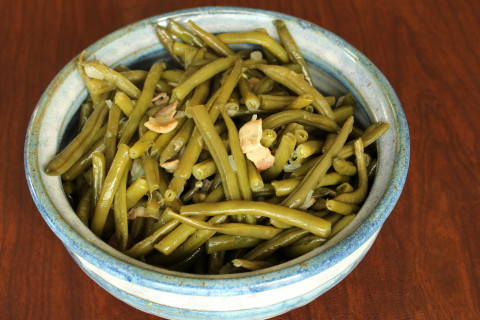
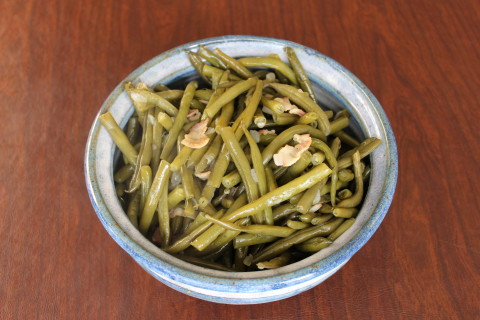
Grandma served her special Grandma’s Green Beans recipe at least once per week and I never tired of it, but I did tire of cutting green beans. She would cook bacon, onion and green beans that would be at home in any Farm-to-Table restaurant. There were no herbs needed to flavor this heirloom veggie dish. The flavor was carried by the top quality green beans, onions and bacon. It was a memorable trip to St Louis that I have strong memories from, mostly good ones.
Try this recipe yourself and see if you agree it is one of the best veggie dishes ever. Just be sure and make the whole batch because the leftovers are good for 2-3 days after and heat up in a jiffy. If you can’t get good fresh green beans frozen will do, but use the best Applewood bacon you can get your hands on.
Here’s to good healthy eating. Enjoy!
Grandma’s Green Beans
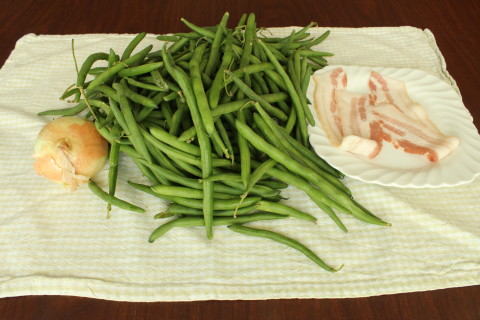
1 pound fresh or frozen green beans
½ cup yellow onion, chopped
2 slices of bacon cut into ½ inch pieces
½ teaspoon oil
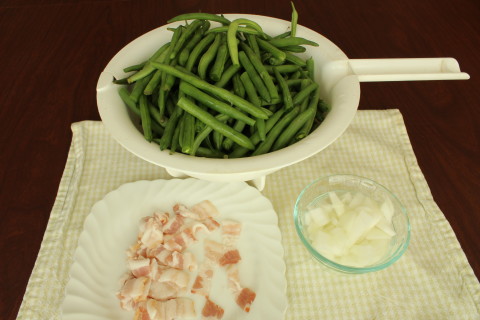
If using fresh green beans wash and then trim the stem end off. Cut to about four inch lengths for easier stirring in the pot.
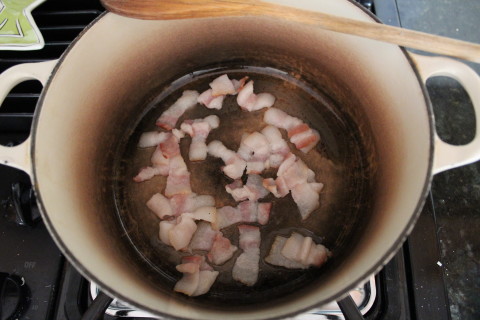
In a 3 ½ quart to 4 ½ Le Cruset™ or similar heavy type of cooking pot with lid add oil and bacon cooking on medium heat for 3 minutes stirring every 30 seconds or so.
Add onions and cook on medium low heat stirring often for 5 minutes.
Drain the oil and bacon grease and add green beans plus a quarter cup of water and continue cooking without stirring for 5 minutes covered on medium low.
Stir and continue cooking on medium low heat covered for five minutes covered.*
At this point you can let it cook for another 10 minutes before uncovering, adding salt and fresh ground pepper to taste and stirring. If it is dry on the bottom of the pot add a bit more water-2 tablespoons should do.
Now the beans have been cooking for 20 minutes and are either close or will need about 10 more minutes depending on the size and tenderness of the beans. Taste one to see if it needs more cooking time, or seasoning.
Serves 4-6
Note:
It’s okay if the beans come to the top of the pot as in 10-15 minutes they will shrink considerably.
Pico de Gallo
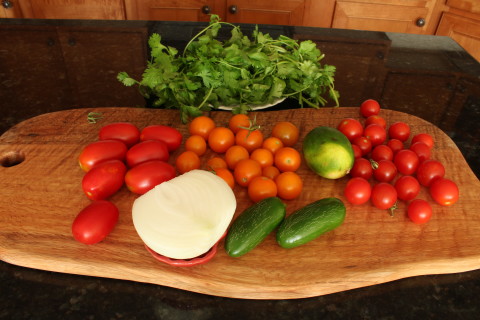
At a recent cooking class I conducted at Phillip’s Mushrooms in Kennett Square, Pennsylvania I made Maitake mushroom tacos topped with Pico de Gallo . I needed some kind of tomato component to go with the tacos and didn’t want to use typical salsa. I decided to make a Pico de Gallo and use tomatoes from my garden since I have so many this year. Instead of using regular tomatoes I used Sungold and Sweet Million cherry varieties that are known for their sweetness.
I also had a new heirloom variety named “Juliet” that is similar to a roma tomato but half the size. It looks like a roma and tastes similar too. What I really love about the Juliet is the amount of bright red tomatoes I pick every day from my one-and-only bush. It really puts out the fruit! Into the mix it went in my trial version with the usual chopped onion, jalapeno, cilantro and lime. It was outstanding. It lit up the Maitake tacos and paired well with the Asiago cheese I grated and melted over the mushroom layer. With fresh arugula on the next layer the Pico De Gallo made for a lovely looking taco that everyone loved.
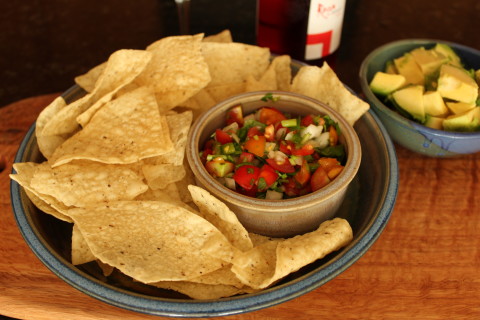
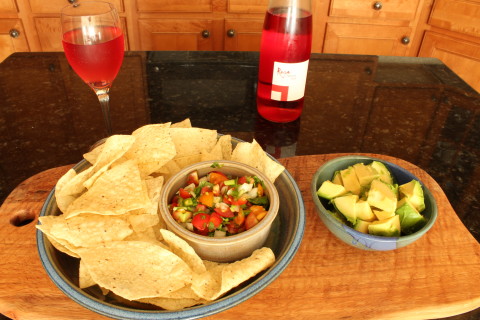
A few days after teaching the class I had some more tomatoes to use up and made a new batch the same way as the first. This time I served it with tortilla chips, avocados on the side and a glass of Spanish rosé. The sweetness of the cherry tomatoes made the Pico pair perfectly with the chips and wine. What a great summer appetizer spread it made.
You can probably buy the Sungolds and Sweet Million tomatoes at most any farmer’s market in the U.S or in a specialty grocery store. As for the Juliets, I think they are quite rare and you would need to use roma tomatoes. What sets this apart from other Pico de Gallo recipes is the sweet cherry tomatoes. If you can’t find the ones I used just get the sweetest ones you can find and it should turn out fine.
I believe this would be a great side dish for any Mexican type food whether it’s burritos, tacos, nachos or tostadas. Give it a try and please leave comments on how it turned out.
1 cup whole Sun Gold tomatoes
1 cup whole Sweet Million tomatoes
1 cup whole Juliet tomatoes, or roma tomatoes
1/2-3/4 cup yellow onion diced small
1 cup fresh cilantro
2 jalapeños chopped, or green bell pepper if you don’t want it spicy
1-2 tablespoons fresh lime juice
1/2 teaspoon salt, optional
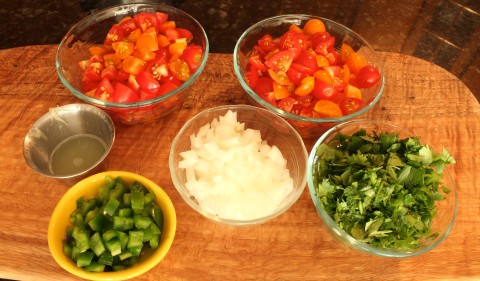
Cut Sun Golds and Sweet Million tomatoes in quarters, then cut in half. *
Dice Juliets or romas.
Chop cilantro.
Add everything together in a 2-3 quart mixing bowl tossing until distributed equally. Toss fairly gentle so you don’t break down the tomatoes too much.
As a salsa it serves about 6-8. For a taco topping this will tap about 30 tacos.
Note:
I like to cut the cherry tomatoes in quarters then lay them skin side down in a row of four pieces and cut in half.
Asparagus Rice Pilaf
In celebration of asparagus season I decided to develop an asparagus rice pilaf recipe for you asparagus lovers out there. I have been eating asparagus almost every day for over two weeks and still am not tired of it. I usually only buy locally grown so I expect the season around here is going to be over in about two weeks and I’ll be done with fresh asparagus until next year. I admit to buying the South American asparagus occasionally when I just have to have it, but I never said I was 100% locavore!
Asparagus is so versatile you can put it in salads in its raw, grilled, or blanched form. To grill asparagus on over charcoal with a bit of olive oil, herbs and spices is true summer bliss. It goes great with Asian foods like a chicken and asparagus stir fry or even a hot sour soup with asparagus. In soups it really shines whether hot or cold. I love the recipe I developed two years ago for a chilled asparagus soup using almond milk. You can find it here:http://www.fastandfuriouscook.com/category/soups/page/2/ The problem with most hot asparagus soups when dining out it the amount of heavy cream restaurants like to use.
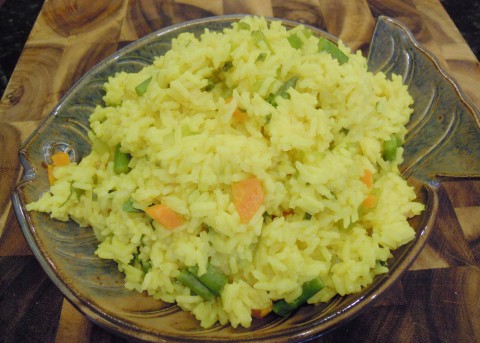
What I had in mind was a rice dish using asparagus that would pair well with fresh Alaska salmon that is just showing up in local grocery stores and Costco. I served a nice salmon burger, and a side of stir fried bokchoy and Thai basil with the asparagus rice pilaf last night with great results. This rice dish would go well with grilled chicken, pork chops or shrimp. It’s fast, easy and healthy like almost every recipe I develop and hope you will give it a try and leave a comment on how it turned out. And by all means pair it with a hunk of grilled Alaska salmon and a chilled Pinot Gris, or Pinot Noir for a winning combination.
Asparagus Rice Pilaf
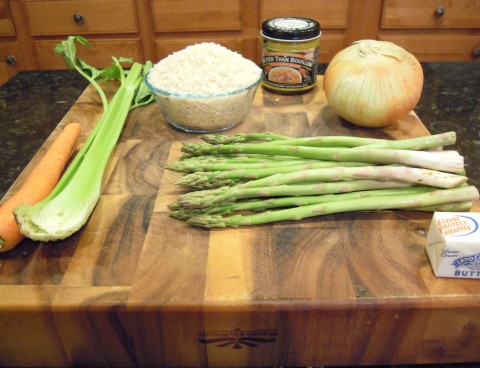
2 cups Uncle Ben’s Converted rice, or other similar rice
4 cups water
1 1/2- 2 cups asparagus*
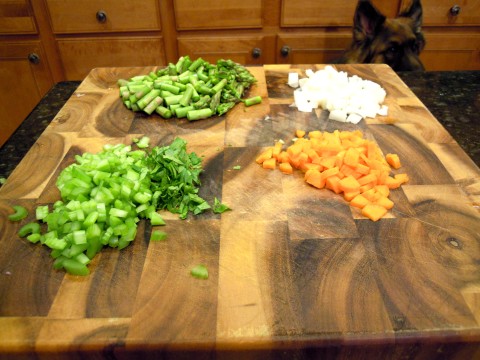
1/2 cup minced yellow or white onion
1/2 cup fresh celery chopped
1/3 cup diced fresh carrots
1 tablespoon Better than Bouillon chicken base
1 tablespoon butter or olive oil
1/2 t turmeric, optional
1/4 teaspoon ground white pepper, optional
In a 2 1/2 quart pot on high heat bring water, onion, celery, butter and chicken base to a boil.
Add carrots and rice and return to a boil.
Reduce heat to maintain a simmer and cook covered for 8 minutes.
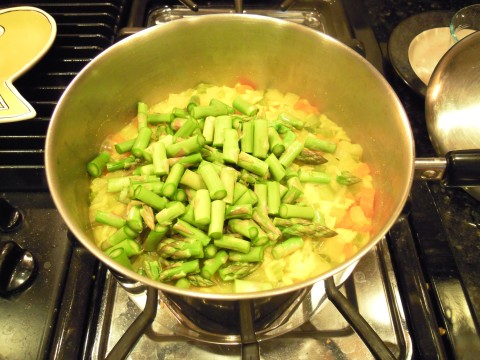
Add asparagus and stir in well.
Lower heat a bit and cook 5 to 10 more minutes or until most water is absorbed.
Let sit for 5 minutes covered or serve right a way.
Serves 4-6
Note
*About a half pound of asparagus yields 1 1/2 cups of one inch pieces after trimming away the tough 2-3 inches from the bottom of the stalks.


